2-Step Verification for sign-in to increase security #
Did you know that you can protect your account with 2-Step Verification?
Two-Step verification is designed to increase the security of your data. If this authentication is enabled, you will need to enter a special code in addition to your password.
☝ All you need to do is install a mobile app (for example, Google Auth) and сhoose the appropriate option in the settings.
From now on, you’ll need the code and your password to log in. The temporal code will be generated on your mobile device to protect your account! ?
Please note, the feature is available for pro and business users only.
How to enable 2-step verification if you use Google or FB authentication #
If you registered via Google or Facebook Authentication you have two options:
- Enable 2-step for Google and Facebook.
Read “Google Guide”
Read “Facebook Guide” - You can switch your Google/Facebook sign-in to Nimbus and enable 2-step verification
Read guide “How to switch your Google/Facebook sign-in to Nimbus”
How to set up 2-step verification in Nimbus Note #
It works on Web, Windows, Mac, and mobile versions. You need to use the Nimbus account sign-in process.
☝ Note: We recommend you use the last versions of Nimbus Note, which support this type of authorization process, otherwise you may experience problems accessing your account.
Now, we’ll show you how to enable two-step verification using Google Authenticator as an example. Other applications work in the same way.
- Download an OTP application for your device.
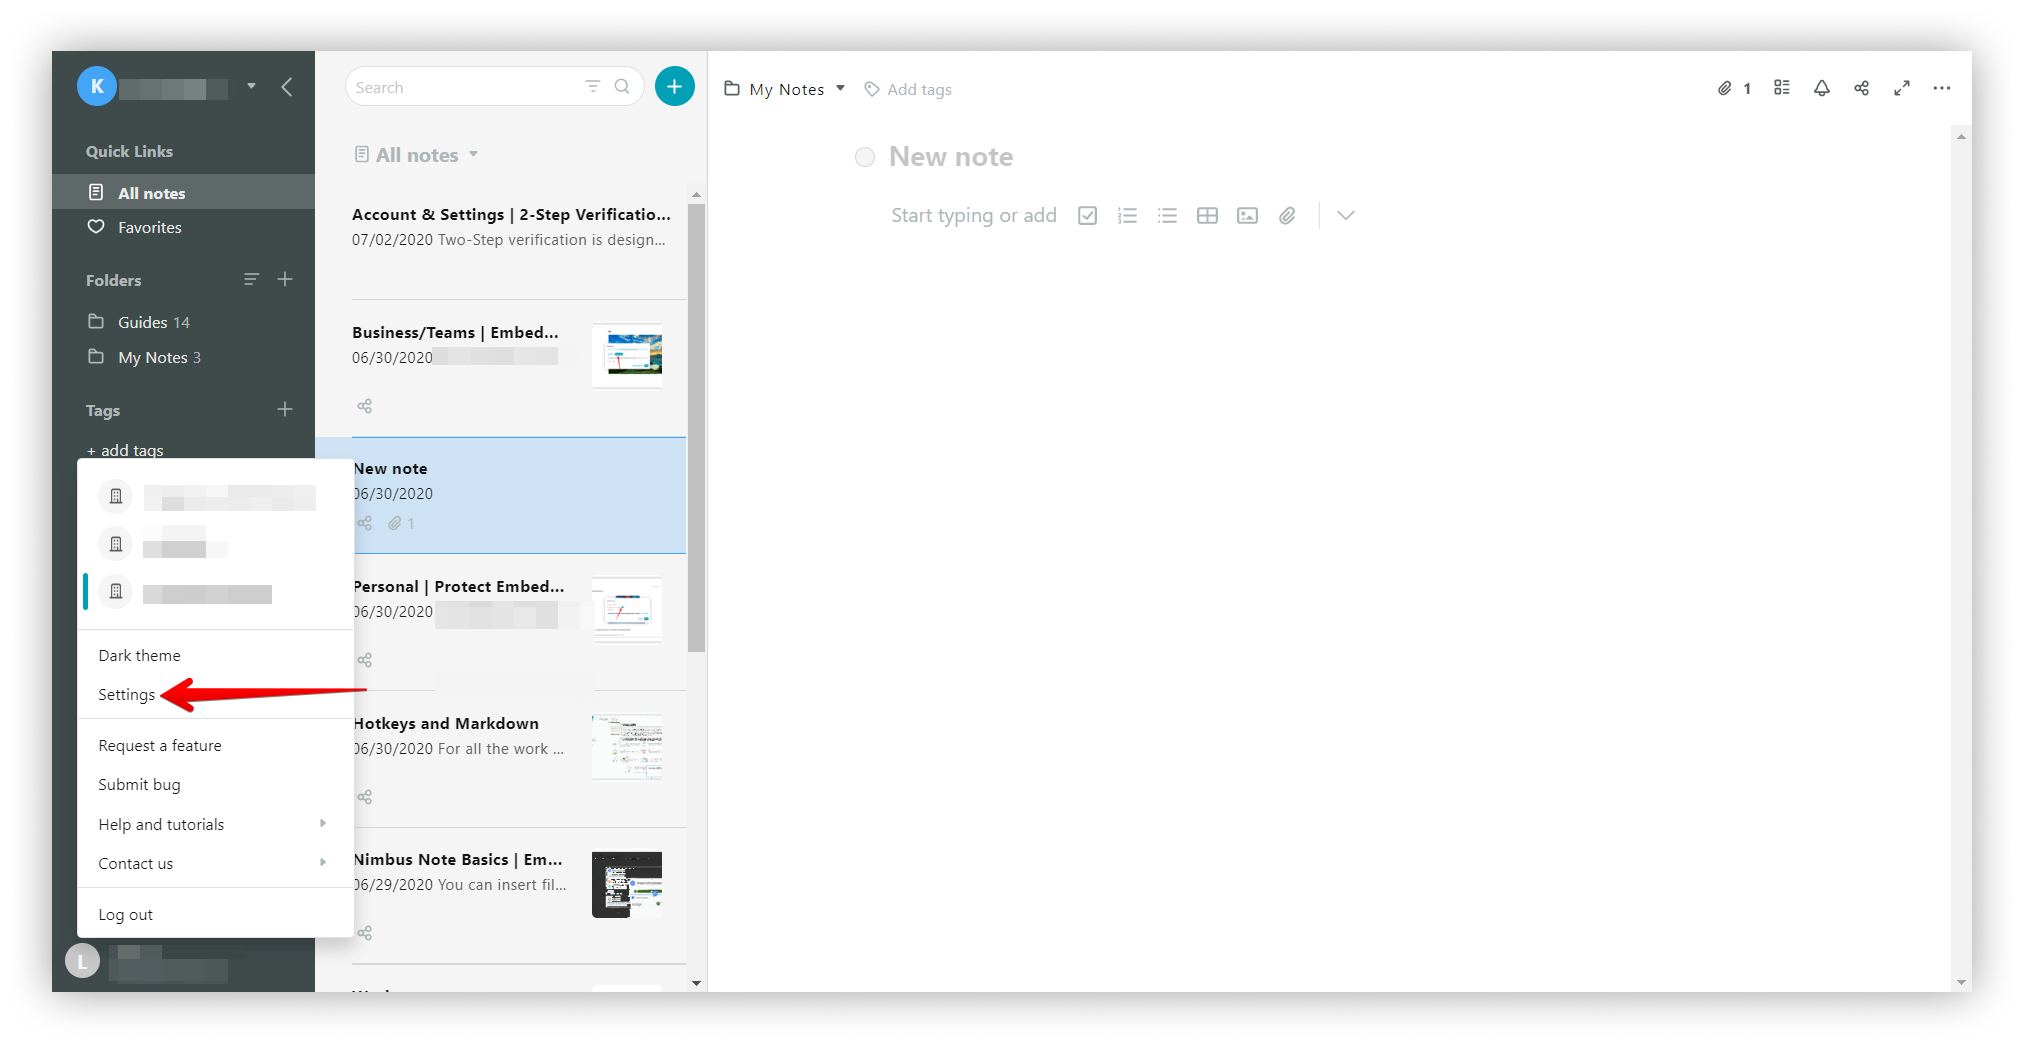
- To turn on the 2-step verification function you need to go to the Nimbus Note Settings
.png)
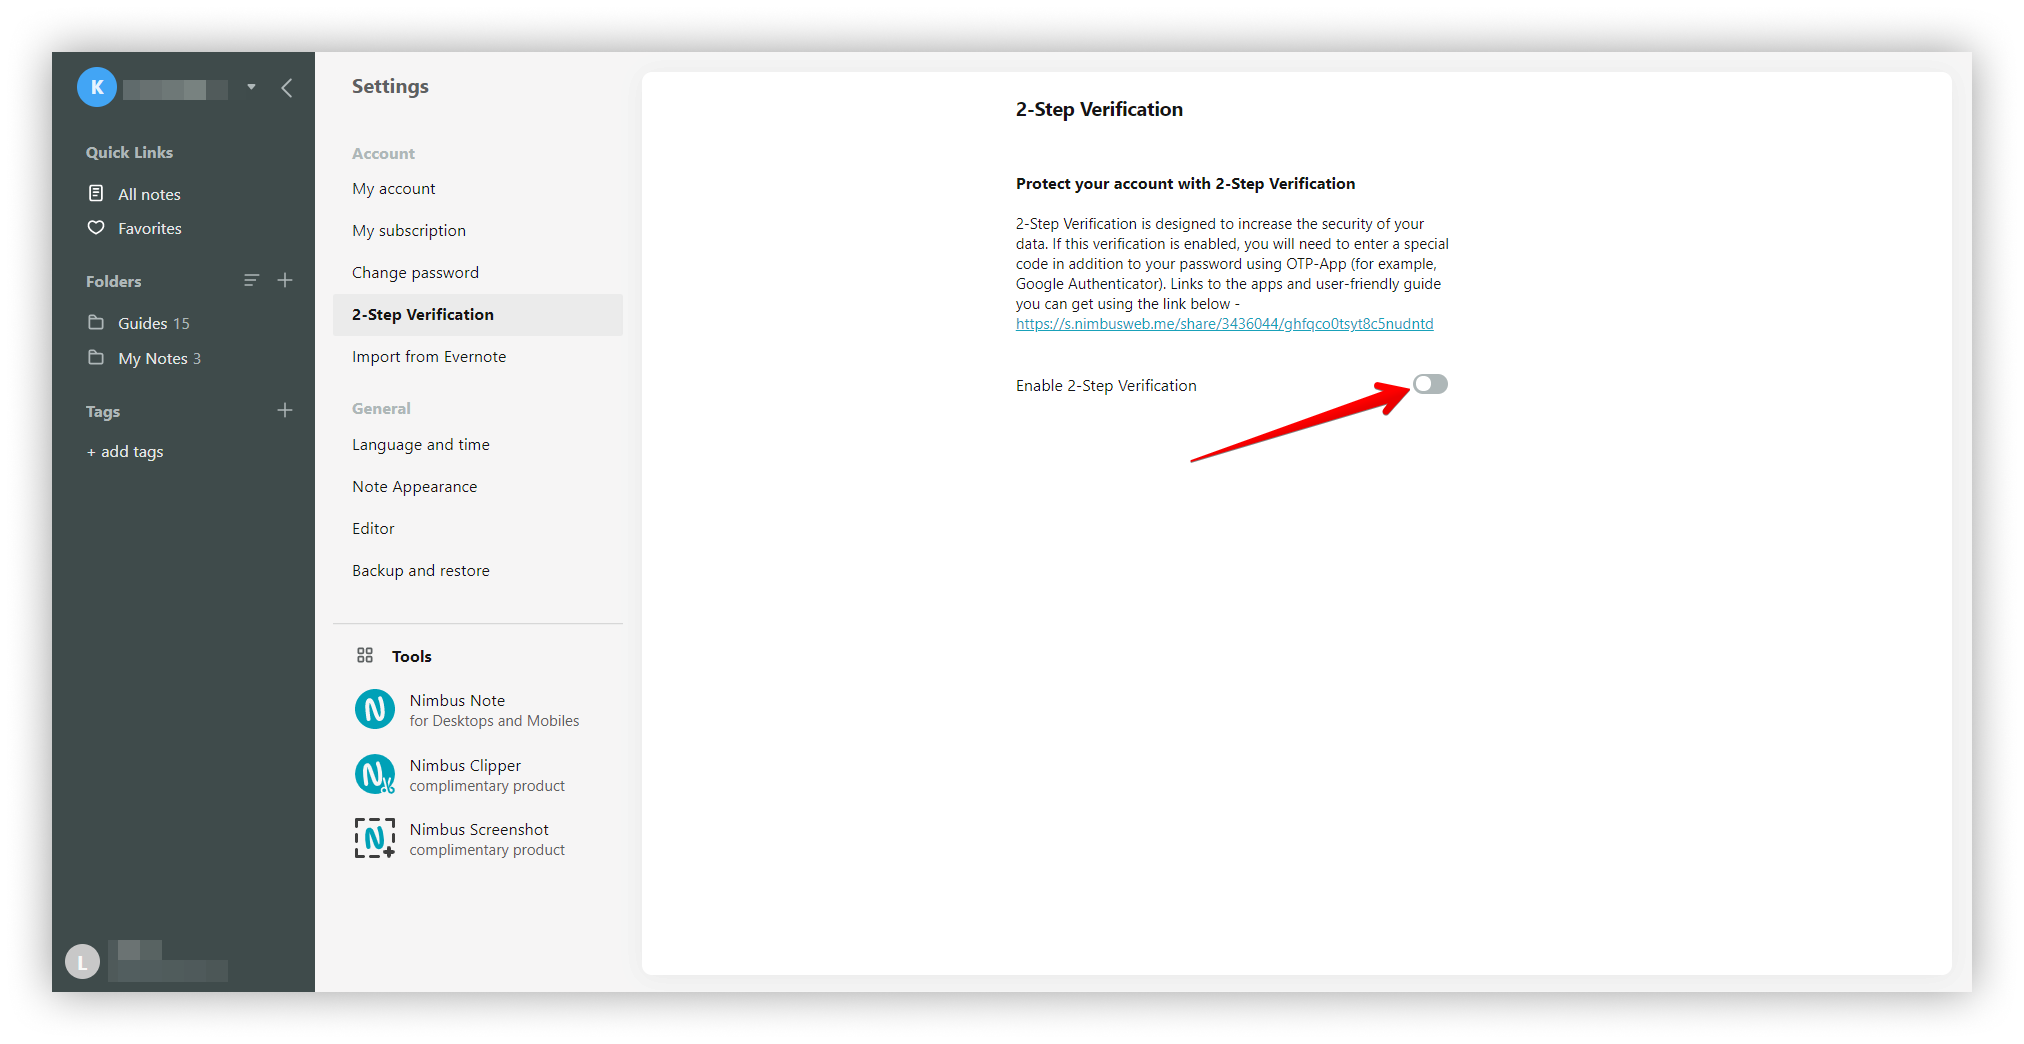
- Select 2-Step Verification toggle to enable this function
.png)
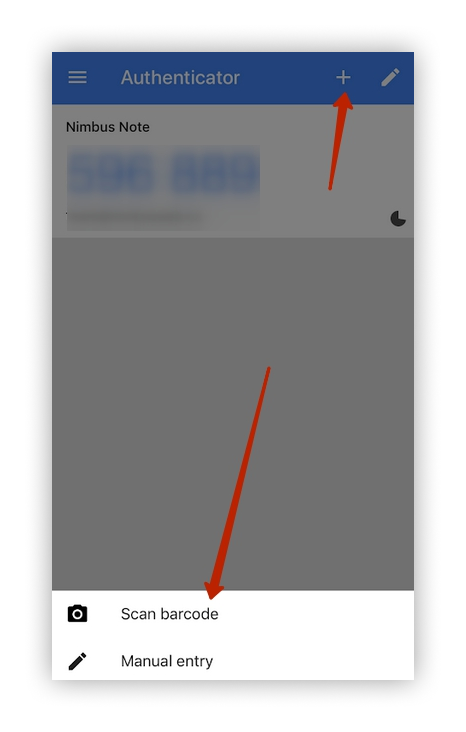
- Open Google Auth, press + and select Scan QR code. Next, scan the code that you see below.
.png)
- Scan barcode using Authenticator app and enter generated code. Then Press the Enable button.
.png)
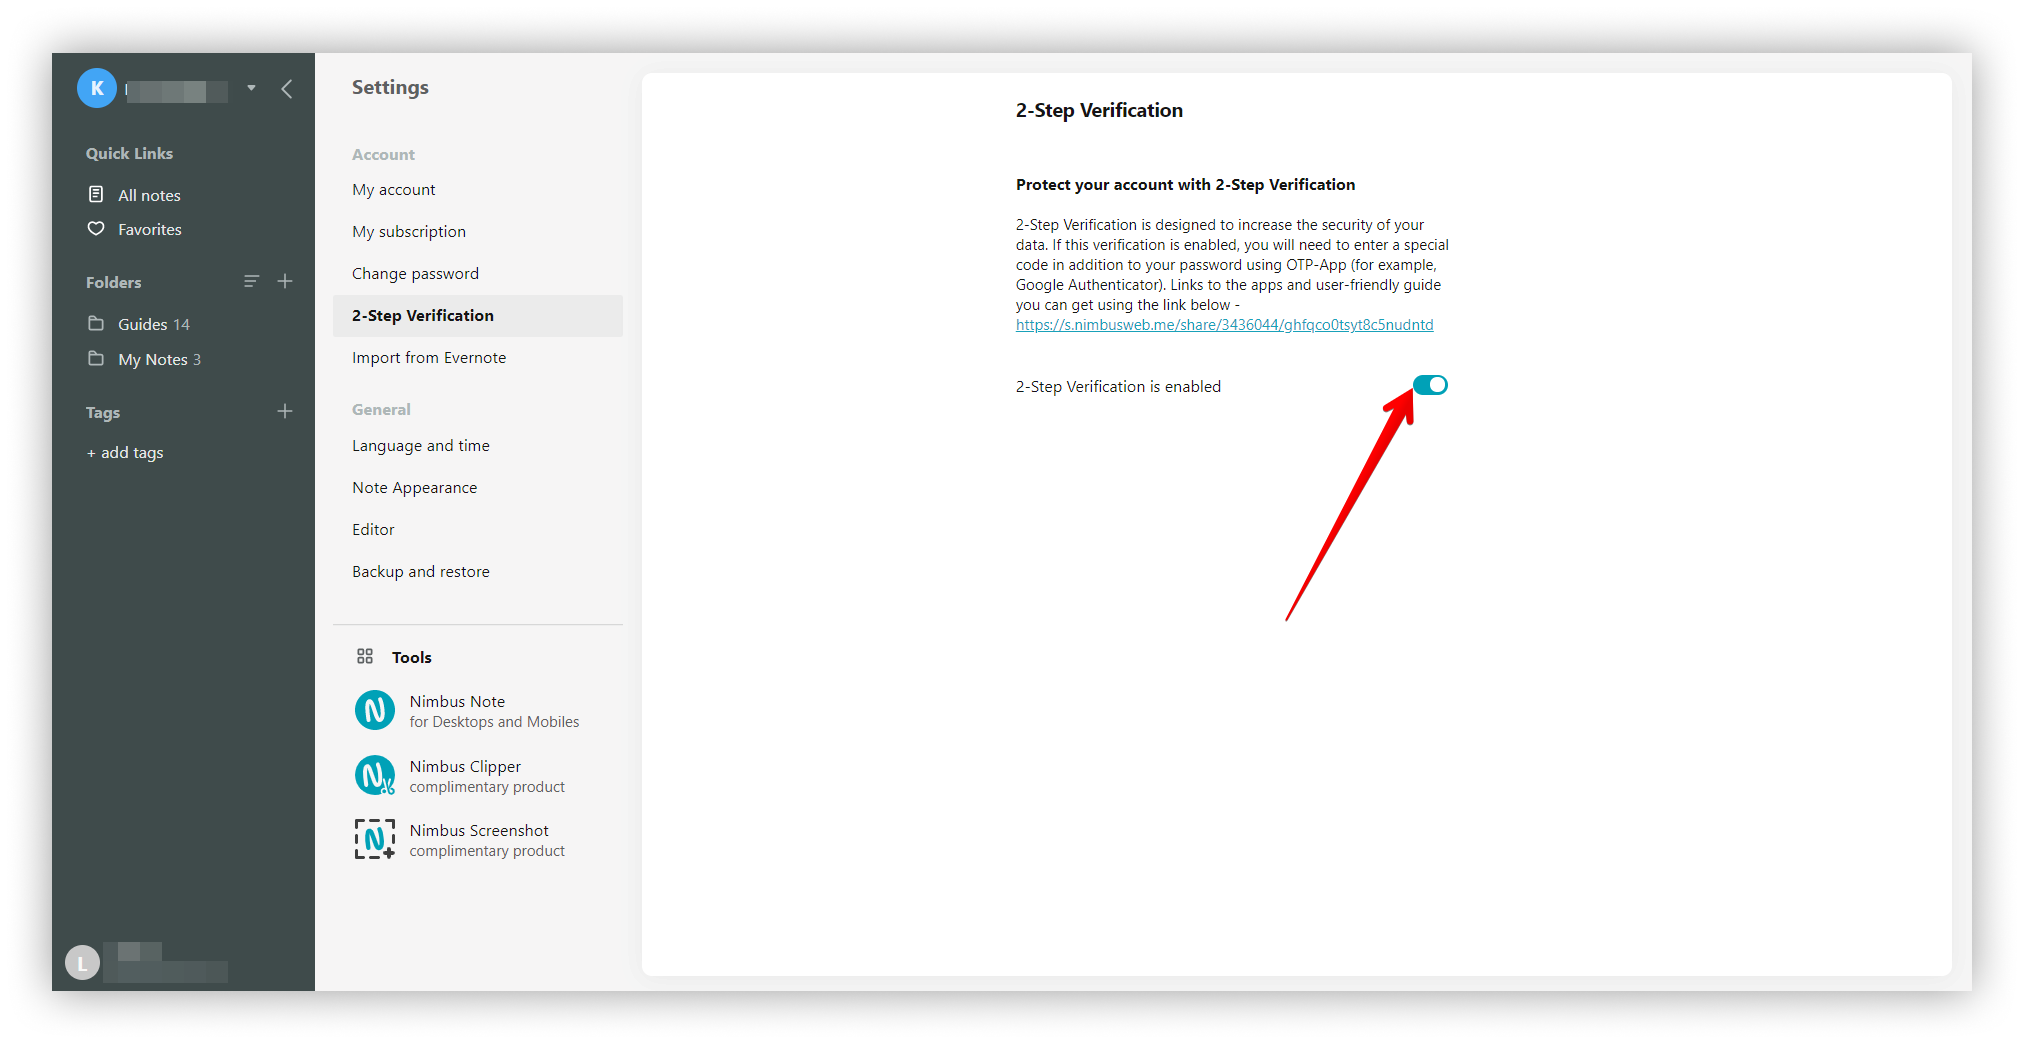
Two-step verification is enabled!
- You can also disable this verification in Settings
.png)