In this guide, I will explain how to automate the transcription of uploaded videos. And not just transcription, but also automatic summarization with email delivery.
Adding a File Upload Trigger #
To start, we need to add the File Upload trigger.
1) Go to the Automation module and create a new flow.
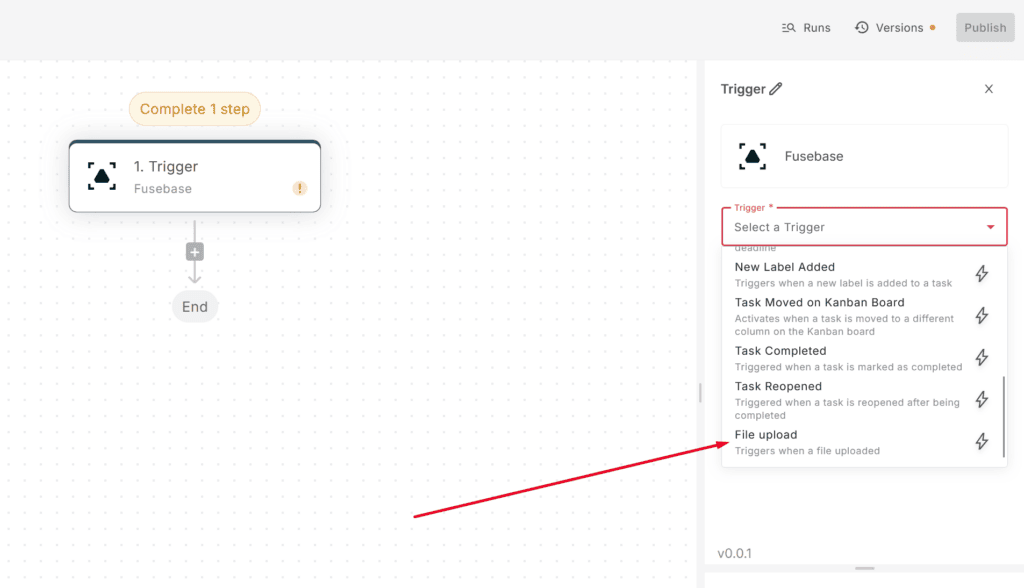
2) Click the “Choose a trigger” button to open a list of applications. From the list of applications, select “Firebase”. In the “Trigger” section, select “File upload” from the dropdown list.
3) Select the file upload location that the trigger should respond to. This can be either a portal or a workspace. In our case, we select workspace and then choose the desired one from the list.

4) Next, you can select more specific parameters, such as the page where the trigger will respond, the file type, or even the user. For example, you can configure the trigger to respond only to image uploads and only from a specific member.
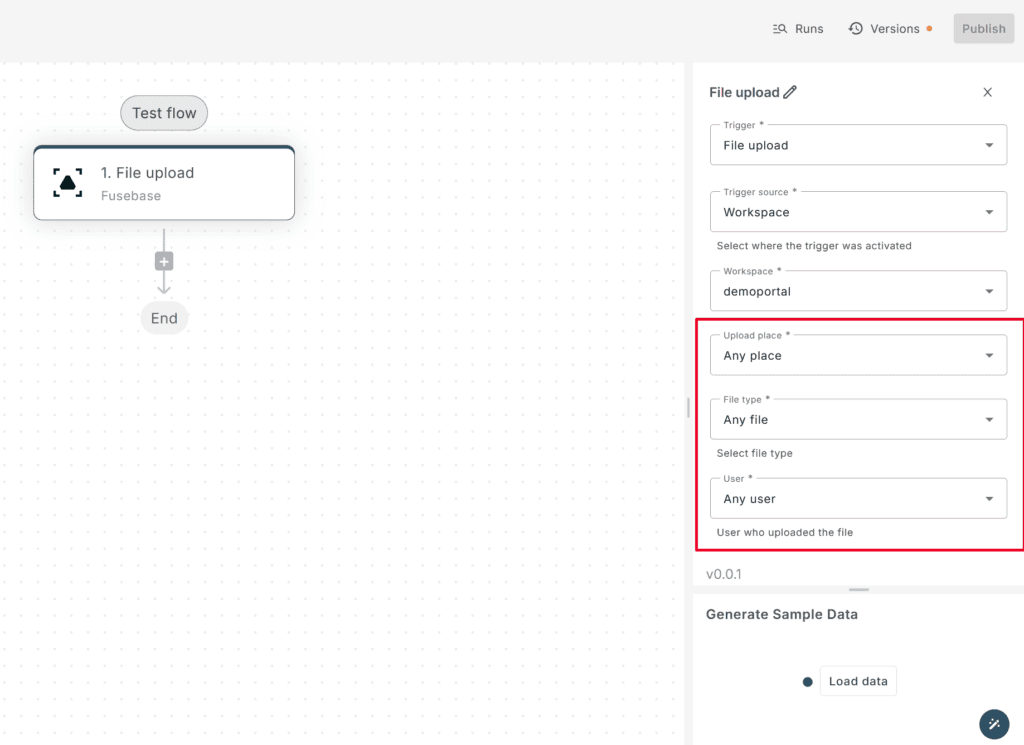
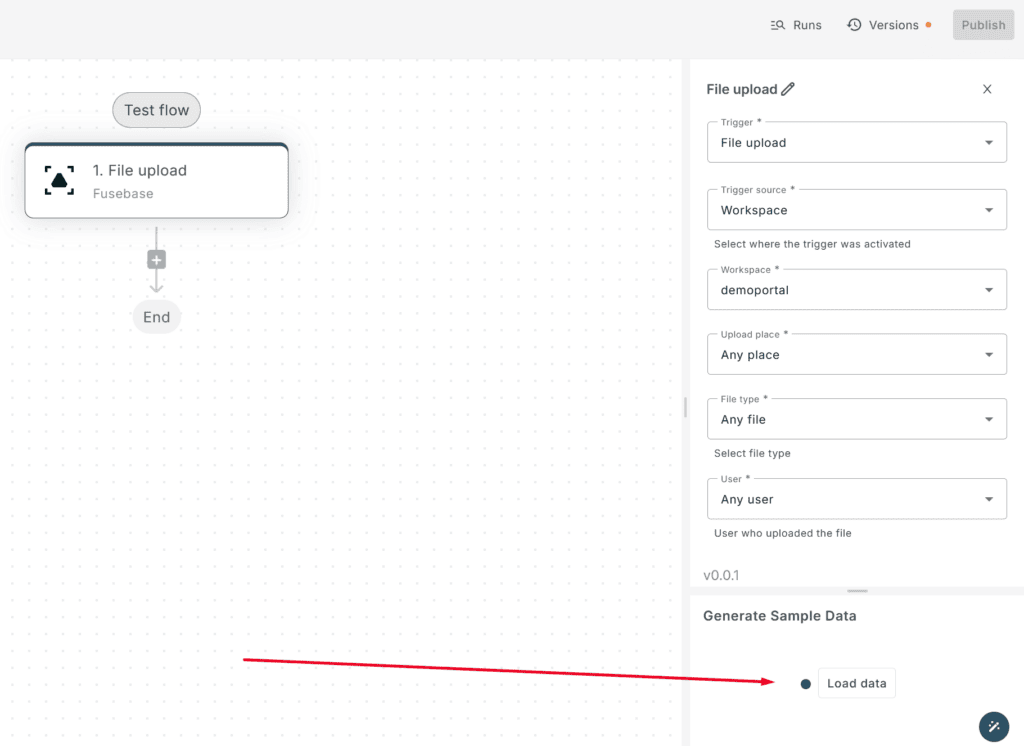
5) Click the “Load data” button to load sample data. This is important for the following steps.
Adding the Transcribe Action #
Next, you need to add the Transcribe action to extract text from the video.
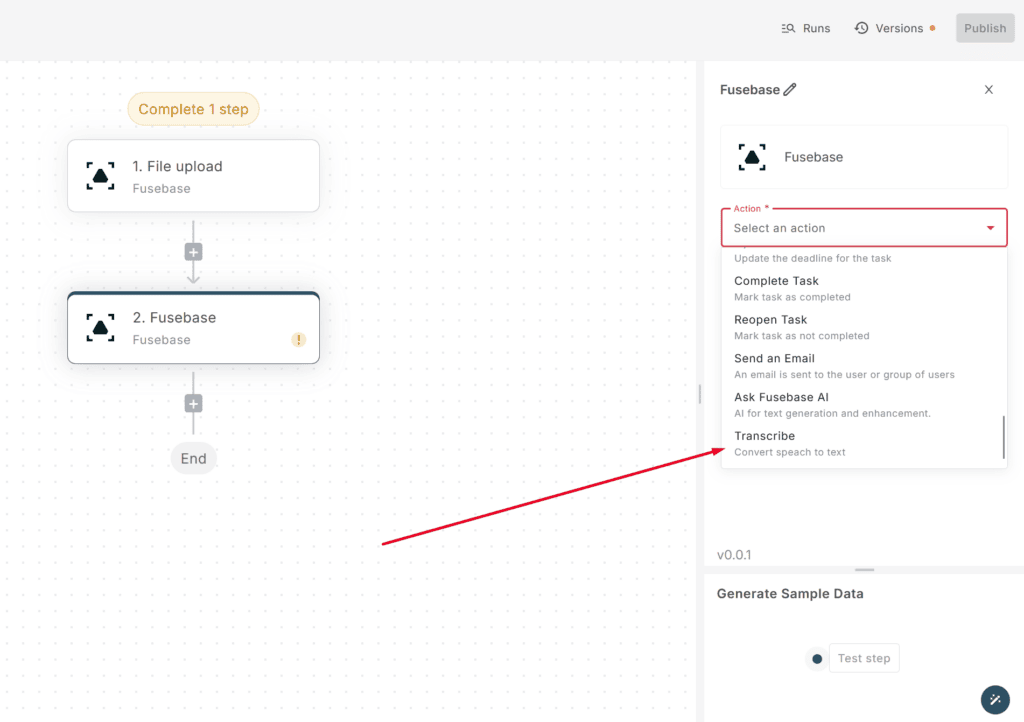
1) Click the “plus” button below the “File upload” step.
2) In the “Action” section, select Fusebase -> Transcribe from the dropdown list.
3) In the File URL field, we need to select the file that will be transcribed. Choose File Upload and click on FileUrl.
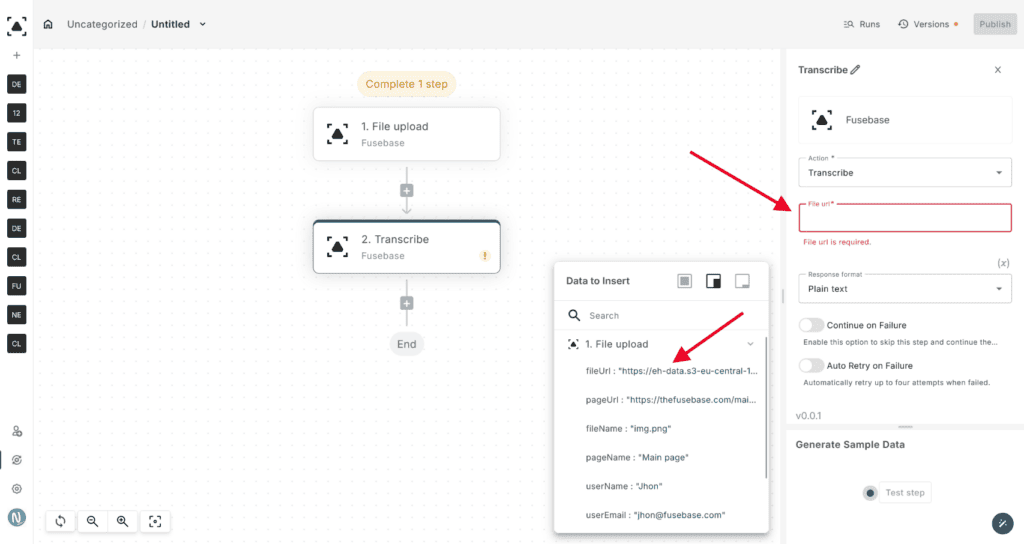
4) In the “Response format” section, select “Plain text” from the dropdown list.
5) Click the “Test step” button to load sample data. This is important for the following steps.
Creating a Summary with ASK AI #
Next, we need to generate a summary of the transcript. To do this, use the ASK AI action.
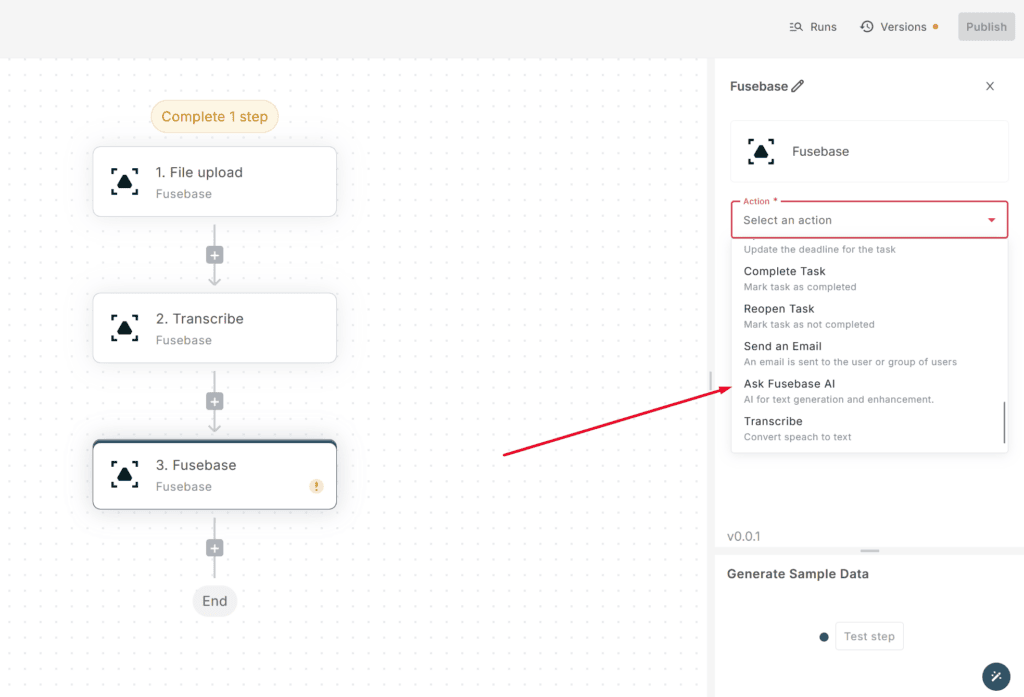
1) Click the “plus” button below the “Transcribe” step.
2) In the “Action” section, select Fusebase -> Ask Fusebase AI from the dropdown list.
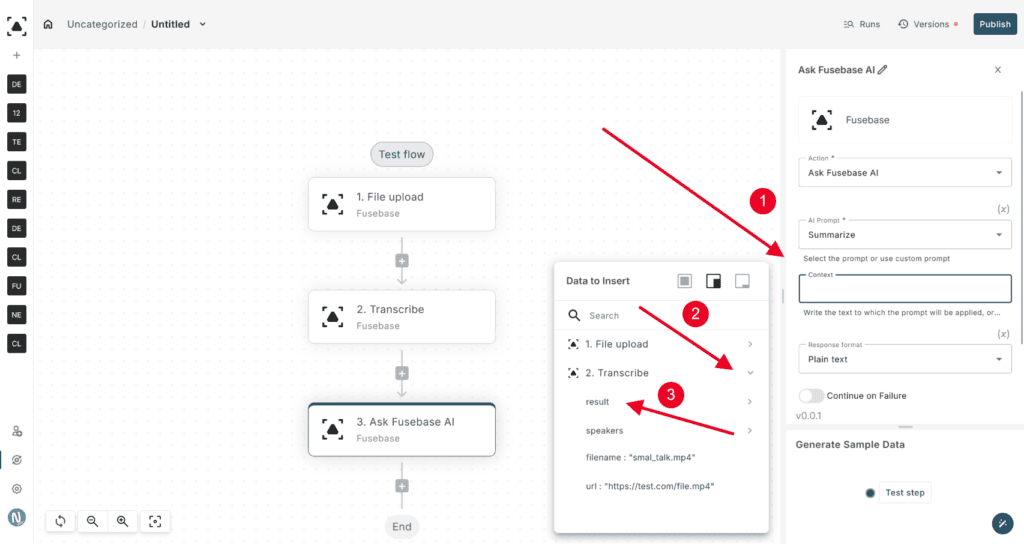
3) In the “AI Prompt” section, select “Summarize” from the dropdown list.

4) In the Context field, you need to pass the content of the transcript. To do this, select the Result parameter from the Transcribe step.
5) Select HTML in the Response format. This is necessary for proper formatting in the email.
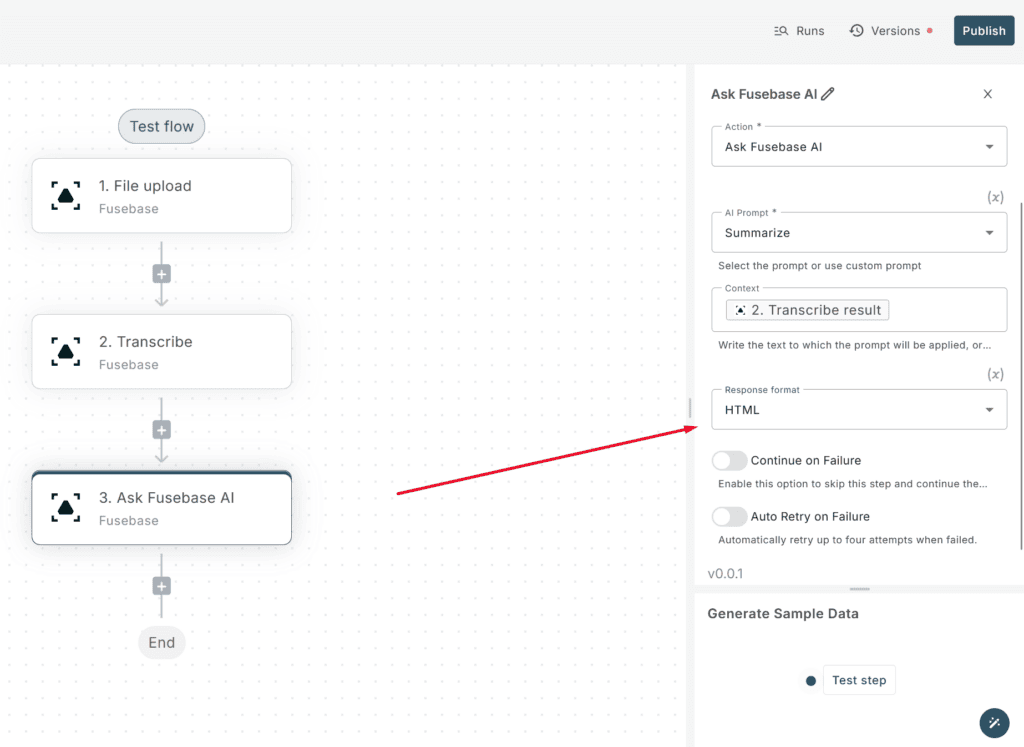
6) Click the “Test step” button to load sample data. This is important for the following steps.
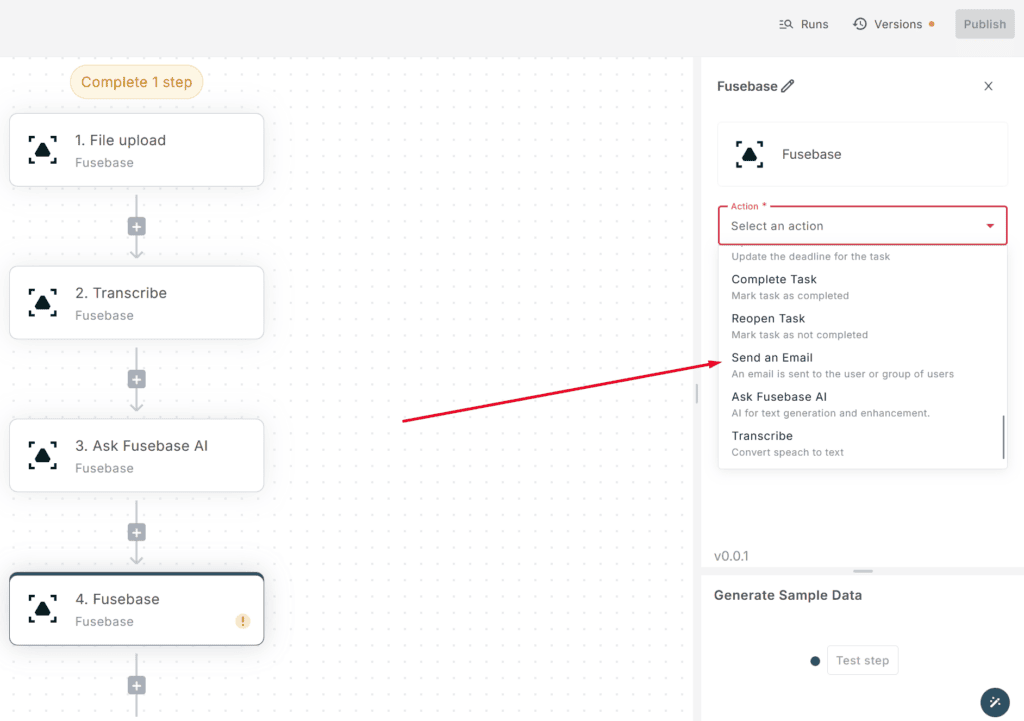
Sending the Email with the Summary #
Next, let’s set up the email to send the summary to the author who uploaded the file.
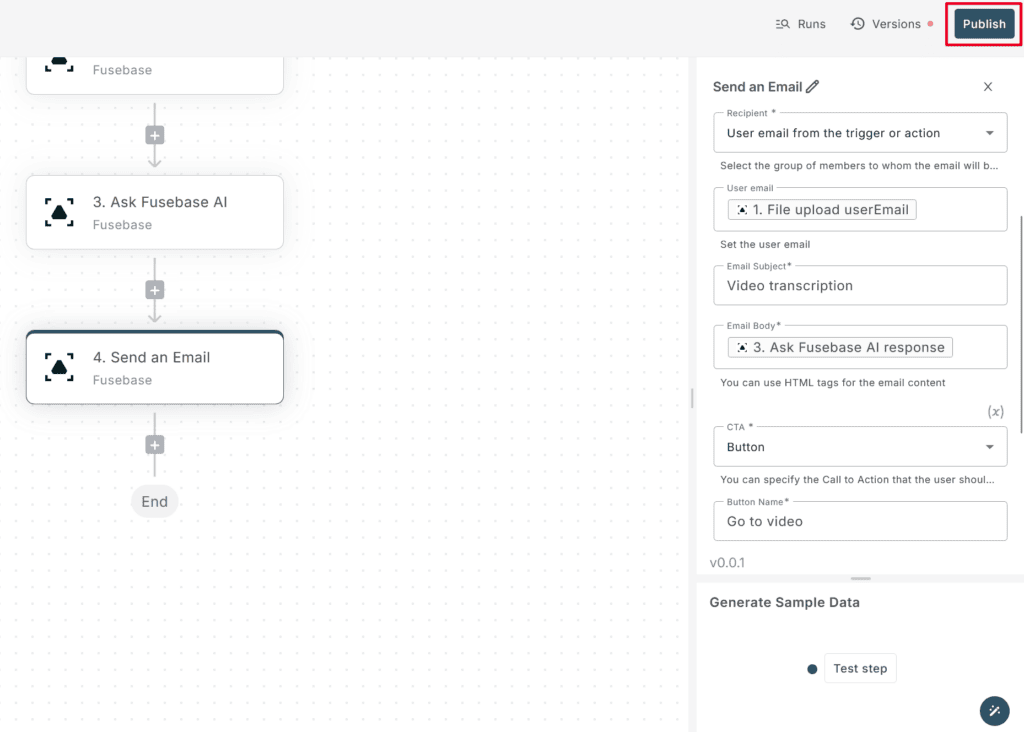
1) In the “Action” section, select “Send an Email” from the dropdown list.
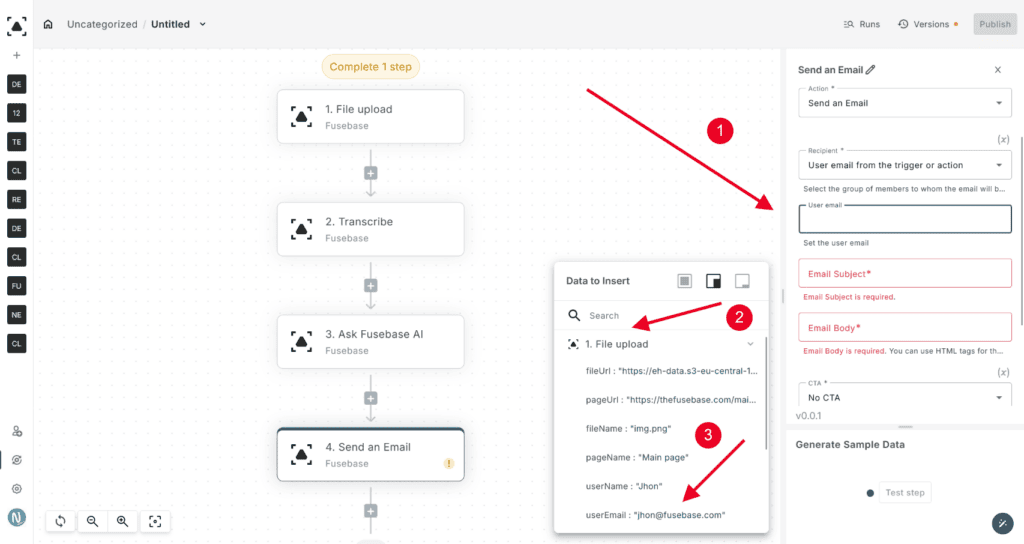
2) In the “Recipient” section, select “User email from the trigger or action” from the dropdown list. In the User email field, select the file uploader from the first step, File Upload. This will ensure the email is sent to the author who uploaded the file.
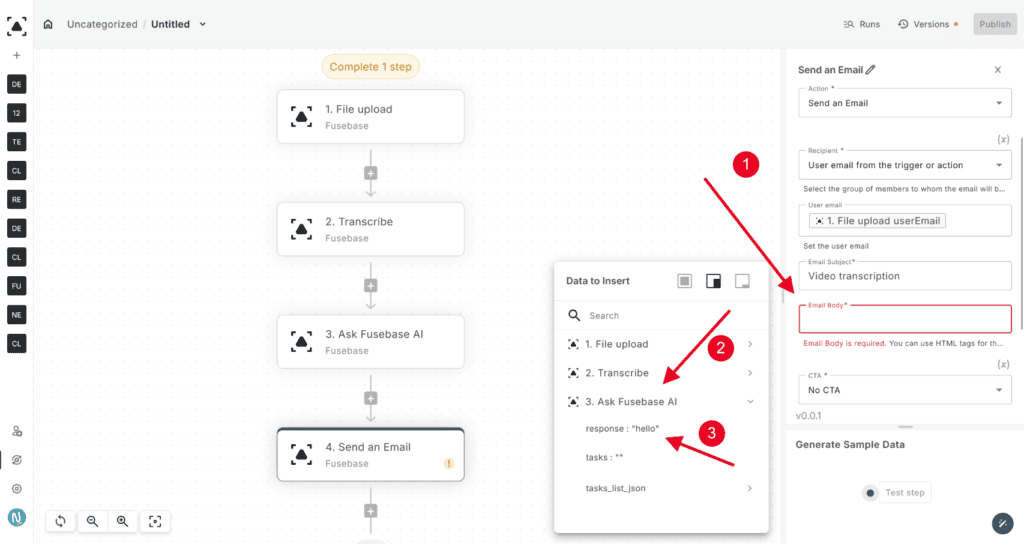
3) In the “Email Subject” section, type “Video transcription” (or something else).
4) In the Body of the email, we add the result of the Ask Fusebase AI action. This will include the generated summary of the transcript.
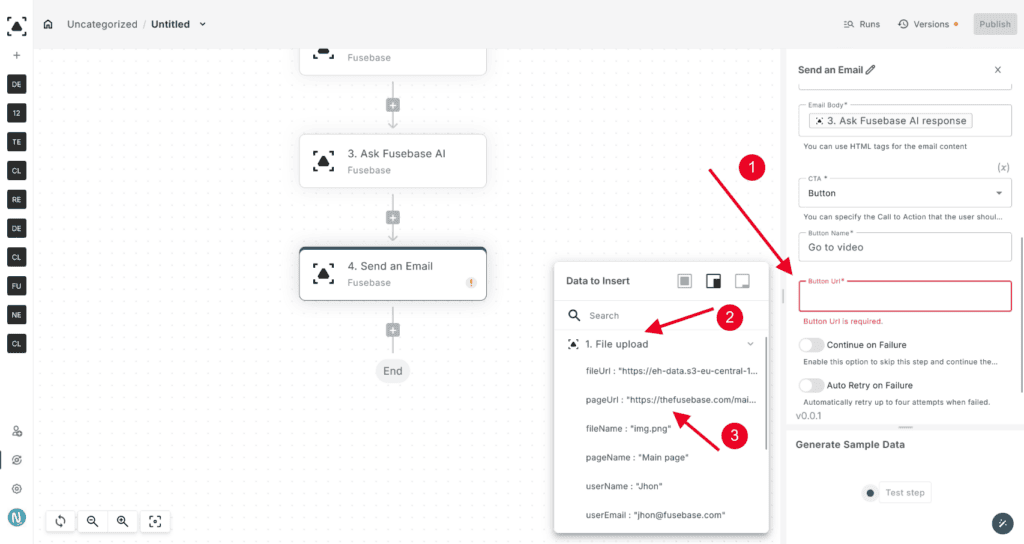
5) In the CTA (Call to Action), you can add a button to the email. For example, you can link it to the page with the video. This allows the recipient to easily access the uploaded video directly from the email.
Click the “Publish” button to publish the automation flow.
Next, we can test our flow. To do this, simply upload a video to the selected workspace. This will trigger the automation, and you can verify that the transcription, summary, and email processes are working as expected.