Not long ago, we released our AI agents—designed to help with a wide range of routine tasks. But you can go beyond using them individually by creating entire agent systems through our automation module.
To enable this, we’ve added a new action – FuseBase Agents – where you can select the agent you need to work as part of your automation flow.
Let’s try to build a simple automation. As a business, it’s very important for me to stay updated on what’s happening with competitors, but visiting their websites and checking blogs and releases every time takes a lot of time. So, I’ll create an agent that will check the main competitors’ websites for news and set up a flow that runs the agent every week and sends the news to a Slack channel.
Creating an Agent for Competitor Research #
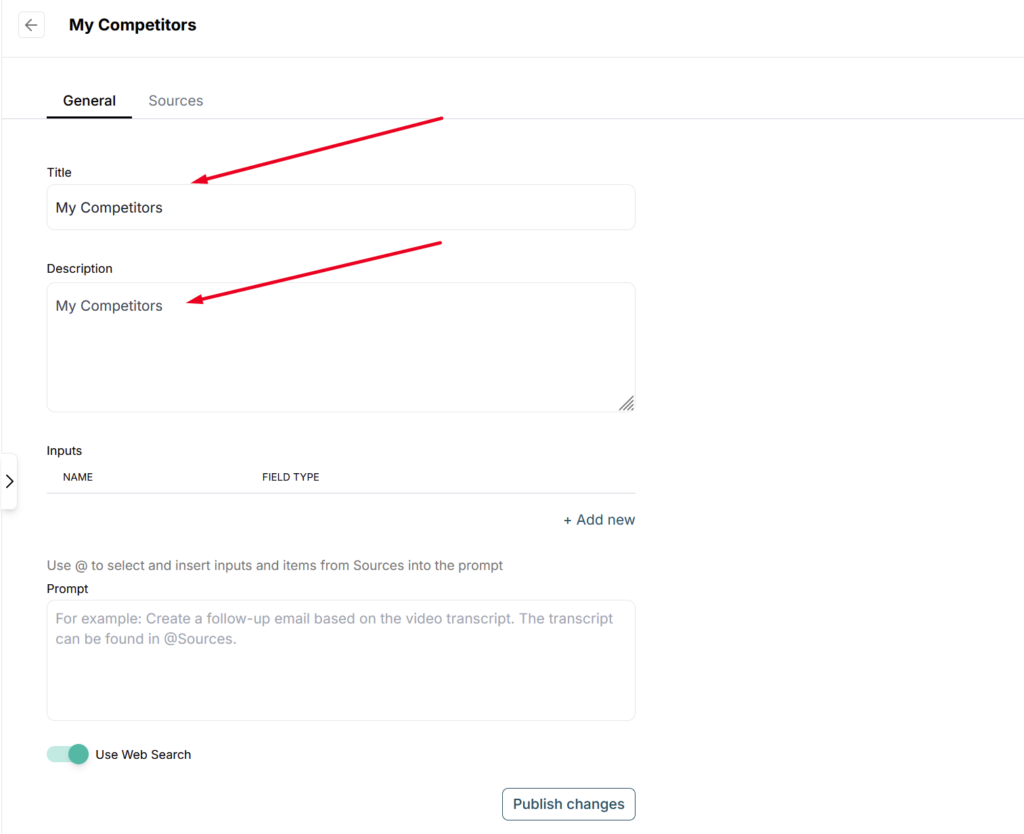
First, you need to create an agent. To do this, go to the Agents page and create a new one.
Give your agent a name and a description.
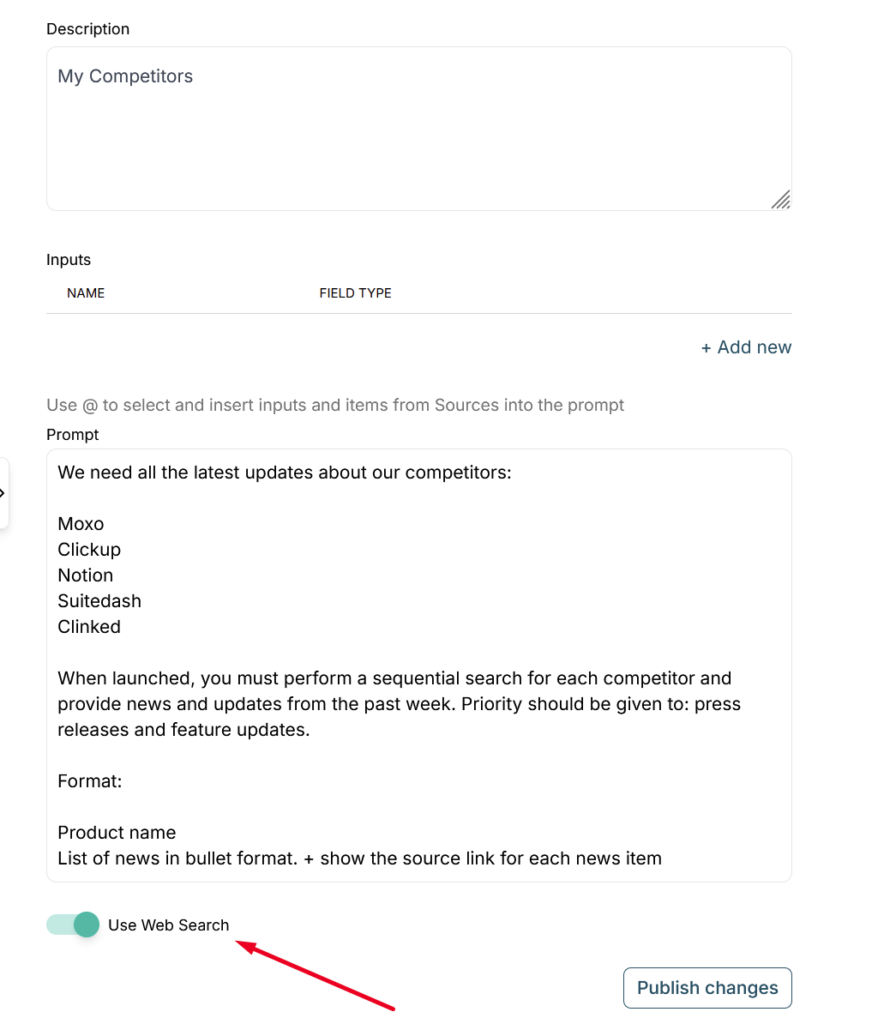
In the prompt, we need to clearly specify what we want. State directly that we want to gather all the latest news about competitors from their websites and blogs. List the competitors and the desired output format. Here’s an example prompt:
We need all the latest updates about our competitors:
List of Competitors
When launched, you must perform a sequential search for each competitor and provide news and updates from the past week. Priority should be given to: press releases and feature updates.
Format:
Product name
List of news in bullet format. + show the source link for each news item.
Don’t forget to activate the web search switcher. This will allow the agent to access the internet to search for information.
Next, publish the agent.
Creating the Automation Flow #
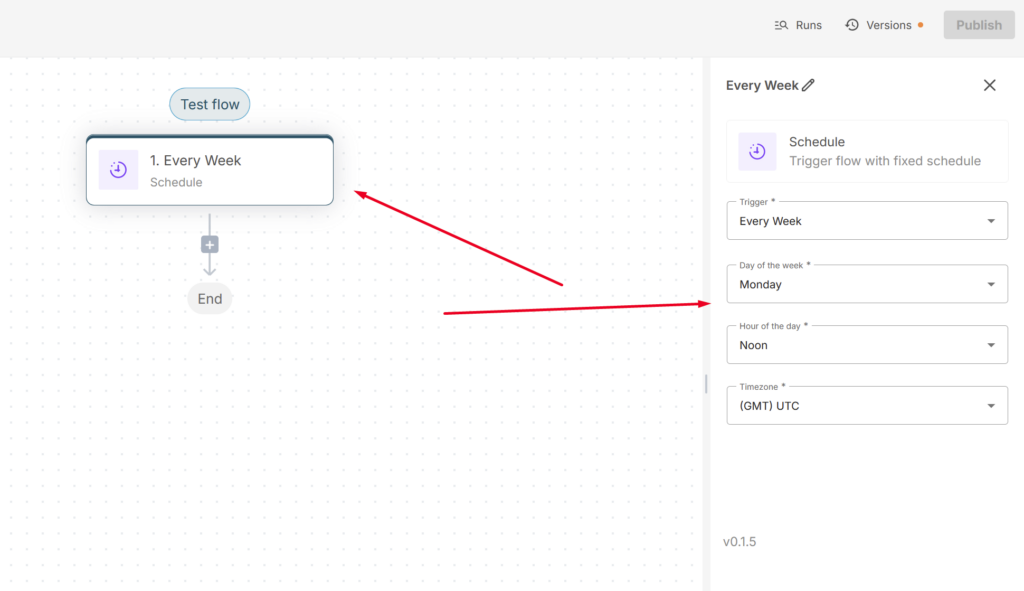
Now, we need to create an automation flow. Go to the Automation section and create a new flow.
1) For the trigger, select Scheduler and set it to run once a week.
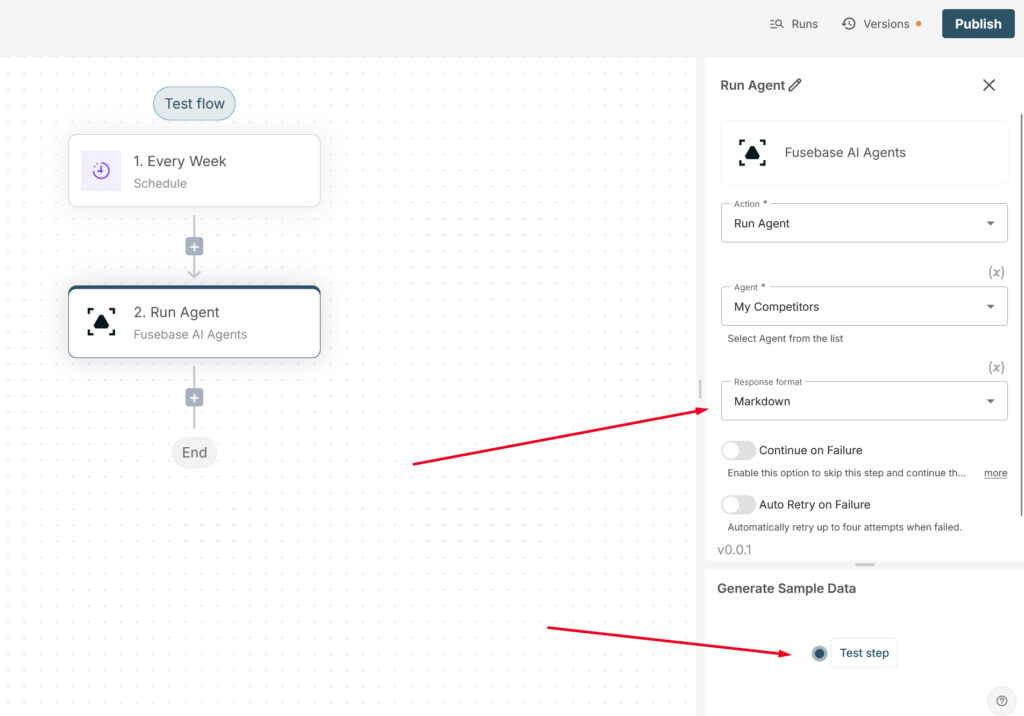
2) Next, add our new agent as the first action. To do this, select Fusebase AI Agents. Then, choose Call agent -> select the agent you created.
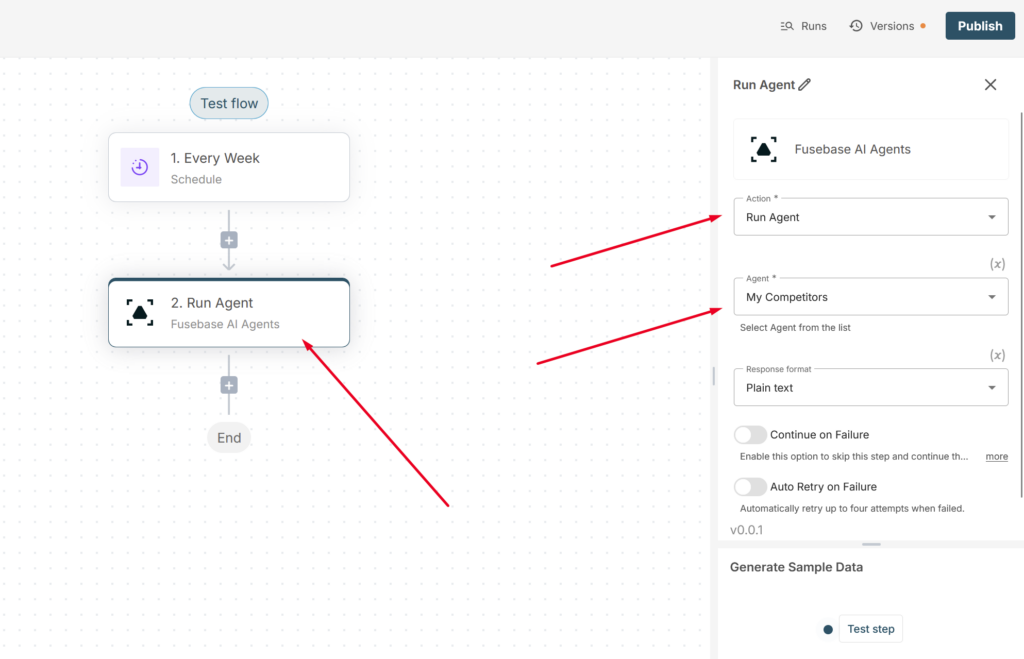
For the response format, select Markdown. Don’t forget to click Step test to fetch the data for the next step.
3) The next step will be sending the update to Slack. To do this, choose Slack from the actions list and authorize your account.
For the action, select Send a message to either a channel or a user, depending on your preference. Then, choose the desired channel or member.
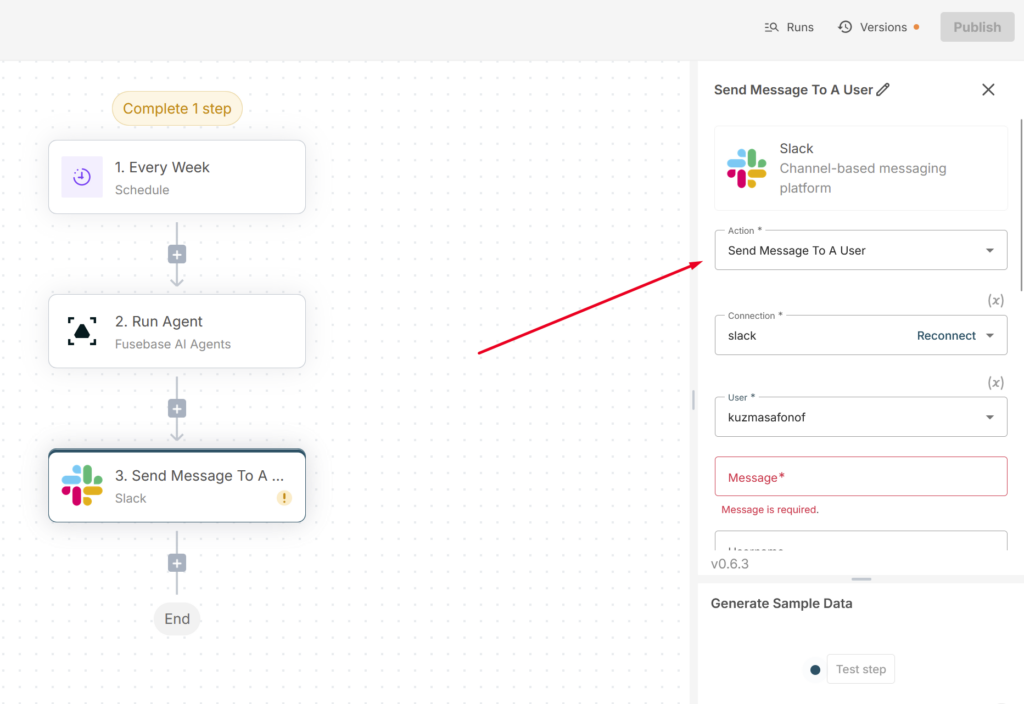
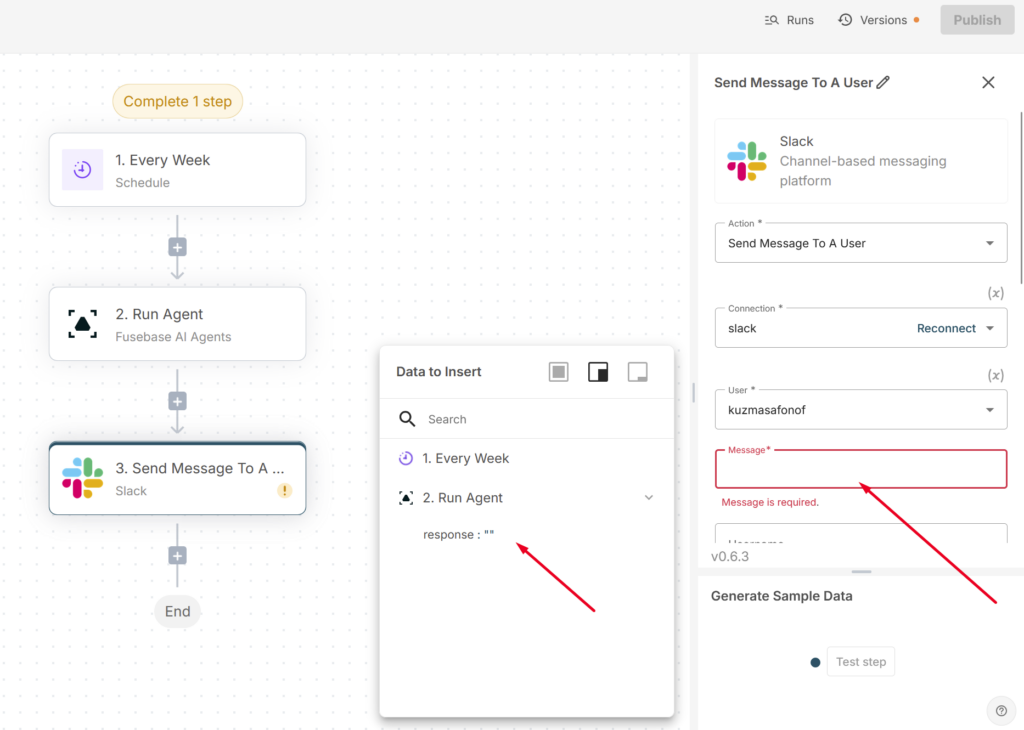
In the Message field, insert the response from the agent.
For the Username, enter any name you prefer, and then publish the flow. The flow is now published, and once a week, you’ll receive the latest news from your competitors.


