Forms will allow you to collect various types of information from your clients: personal details, product feedback, and more.
Adding a Form #
To add a form to the page, select the “Form” block from the list of blocks available for adding to the page.
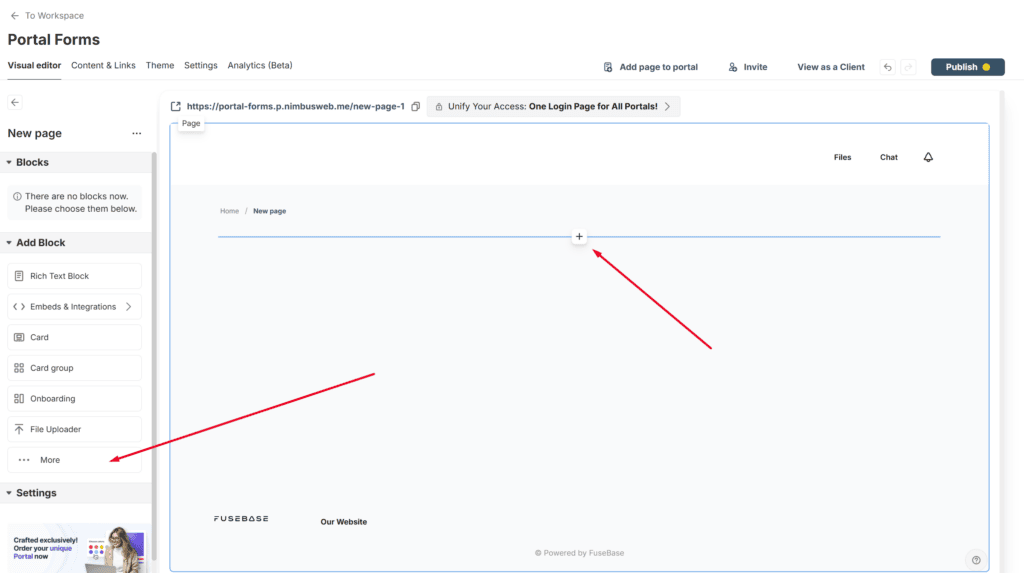
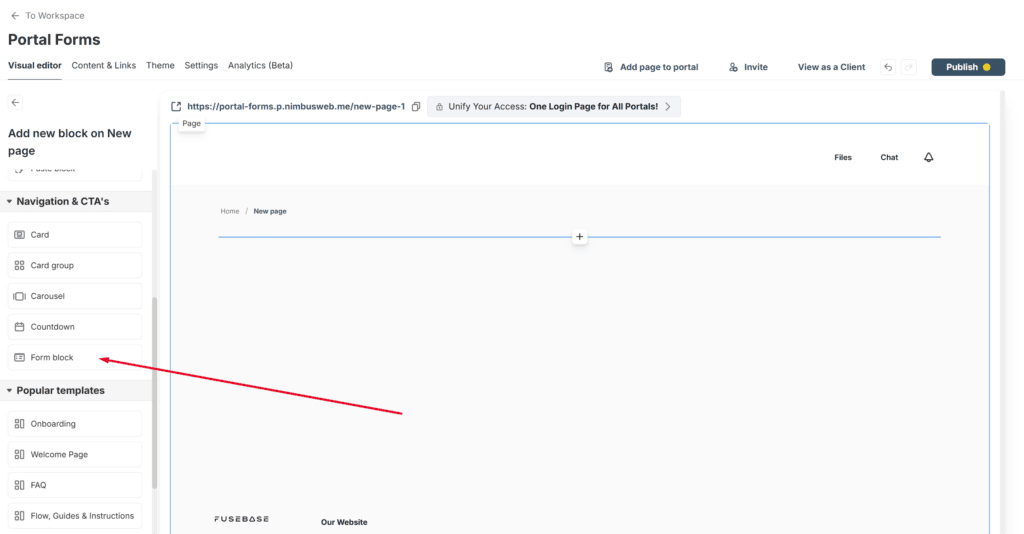
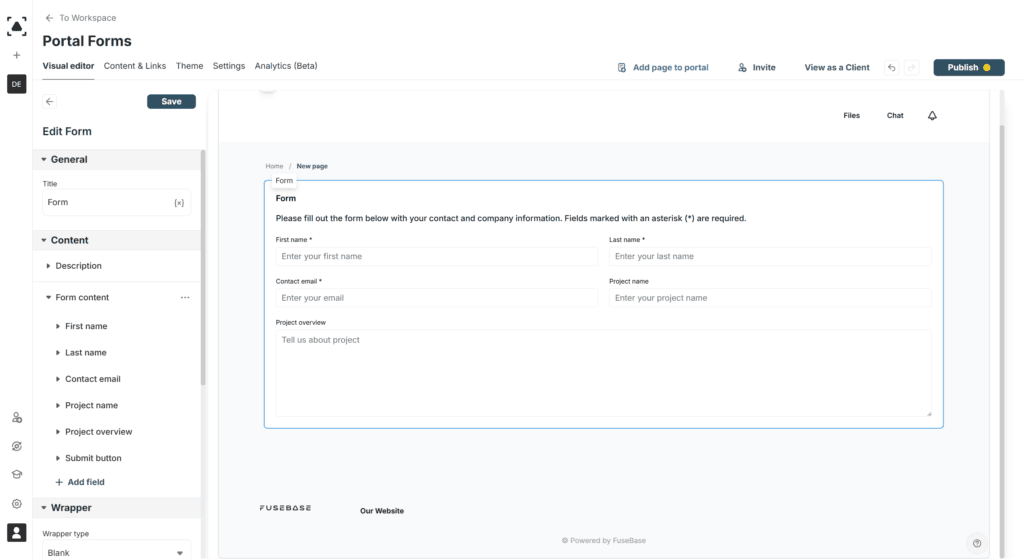
A form with default fields will then be added to the page.
Customizing the Form #
In the control bar, you can customize the form to your liking. For example, you can update the form’s name and description, or remove them entirely by simply deleting the text.
The form consists of various fields, such as text, numeric, phone, email, file, date and others. You can add a new field by clicking Add Field and selecting the desired field type.
If needed, you can rearrange the fields immediately by dragging and dropping them.
Editing Fields
To edit a field, click the arrow next to its name.
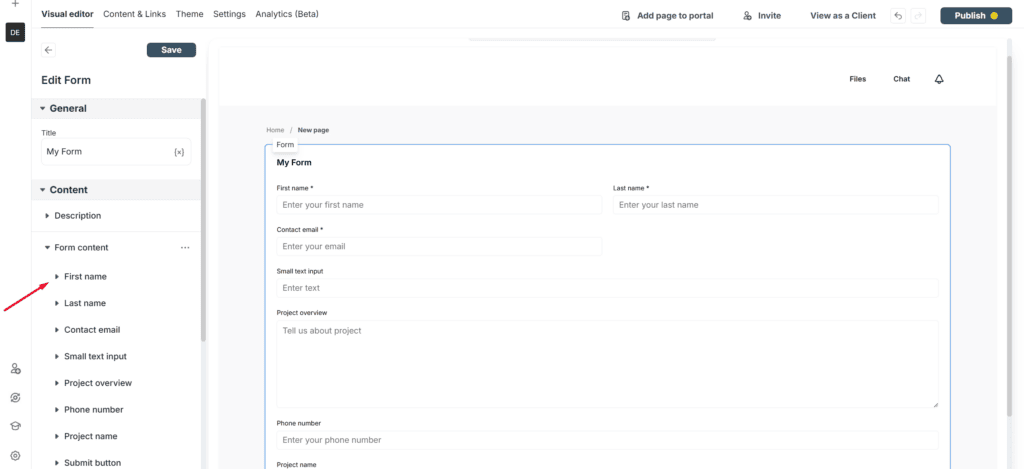
Then, you can update the field’s name and the placeholder/hint inside the field. Here, you can also make the field mandatory (or optional, if it’s not required). Additionally, you can adjust the field’s appearance by setting it to span the full width or half the width of the row, making the form more compact.
Enabling/Disabling the Submit Button
The submit button for saving form data can also be enabled or disabled. This can be managed through the Submit option.
- If the button is disabled, the form data will remain on the form even after it has been filled out.
- If the button is enabled, the form will be cleared after submission, allowing another client to fill it out again.
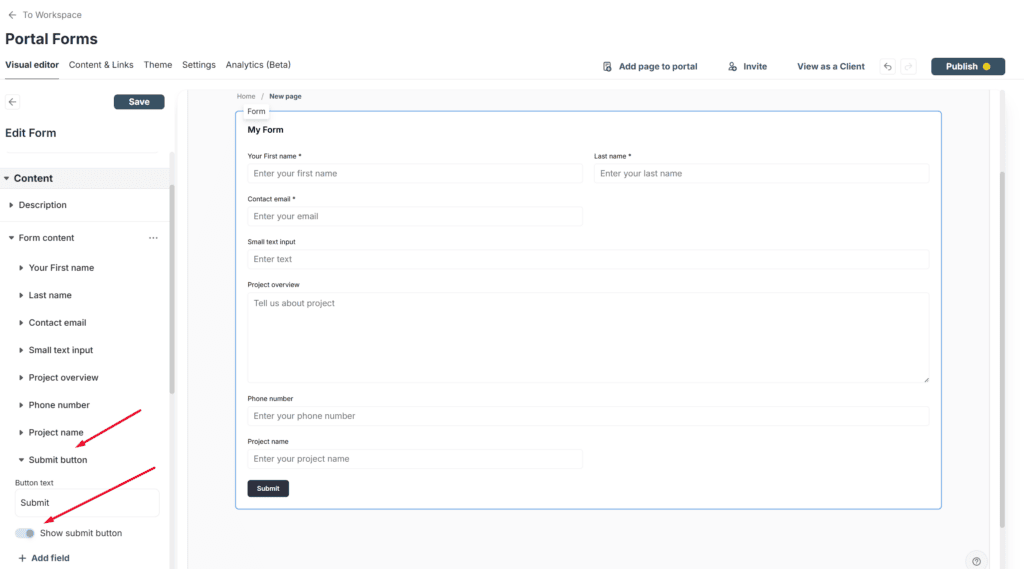
Once all the fields have been added and the form is configured, save the changes and publish it using the Publish button. After that, your clients can start filling out the form.
Form Reusability Option #
In FuseBase, you can create two types of forms:
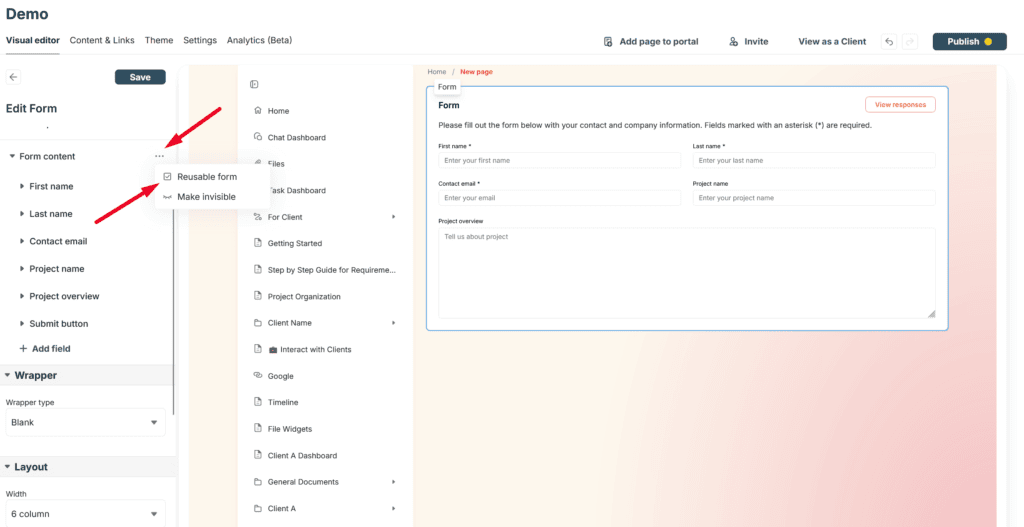
- Reusable Forms: These forms can be filled out by multiple clients. After each submission, the form fields are cleared.
- Non-Reusable Forms: In this case, the form fields are not cleared after submission. This is ideal for complex forms that require input from multiple people over time. For example, you can create a form for a Compliance Check, allowing a client to fill it out and make additions over an extended period.
By default, portals create reusable forms. However, you can change the form settings to make it non-reusable. In this case, your clients can continue adding data to the form even after the initial submission.
Viewing Form Responses #
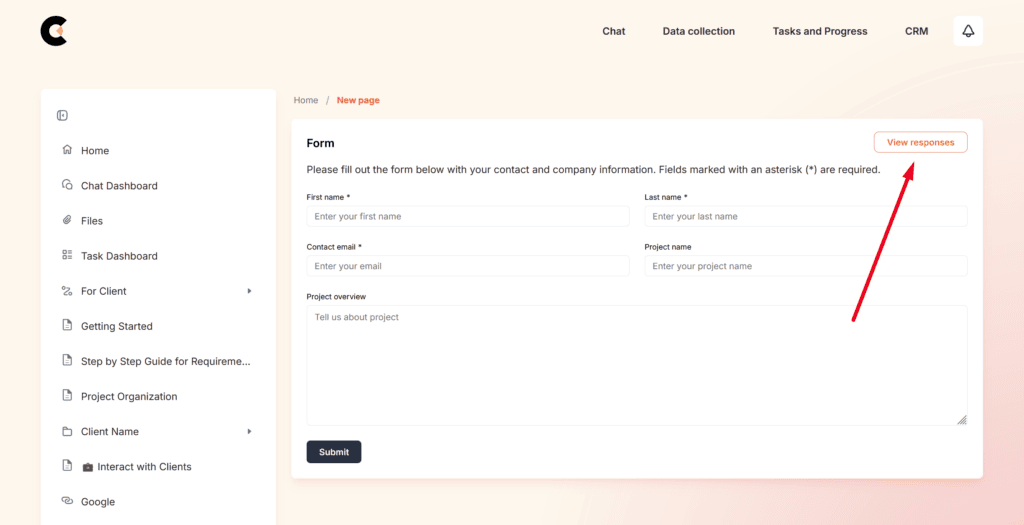
Once a client has filled out a form, it is important to review the information they submitted. This can be done through the Responses section, which is available for each form and is visible only to portal managers.
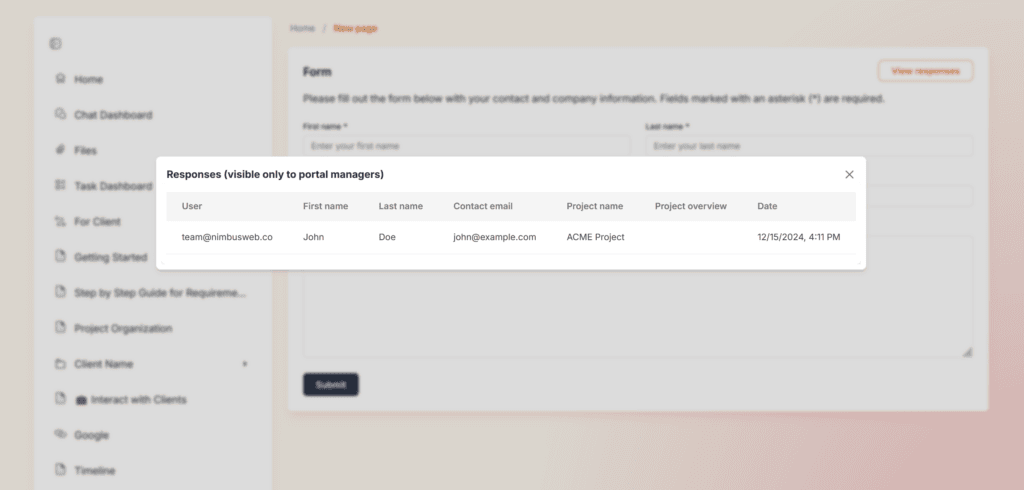
Clicking on Responses opens a pop-up displaying the results for that form. Here, you can view a list of clients and see what each client submitted in the form.
Automation and Form Integration #
Our forms can be integrated both with other FuseBase modules and with external services. For example, you can create new tasks in FuseBase based on form responses, send answers to AI agents, or save form submissions to tools like Airtable or Monday. You can read more about automating forms in this guide: https://nimbusweb.me/guides/automations-and-integrations/trigger-form-submission-automate-forms-in-the-portal/