

HR Management with FuseBase: Robbie Forsyth’s Case Study
- 4 Min read
Take screenshots any way you want with Nimbus Capture
Try it nowA picture paints a thousand words. That is quite true, do you agree? Today, with more and more teams working remotely, the importance of visual communication grows exponentially. Our blog already covered this – when you show rather than tell, you save tons of time and convey meaning more effectively.
If you asked the members of a hybrid team what form of visual communication they use most – the answer, most definitely, would be – a screenshot. Let’s narrow down the topic a bit and have a look at what webpage screenshots are and how to work with them. In this article, we’ve compiled the best expert tips and life hacks for taking and using webpage screenshots.
Most probably, you have taken a screenshot at least once and know that a screenshot (also called a screencap or screengrab) is an image that shows the contents of a computer display. What you might not know is that you can capture not only your screen but take a full webpage screenshot including the sections that you have to scroll for. Sounds unbelievable, but it’s true! Instead of taking a screenshot of the screen, then scrolling down and taking another screenshot, and then repeating that again, again, and again, you can get an excellent quality screenshot of a whole webpage in one click. All you need is special software.
“When do I need a full webpage screenshot?” you might ask. When it comes to situations like these, you’ll be able to avoid unnecessary meetings. Suppose, you ordered a new design of your website and need to give feedback to a designer; or you’re a copywriter and need to convince a client to change the order of the sections with content on the site; or you are working for a marketing agency and have a task to analyze the efficiency of the client’s product page – in all these situations a full page screenshot is invaluable.
Try Nimbus Capture to save your time with one-click screenshots
There are lots of different programs for snapping webpage screenshots on the market today. Here are some examples. Among them Nimbus Capture is reported to be one of the simplest and most user-friendly tools. In 2021, the application was chosen as one of Google Chrome’s Favorite Extensions for productivity. We will look at Nimbus Capture in detail to demonstrate to you how you can take your screenshots to the next level. Let’s get started!
With Nimbus Capture, you get more done in less time. Just think of it! Instead of explaining your ideas verbally or choosing the right words when composing a written message, you snap and edit a screenshot, and then send it to your clients, teammates, or other stakeholders. The best part of this is that a screenshot can be taken and sent in a matter of seconds. All in all, screenshots make it easier and faster for your audience to receive your message.
By the way, Nimbus Capture has already received a lot of positive feedback. What makes the solution so remarkable? The answer is – it is stuffed with multiple useful options designed to make the life and work of its users easier and more efficient.
Before we show all our cards, please check the tool compatibility with the browser you use. Below you can find the list of browsers our extension works with. For more information about the tool, please, refer to the Nimbus Capture product page.
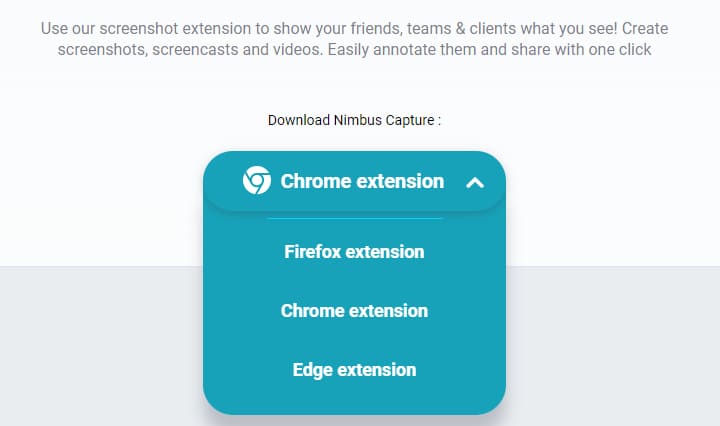
If your browser is on the list, congratulations! You can become an owner of a superb, high-quality tool. All you need is to add an extension to your browser and test-drive the functionality the tool features:
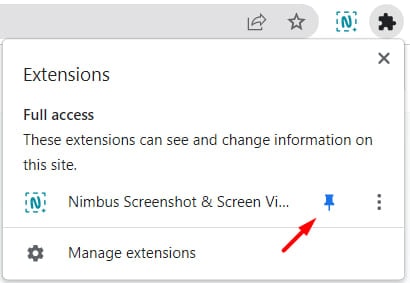
Now that you have got acquainted with the tool’s features, nothing stops you from evaluating it yourself. Add Nimbus Capture to your taskbar so that you can quickly access it when needed. Tools for frequent tasks should always be close at hand. Right?
As you can see, Nimbus Capture is useful for more than one purpose. However, here, we are going to focus mainly on how to take a screenshot of a whole web page.
Get started with Nimbus Capture
First and foremost, you need to add Nimbus Capture to your browser. The tool can efficiently operate from various devices. The only prerequisites for its successful work are a stable internet connection and one of the supported Web browsers installed. You will not have to waste time and effort downloading, installing, and configuring the tool – everything is done automatically. Nimbus Capture will be activated immediately after the launch of the browser.
Now let’s have a look at how you can work for free with Nimbus Capture in different browsers as well as how to screenshot a whole website with the help of the tool!
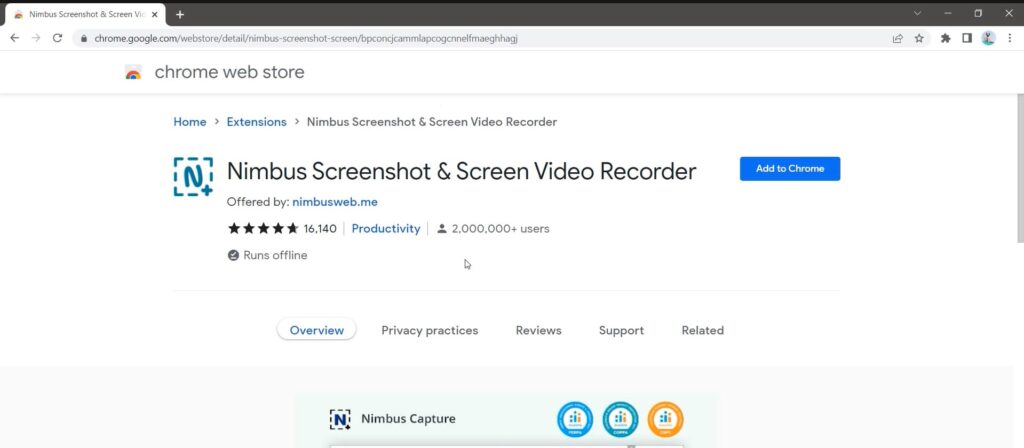
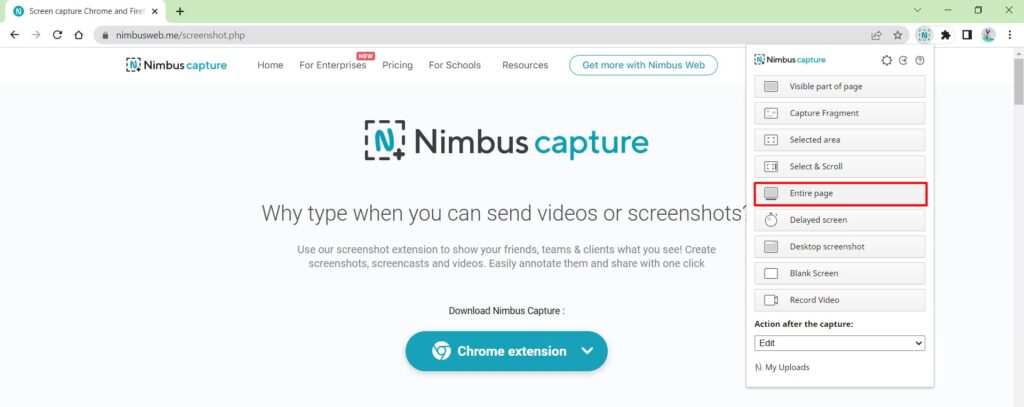
To get Nimbus Capture, go to Google Chrome Store>>. There, hit the Add to Chrome button and then select Add Extension. Your next step will be to select the Entire page option from the Nimbus Capture menu. Astonishingly easy, isn’t it? In such a simple way, you can even capture entire website.
Watch a short video about how to work with Nimbus Capture in Google Chrome here:
You can get the Nimbus Capture extension for Mozilla Firefox on its dedicated page in the Firefox Add-ons Store>>
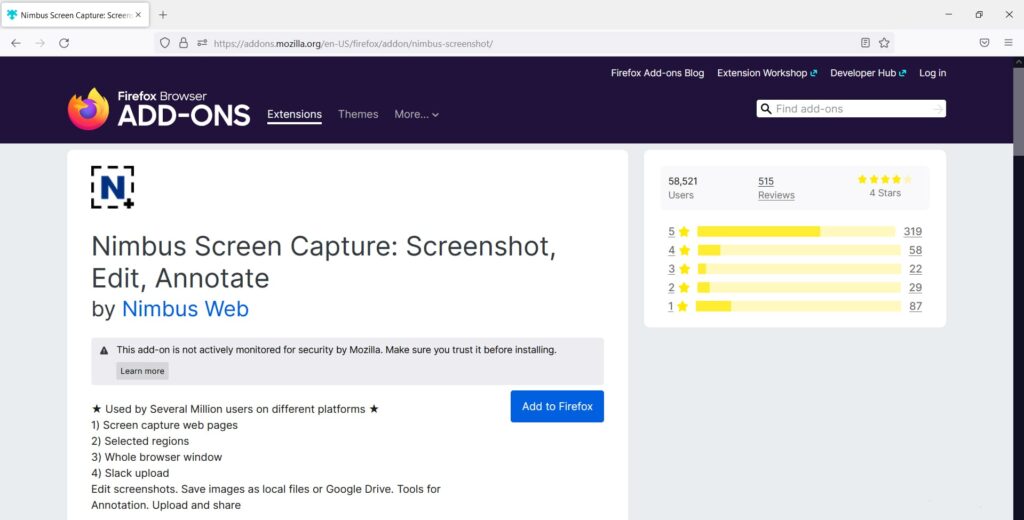
Just press Add to Firefox and you’re all set. Now you can quickly and easily screenshot webpages for presentations, reports, and documents.
Find Nimbus Capture in the Microsoft Edge Add-ons Store>>. To add the extension to your Microsoft Edge browser, click Get and then select Add Extension. This will add a new button to your Microsoft Edge browser bringing all the Nimbus Capture features in. The tool will be downloaded and installed within a couple of seconds.
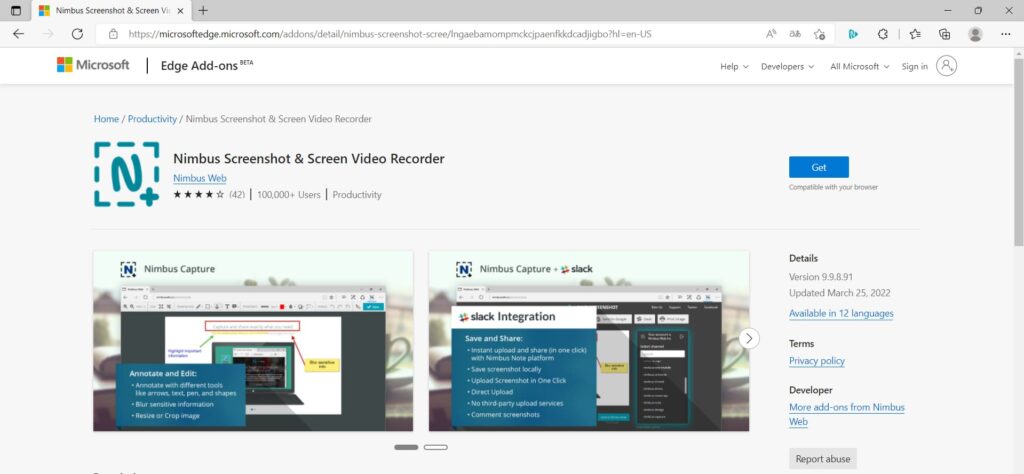
Once done, open it. Now you can proceed to capture the entire webpage. That’s pretty easy, huh?
Now that we have revealed how to add Nimbus Capture to the browser of your choice, we will provide you with more practical information and show you how to edit your screenshots and make images out of them. We have already mentioned that Nimbus Capture works perfectly well both on Windows and Mac. Let’s first look at how you can use the tool on Windows.
If you are a Windows fan, you must surely know all the perks this operating system has. And you probably would not mind adding one more point to that list. Nimbus Capture can propel your user experience to the next level by providing you with the most awesome functionality for making screenshots (including screenshots of the entire webpage) you can get for your Windows PC.
After you have downloaded and installed the solution here, first, make sure you have pinned it to your panel for quick access. Now, to take the screenshot, all you need is to click the Nimbus Capture icon and select the required option from the menu:
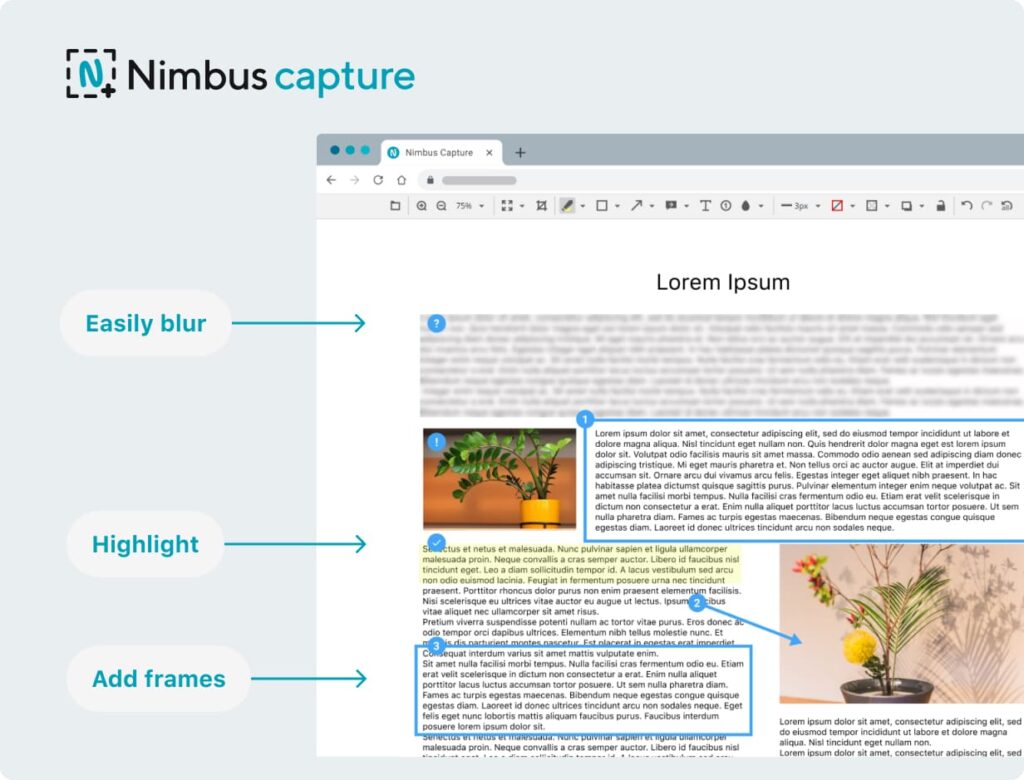
After Nimbus Capture takes the screenshot, the Edit menu appears. With its help, you can crop the screenshot, add arrows, other figures, and text to it, zoom the screenshot in and out, and many, many more. If necessary, you can cancel all edits by clicking the Back button.
Once you’re happy with your screenshot annotations, click Done. After that, you will be offered a number of options to save the screenshot:
Incredible, right?
The workflow is pretty much easy and straightforward. Click the extension icon in your browser and then select Entire Page. As soon as the webpage capture tool finishes its task, the Edit panel will appear for you to be able to make the necessary edits. After that, click Done, and you will be offered to either save or share the screenshot.
Please note that some of the described Nimbus Capture tool features are available under the Pro plan only.
Check out all opportunities of Nimbus Capture Pro!
Working with Nimbus Capture on the Macintosh Operating System is as easy as working with it on Windows. The options are the same, and the menu looks pretty much similar.
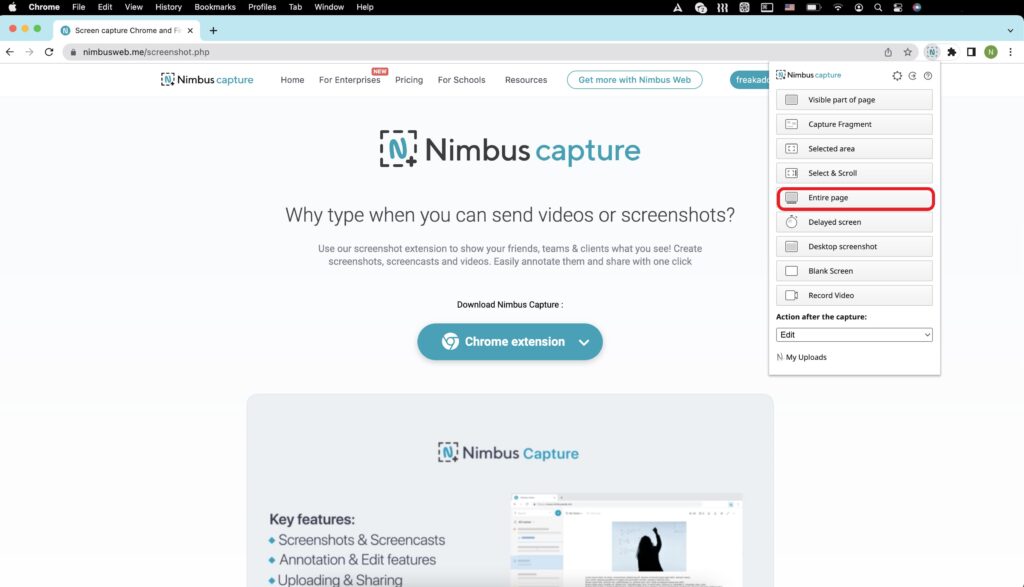
Click the Nimbus Capture icon in your browser on macOS and select the required option. If you want to be able to edit the screenshot afterward, make sure that the Edit option is selected in the Action after this capture section. Next, use the tools on the top panel to change the screenshot as required: add text, crop the image, add arrows and geometric figures, blur selected areas, etc. Click Done to proceed to save the screenshot.
To capture the entire website on Mac, click the Nimbus Capture icon in the browser and select the Entire page option from the menu that will appear. Next, make the necessary edits and click Done. The extension allows you to save your screen captures:
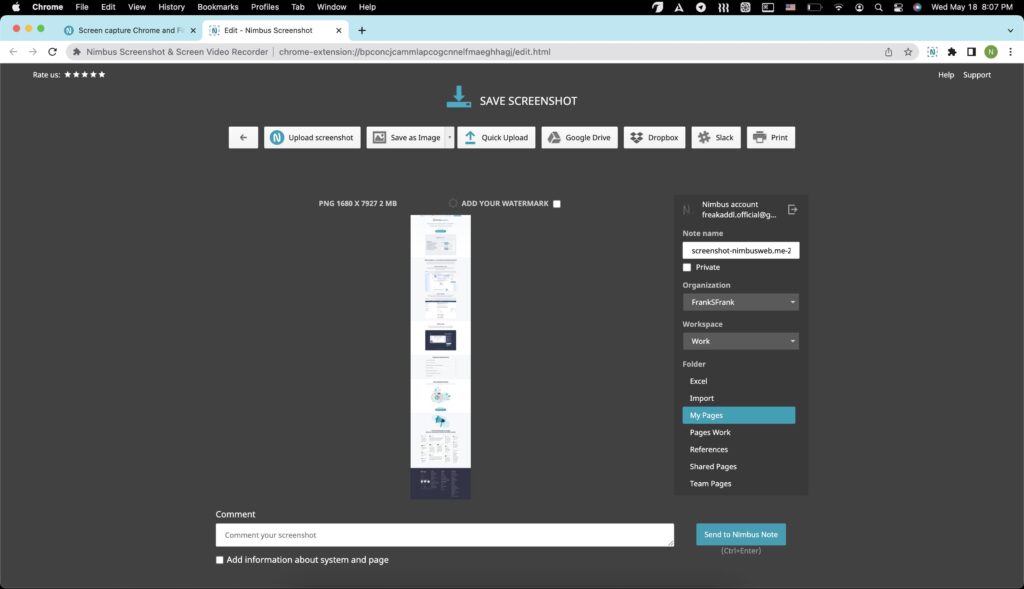
Pro plan users can upload the full webpage screenshot straight to YouTube, or Dropbox. On top of that, with a Pro plan, you can make the screenshot look more professional by adding your watermark.
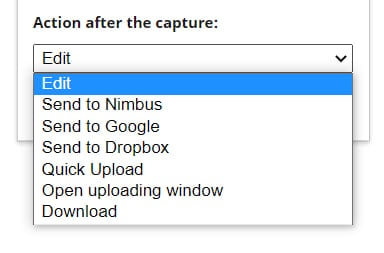
A small tip. To make things even faster, you can skip the editing part of the screenshotting process. For this, before taking a full page screenshot, in the Action after the capture dropdown in the Nimbus Capture menu, select how you want to save your screen capture.
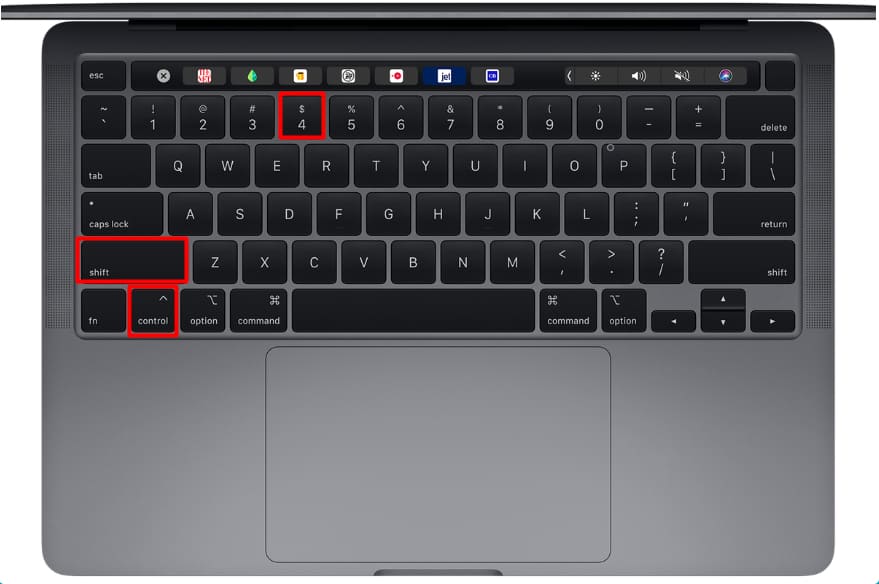
We have unveiled all the secrets about this top-notch tool. However, we would like to share one more super easy but very useful life hack. It’s the last one, we promise. Install Nimbus Capture to any of your browsers, and press Ctrl+Shift+4. This way, your screenshot will automatically be saved to the default download folder on your PC.
Today millions of people use screenshots to show something they found when purchasing online, share a funny meme, or try to assist someone in troubleshooting a computer or phone issue. But there might be situations when a plain screenshot is not enough and you need to crop the image, blur a certain area on it, add text, or highlight something. The market today is saturated with third-party applications allowing you to do all this, but how to choose the best one?
In this article, we’ve shared everything we know about taking screenshots with a focus on how to screenshot the entire page of a website. Now the ball is in your court. Download and install Nimbus Capture, which is one of Google Chrome’s Favorite Extensions for productivity, and start performing better and more effectively. All you need is to activate the extension and enjoy its brilliant performance. You can use Nimbus Capture for free:
The free version is great, no doubt. However, to unlock the full potential of the Nimbus Capture functionality, look at more advanced Pro and Team plans. The Pro subscription is suitable for those who work solo. Blurring confidential information, image editing & annotating, adding personal watermarks and other robust features will be available for you! If you want all these functions for your whole team, then try the Team plan.
Seeing is believing. Remember?
Found it useful? Share the article with your community

Get weekly tips and insights on how to grow your business