
Now we are all digital ninjas. We can record screencasts with one hand and make sandwiches with another. But when it comes to system audio recording, many applications can let us down.
Let’s say you make presentations to explain project details or want to give a review on webinars. Or maybe you make your own content such as vlogs, documentaries, video tutorials, radio shows or podcasts. Do you want to record desktop audio for your content on Windows?
Now anything that’s coming out of a browser, video call interviews, live streams, conference calls, video games and any other program can be captured with Nimbus Capture. Just use the system audio option.
So what is this scary “system audio” like? And how do you record internal sound?
All answers are in the article. Let’s get the ball rolling!
What does record system audio mean?
System audio refers to any sounds from your computer such as program notifications, videos, music, calls, and so on. When you capture sound from videos played on your computer that means you record system audio. Some typical internal audio recording software may only have microphone recording and may lack a system audio option.
To record a video or screencast with your system audio, try Nimbus Capture. There’s a desktop version of the app for audio capture. With Nimbus Capture, you’ll get recordings with good quality and no disturbances.
When do you need to record internal sound?
Nimbus Capture system audio comes in handy for meetings, webinars, podcasts, and so on. Record parts of video or audio materials and give reviews on them on Windows. System audio will care about capturing all sounds coming from your computer.
Record your screen and internal sound during meetings to enhance your work. However, make sure you don’t infringe copyright. Ask your colleagues if they don’t mind meeting recording and do not distribute any content without permission.
How to record system sound from a computer?
1. Download the Windows version of Nimbus Capture here >>. Register or log in to your Nimbus account.
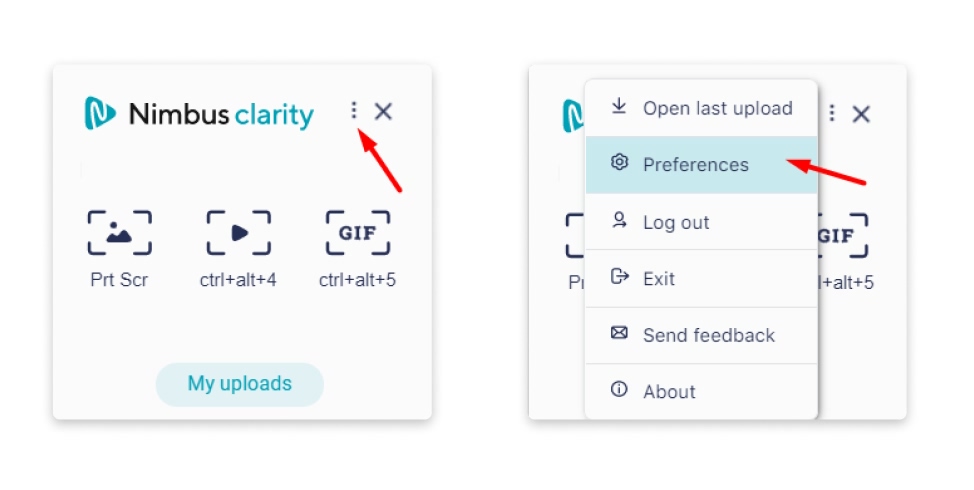
2. You’ll see a small window on your screen. Go to the settings and choose preferences.
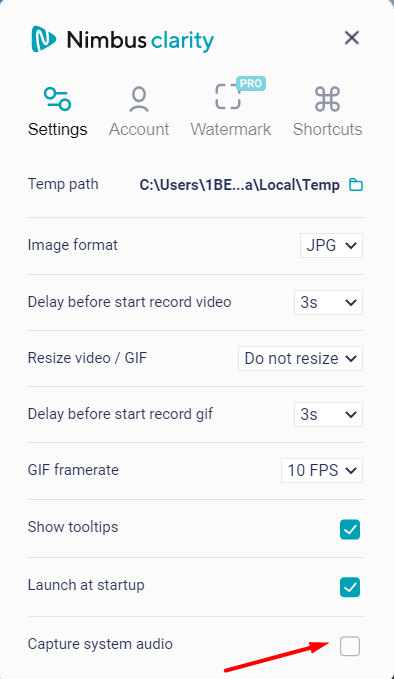
3. To record sound on the computer, tick “Capture system audio” and quit the menu.
4. Click on the icon in the middle or use the hotkeys CTRL+ALT+4

Here you’ll see short instructions on how to work with Nimbus Capture. It is a perfect solution for your business collaboration. Apart from simple recording, you can explain your ideas, give reviews, and more using annotated screenshots & videos.
5. Then, choose the screen area for recording internal audio on a computer and click on the icon or use the hotkeys CTRL+ ALT + L to start.
6. Once you finish your video screen recording with system audio, name it and choose where to store it. There are two options:
- uploading your recording to your Nimbus Note account. There, you can attach anything (files, images, tables and so on) to pages with recording.
- save the file on your computer.
And what if I need more than just a video?
Imagine you have a very important video call. Your clients want to discuss their project. To not miss any details, you ask for an agreement to capture your meeting using Nimbus Capture Windows version with system audio.
After the meeting, there are lots of ideas in your head. You’d love to discuss them with your team. However, it seems sending just a video with system sound and your microphone sound is not enough. You want to add a bunch of files and comments.
Use Nimbus Note for that. Create a perfect library for your screenshots & videos and attach any content to your uploads and more:
- Structure your information according to types of projects, data, and so on with different folders;
- Divide responsibilities and organize them in tables;
- Add content from other websites using embeds and more!
You can always clip your emails or the most essential content from the Internet and send it to Nimbus Note. Nimbus Clipper will help you save only interesting extracts from different websites.
Now storing and organizing references for your projects is so much easier.
Try all Nimbus solutions to enhance your collaboration & productivity
Found it useful? Share the article with your community
Subscribe to our blog!
Get weekly tips and insights on how to grow your business