Not long ago, we added a new action to automation – Send HTTP Request. Today, we’ll show you how to use it to integrate with the Firefiles service to retrieve a video transcript and add it directly into a note.
1) To retrieve a video transcript, we first need to get the meeting ID. For this, we’ll create a trigger that will act as a Webhook.
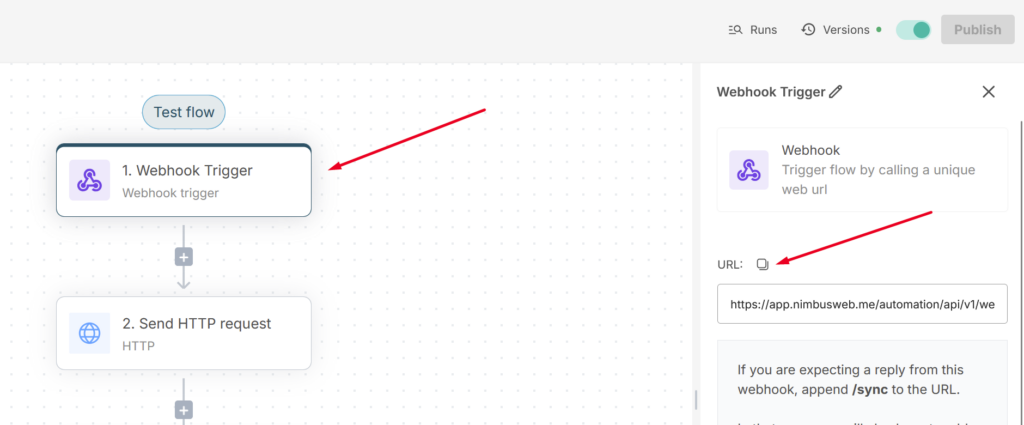
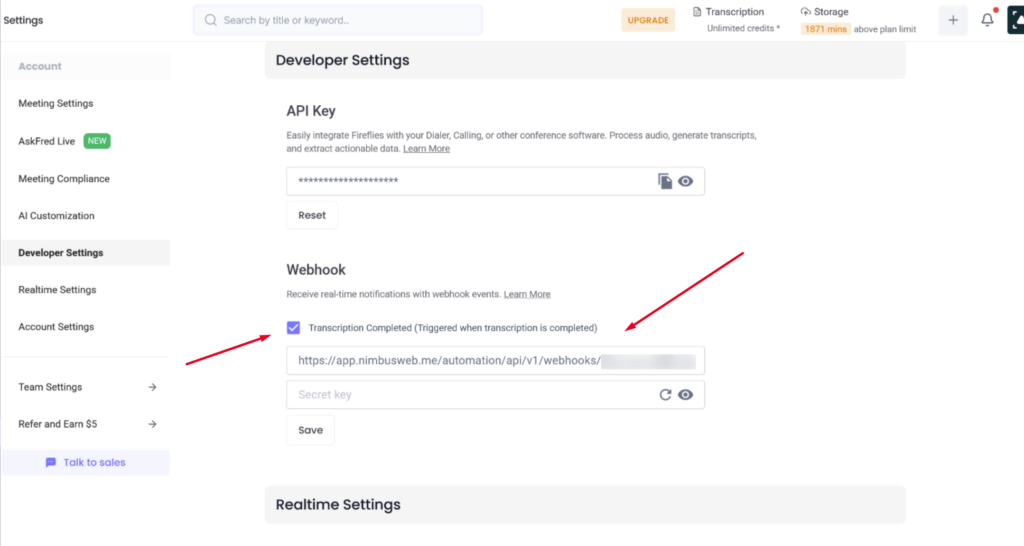
You’ll need to add the Webhook URL in the Firefiles settings at: https://app.fireflies.ai/settings, under the Developer settings section.
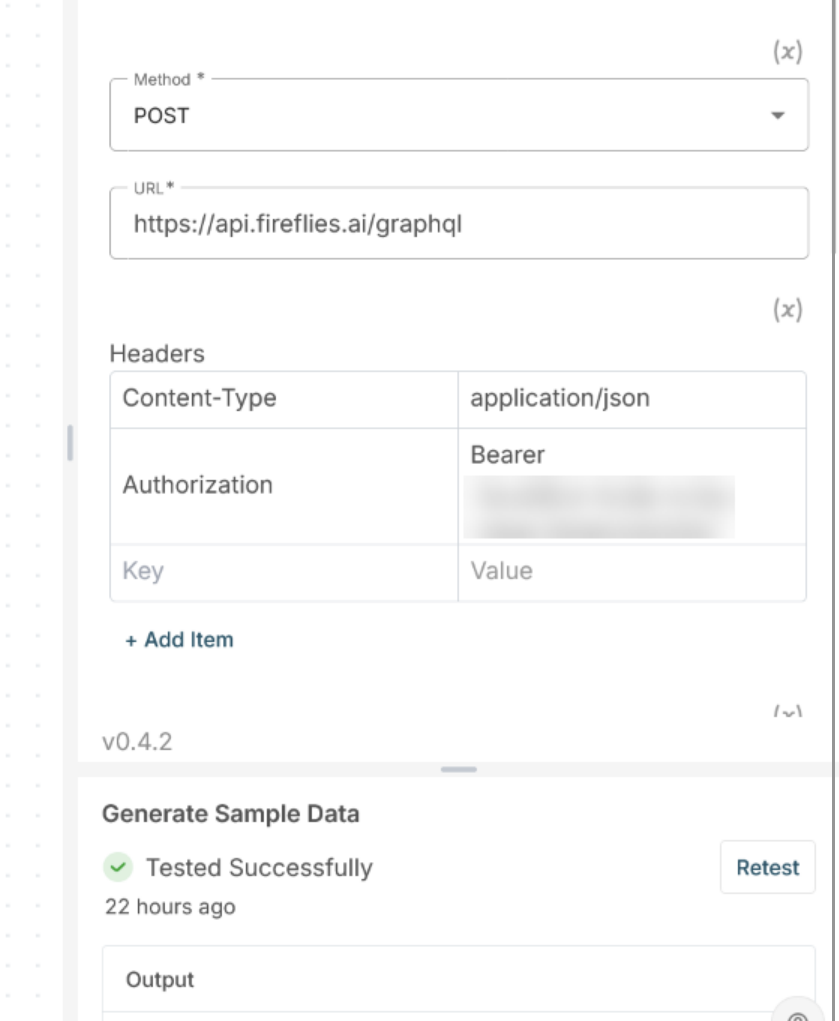
2) Next, we need to retrieve the transcript. To do this, create an action Send HTTP Request. You can find detailed information about how to form the request here: https://docs.fireflies.ai/graphql-api/query/transcript But we’ll go ahead and show you exactly what you need to enter.
Select the POST method and use the following URL: https://api.fireflies.ai/graphql
Then, add two items in the Headers:
a) Content-Type – application/json
b) Authorization – Bearer YOUR_FIREFILES_API_KEY (You can find your API key in the Firefiles settings: https://app.fireflies.ai/settings)
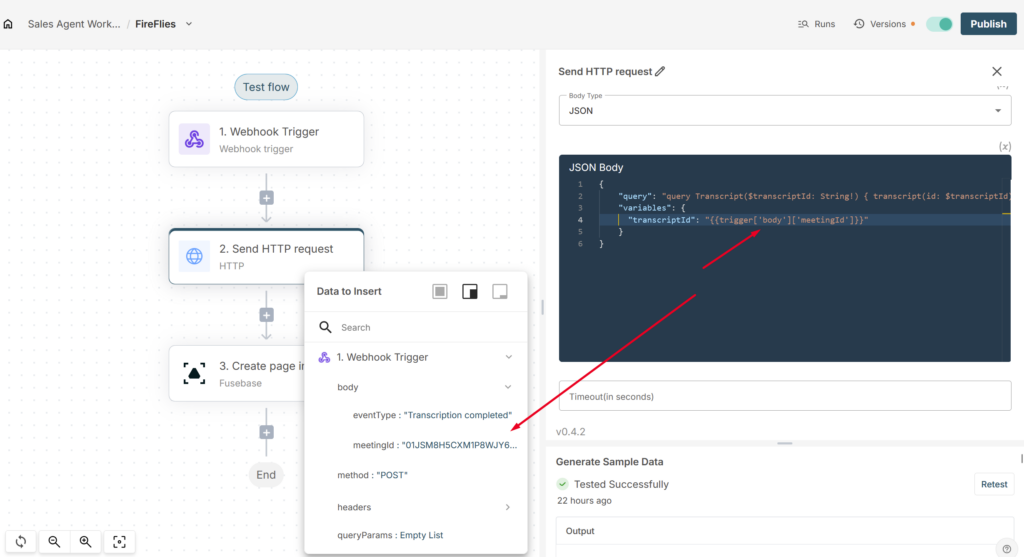
For Body Type, select JSON and use the code from this link:
https://fusebase.nimbusweb.me/share/11716691/kzq6yf8yi0ux1mutekrp
In the transcriptId field, you’ll need to insert the Meeting ID, which you can get from the Webhook trigger.
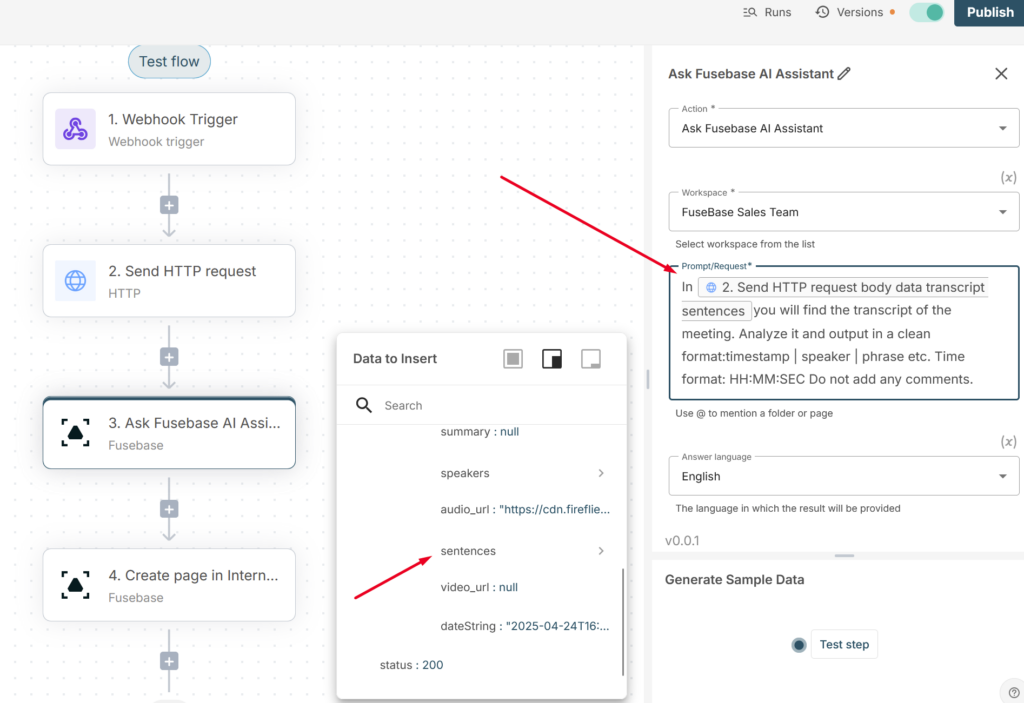
3) Next, we’ve received the transcript, but it’s in JSON format, and we need a version that’s easy to read. To achieve this, we’ll leverage AI technologies. Create a new action – AI Assistant.
Let’s use the following prompt to have the assistant convert the transcript text into a more readable format:
In @Transcript you will find the transcript of the meeting. Analyze it and output in a clean format:timestamp | speaker | phrase etc. Time format: HH:MM:SEC Do not add any comments.
In @Transcript, select the transcript data retrieved from the HTTP Request action. In our case, you can pass the entire Sentences section into @Transcript.
This will give the assistant all the necessary data—timestamps, speakers, and phrases—for proper formatting.
4) Next, we need to create a page with the transcript content. To do this, add the Create Page in Internal Space action and select the desired workspace and folder where the page should be placed.
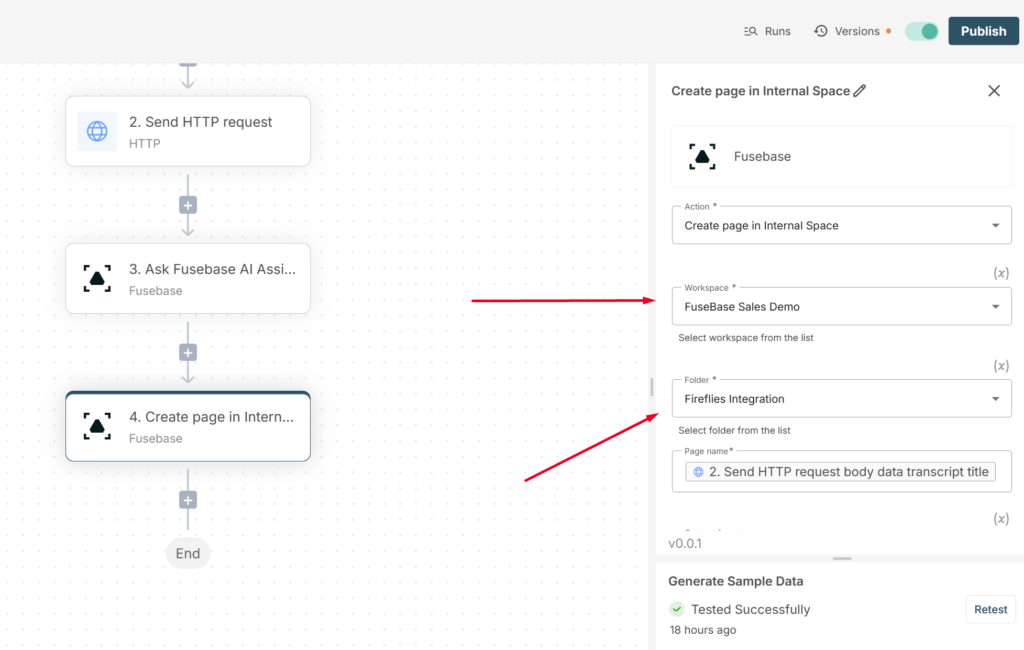
For Page Name, use the meeting name retrieved from the Send HTTP Request action. For Page Content, select the result from the AI Assistant (the formatted transcript).
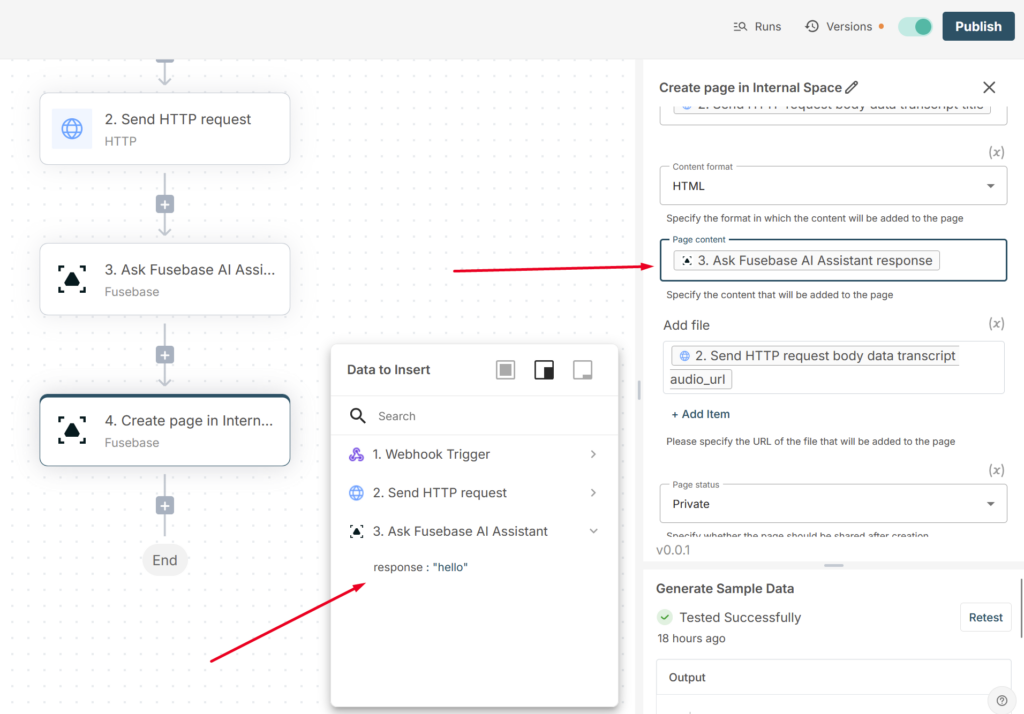
If needed, you can also add the audio recording of the meeting directly to the page. You can retrieve the audio file link from the Send HTTP Request action and insert it into the page alongside the transcript.
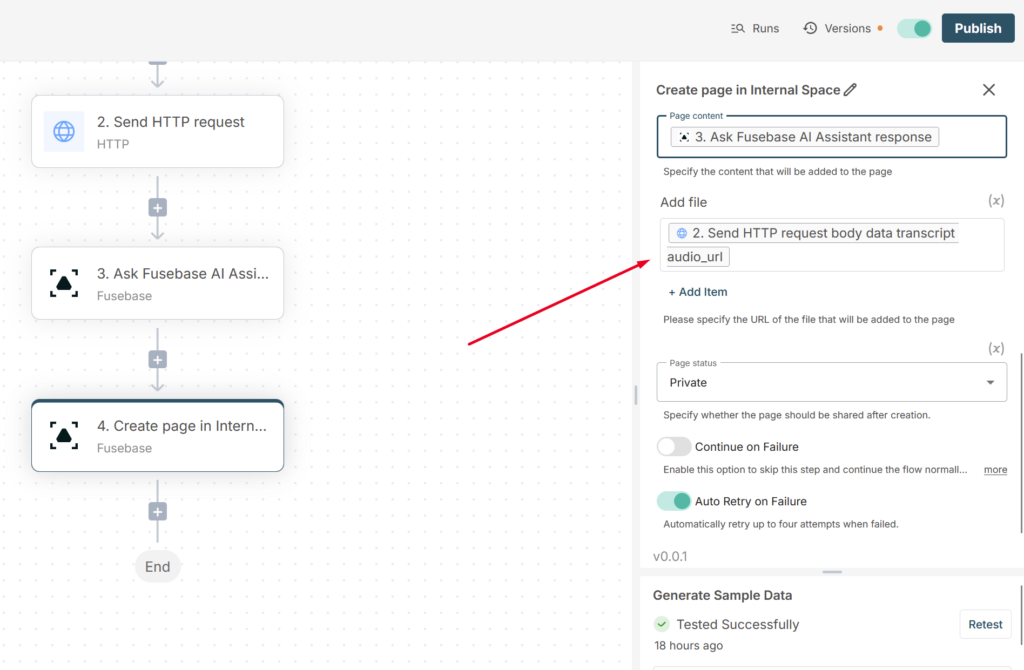
You can leave the other settings as they are. Next, publish the automation, and you’re ready to test the result!