General information #
You can restrict access to individual pages for selected users.
Currently, you can restrict access to pages for:
- Organization members with the Member role
- Organization members with the Guest role
You cannot restrict access to pages for:
- Organization owners
- Organization managers
- Workspace admins
Important! All workspace members have access to the Unsorted folder and that access cannot be restricted.
How to change access to a page for a workspace member #
Who has permission to manage page access? #
The following members can manage folder access:
- Owner organization
- Organization managers
- Workspace admins
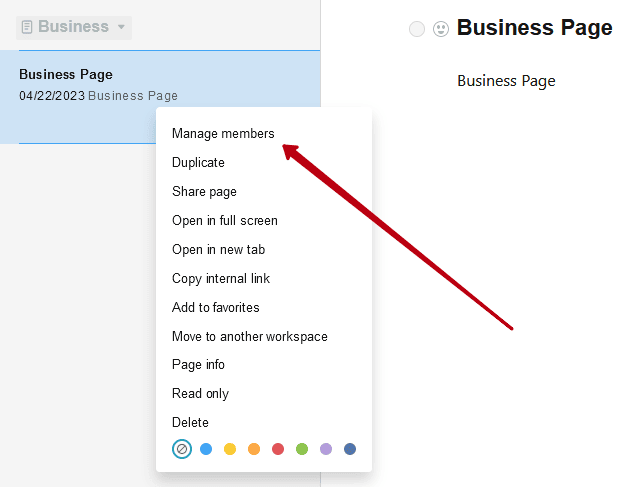
How to deny access to pages to individual members? #
1) Right click on the desired page.
2) Select Manage Members.
3) In the window that appears, you will see a list of participants who have access to the page.
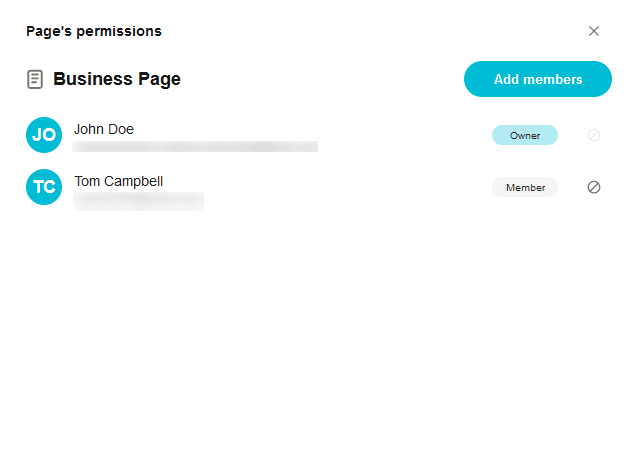
4) Click on the Deny Access icon.
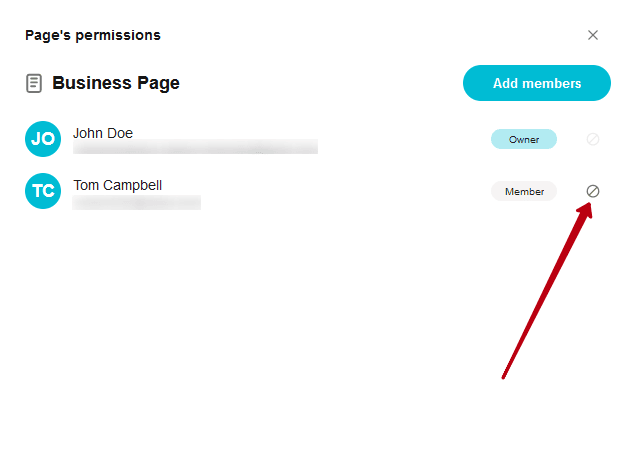
5) Confirm the action.
If you denied access to at least one page, then the following restrictions are also enabled for this user:
- the user will not be able to create new root folders;
- the user does not get access to new root folders;
- the user loses the ability to transfer pages to other folders;
- the user loses the ability to transfer pages and folders to other workspaces;
- the user loses the ability to create new tags.
How to grant a user access to a page #
If you have limited access to pages, then you can also restore access to them for individual users.
1) Right-click on the desired folder/subfolder.
2) Select Manage Members.
3) In the window that appears, click on Add Members.
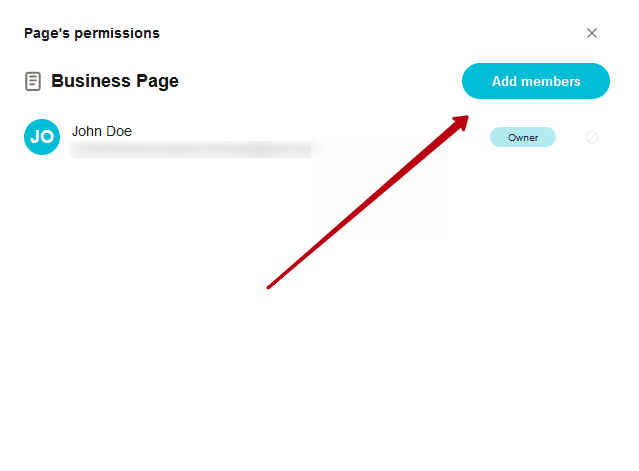
4) In the window that appears, you will see:
- a list of workspace members who have been denied access to the page
- a list of organization members who are not members of the workspace
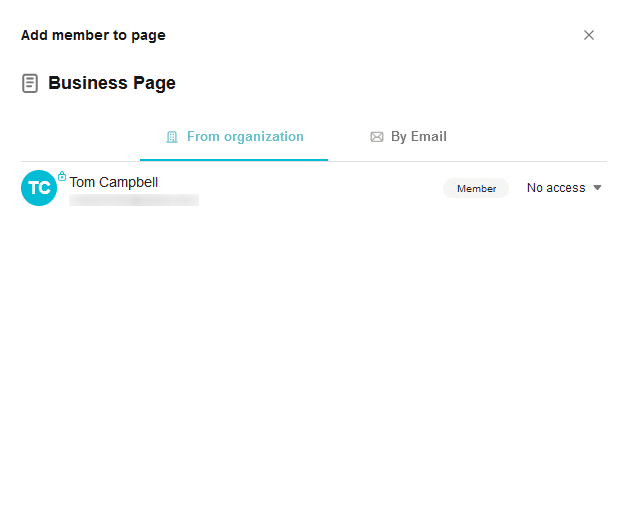
5) To give access to the page, click on No Access and select the desired permission (Edit or Read Only), after which the corresponding permission will be given to the user.

If the user is already a member of the workspace, then they will be given access to the page, depending on the permissions in the workspace. If the workspace has Edit permission, then the folder will also have Edit access. You can change the workspace’s permissions in the organization’s business console.
If the user was not a member of the workspace, then adding them to the page will also add them to the workspace with the permissions that were specified when granting access to the page.
How do I invite a new member to a note? #
You can also invite a new member to the note through an invite.
1) Right-click on the desired page.
2) Select Manage Members.
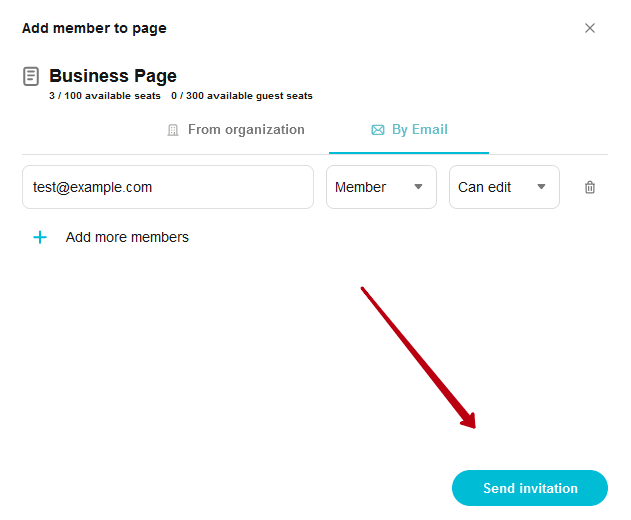
3) In the window that appears, click on Add Members.
4) Go to the By Email tab.
5) Enter the email address of the desired user and specify their role and permissions. Next, click on Send Invitation.
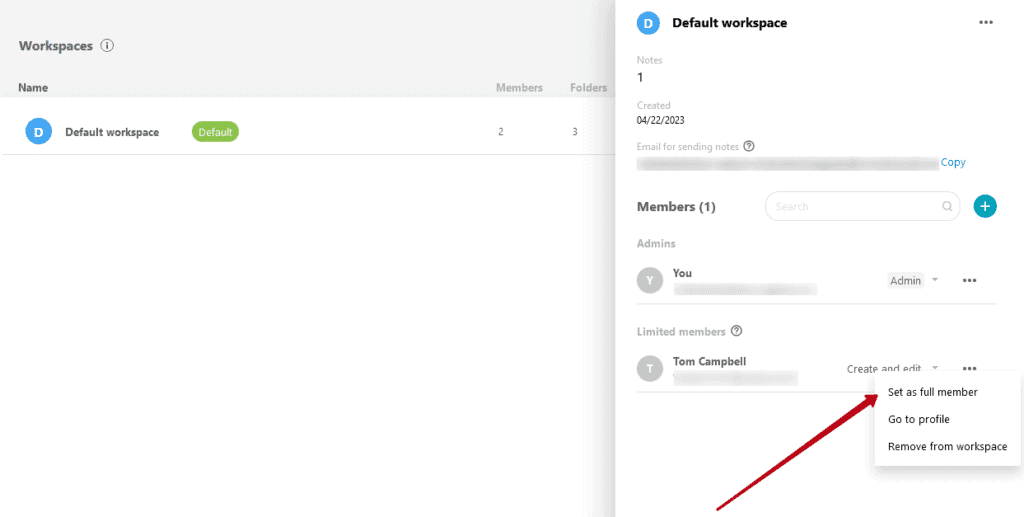
How to return full access to the workspace for a user #
If you want the user to have access to all old and new pages again, then you need to give them full access to the workspace.
To do this, you must:
1) Open the business console https://teams.nimbusweb.me and go to the required organization.
2) Go to the list of workspaces and click on the one you need.
3) In the members list, scroll to the Limited Members section.
4) In the menu for the required member, select Set as Full Member and agree to the action.