- Multi type
- Text
- Numbers
- Currency
- Single select
- Multiple select
- Progress bar
- Collaborator
- Date and time
- Rating
- Link
- Mentions
- Attachments
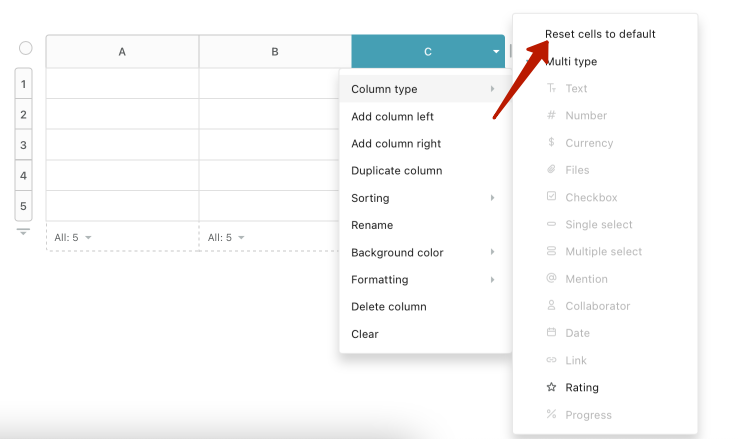
- What does Reset cells to default mean when choosing column type?
- How to sort columns in database?
- Can I create multiple lines in a text cell?
- I don't like that the table is taking up the full width of the screen. How to change that?
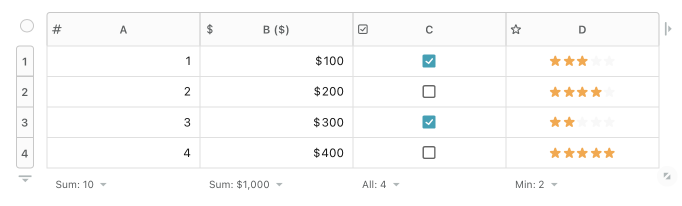
- Does the table summarize data from a column?
You can convert columns and individual cells into different types for displaying and storing information. If you converted a whole column, the type it was converted to will be displayed every time a new line is created in that column.
For example, you can create your own task tracker, product accounting system, project manager, or mini CRM system.
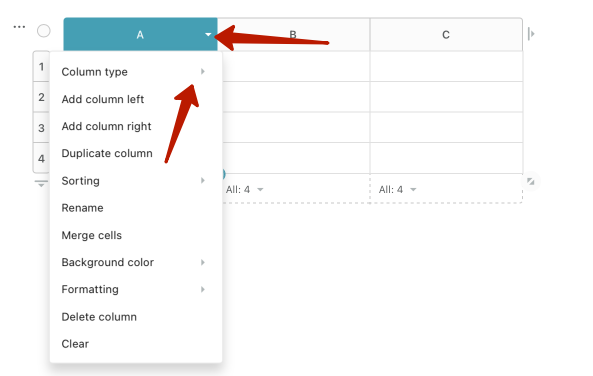
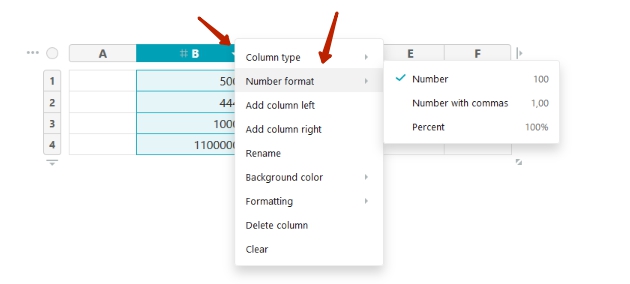
To convert a column, click on the menu arrow and select Column type:
If you want to convert only a single cell, right-click on it and select Cell type:
Important! If the column has already been converted, you cannot convert the cells from that column to a different type.
Columns and cells can be converted to the following types:
Multi type #
This is a default column. It can contain both text and numbers; you can also convert individual cells to other types in this column.
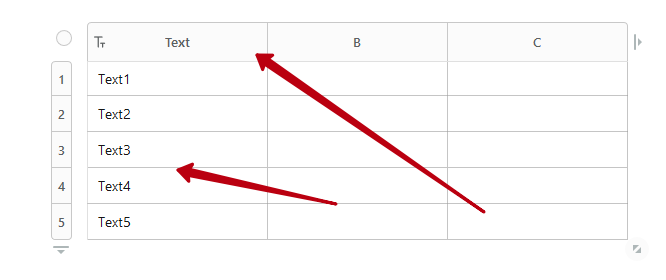
Text #
You can enter different kinds of text information in the column cells.
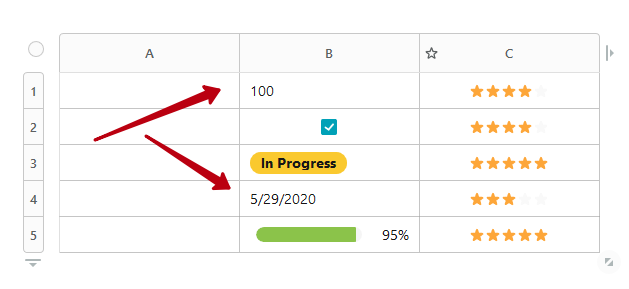
Numbers #
You can enter data in the form of numbers in the column cells. These can include integers, decimals, or percentiles. You can change the format in the column or cell settings.

Currency #
You can enter numbers with a currency symbol next to them. The dollar sign is set by default, but you can set the desired currency in the column or cell settings. There, you can also choose where to display the currency symbol – before or after the number.

Single select #
A single selection is perfect if you want a single parameter or option from the preset list. When editing a cell, an auto-complete menu will be suggested. You can pick the needed option from the drop-down menu or create a new one. To create a new one, just type its name and press Enter. You can also assign a color for each option. The options you do not need can be deleted.
Multiple select #
What makes multiple selection different from single selection is that a few options can be displayed in a single cell. You just need to select the needed options from the list (or enter new ones) and press Enter to confirm.
Also, you can choose the look of the label. There are 3 types of labels:
- Filled.
- No fill, but with a colored frame.
- Plain text.
You can change the type and its color in the label settings. You can display different types of labels in one cell/column.
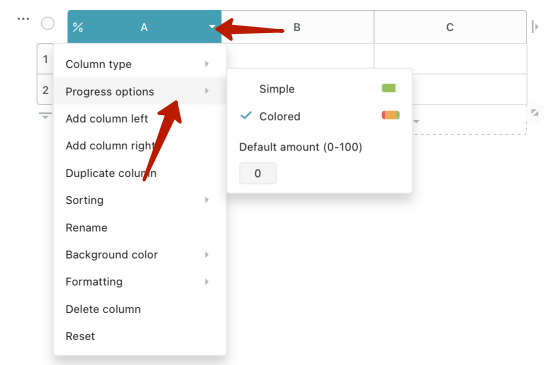
Progress bar #
The progress bar provides a special scale for marking progress (for example, when completing a task). You can mark progress using a 0 – 100% scale. By default, the bottom is set at 0%, but you can change it in the column or cell settings.
Collaborator #
In this cell, you can select one or more project participants from the list. You can mark a team member responsible for completing a certain task.
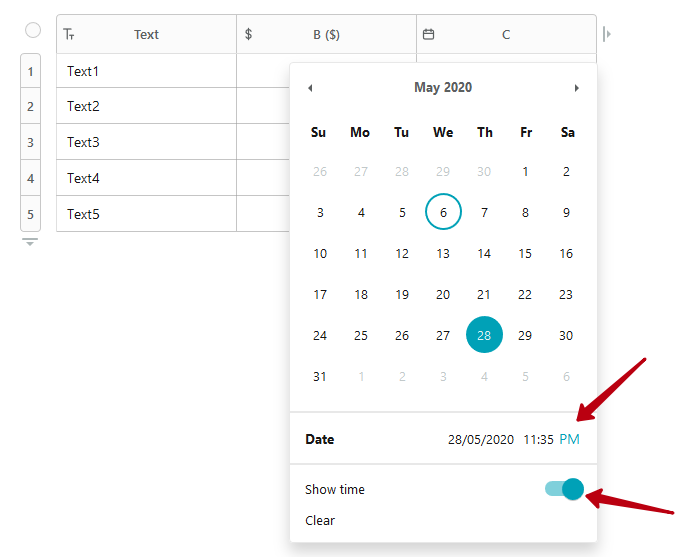
Date and time #
In this cell, you can specify the desired date and time, as well as easily edit it if necessary. You can set the date using the calendar. The date format can be chosen in the column settings.

If you need to set the time as well, please enable the needed option. You can select your preferred time format (e.g. 12h or 24h).
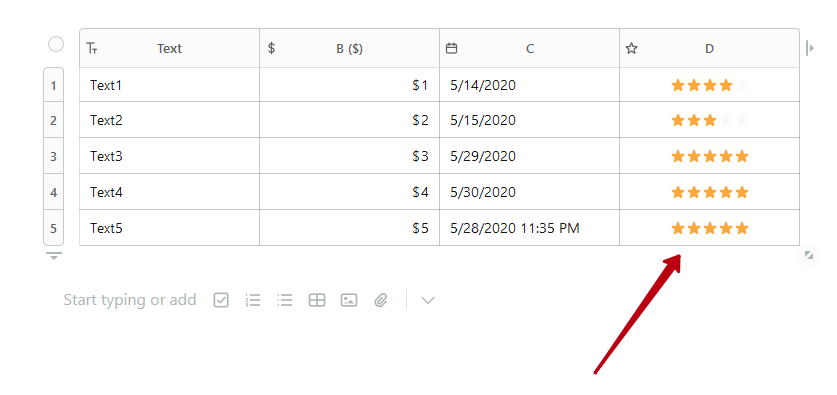
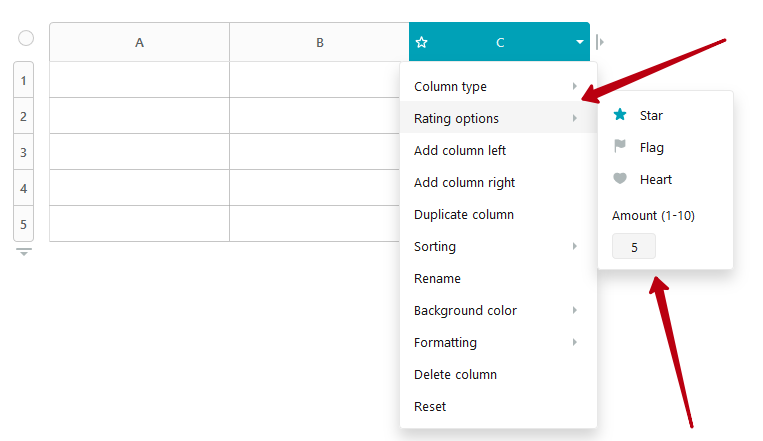
Rating #
This cell is for rating certain actions or objects. By default, you can rate between 1 and 5, but this can be changed to 1 and 10 in the cell /column settings. You can also change the rating appearance, specifically the star symbols.
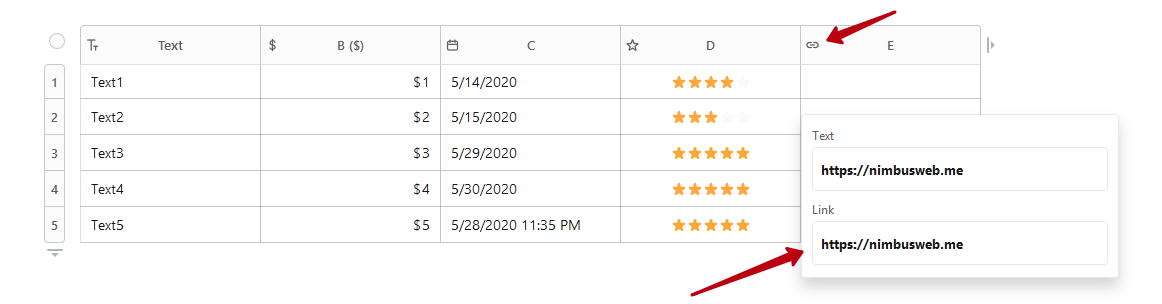
Link #
These cells are for quickly adding links. To do that, click inside the cell, and in the form that appears, enter the link and text (if needed). If you need to access the link, click on it and press Open. To change the link, click on it and press Change. You can also delete the link right away.
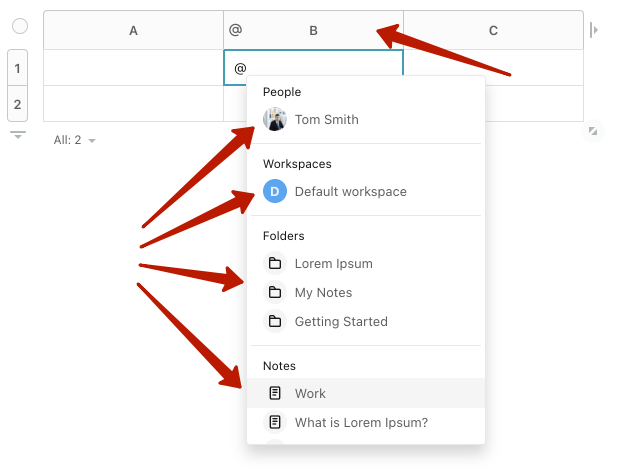
Mentions #
These cells are for quickly selecting and mentioning:
- other participants of the project (in this case the participant will receive a notification)
- another page
- a folder
- a workspace
- date
To go to another page, folder, or workspace, just click on the link. There you can also change the cell.
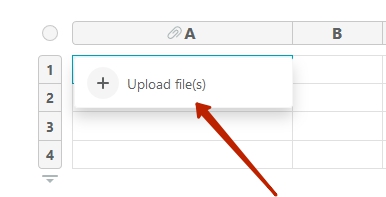
Attachments #
These cells are for adding files and images. You can add multiple files to a single cell. To add a file, click on the cell and press Upload, then select the needed files and wait for the upload to complete (you can stop the upload by clicking on X).
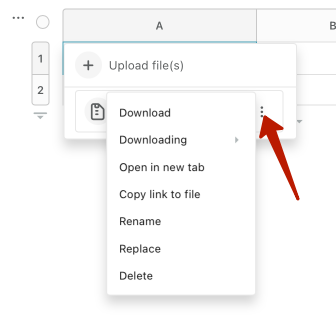
To open or download a file, click inside the cell, then click on the required file.

If you want to rename or delete a file, click on the file menu and select desired option.
What does Reset cells to default mean when choosing column type? #
If you change cell type in a column, to avoid conflicts between a single cell and a column, changing the column type comes with a limit. You first need to reset all converted cells and only then convert the column.
How to sort columns in database? #
You can find more information here
Can I create multiple lines in a text cell? #
Yes, use Shift + Enter to create a new line.
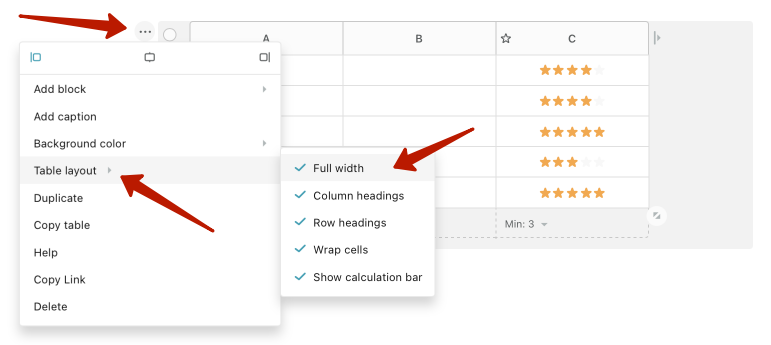
I don’t like that the table is taking up the full width of the screen. How to change that? #
Open the table menu and in Table Layout uncheck Full width.
Does the table summarize data from a column? #
Yes, you can check more information about the calculation panel here.