Nimbus Business/Teams accounts have a higher level of management which can be run in the Organization Console. Through it you can create organizations, manage workspaces and members, add your branding to public pages and web clients, and much more.
Types of accounts in organizations #
- Organization Owner and Managers have access to all workspaces and to the organization’s console.
- Organization Members can access the workspaces they have been added to by the organization Owner or Managers.
- Members with a Guest role can have access to only one workspace and their stay in the organization can be limited in time.
Read more about Guests Accounts.
☝Note: A member can be a part of an organization, but not be a part of a workspace.
.png)
Types of permissions in workspaces #
- Admin – users can edit pages, add new pages, share your pages through public pages.
- Can create and edit – users will be able to do full-fledged work on pages – read, edit, and even delete pages. Folders and tags management will also be available.
- Read only – user’s pages will be available only for reading.
.png)
Add members in the organization #
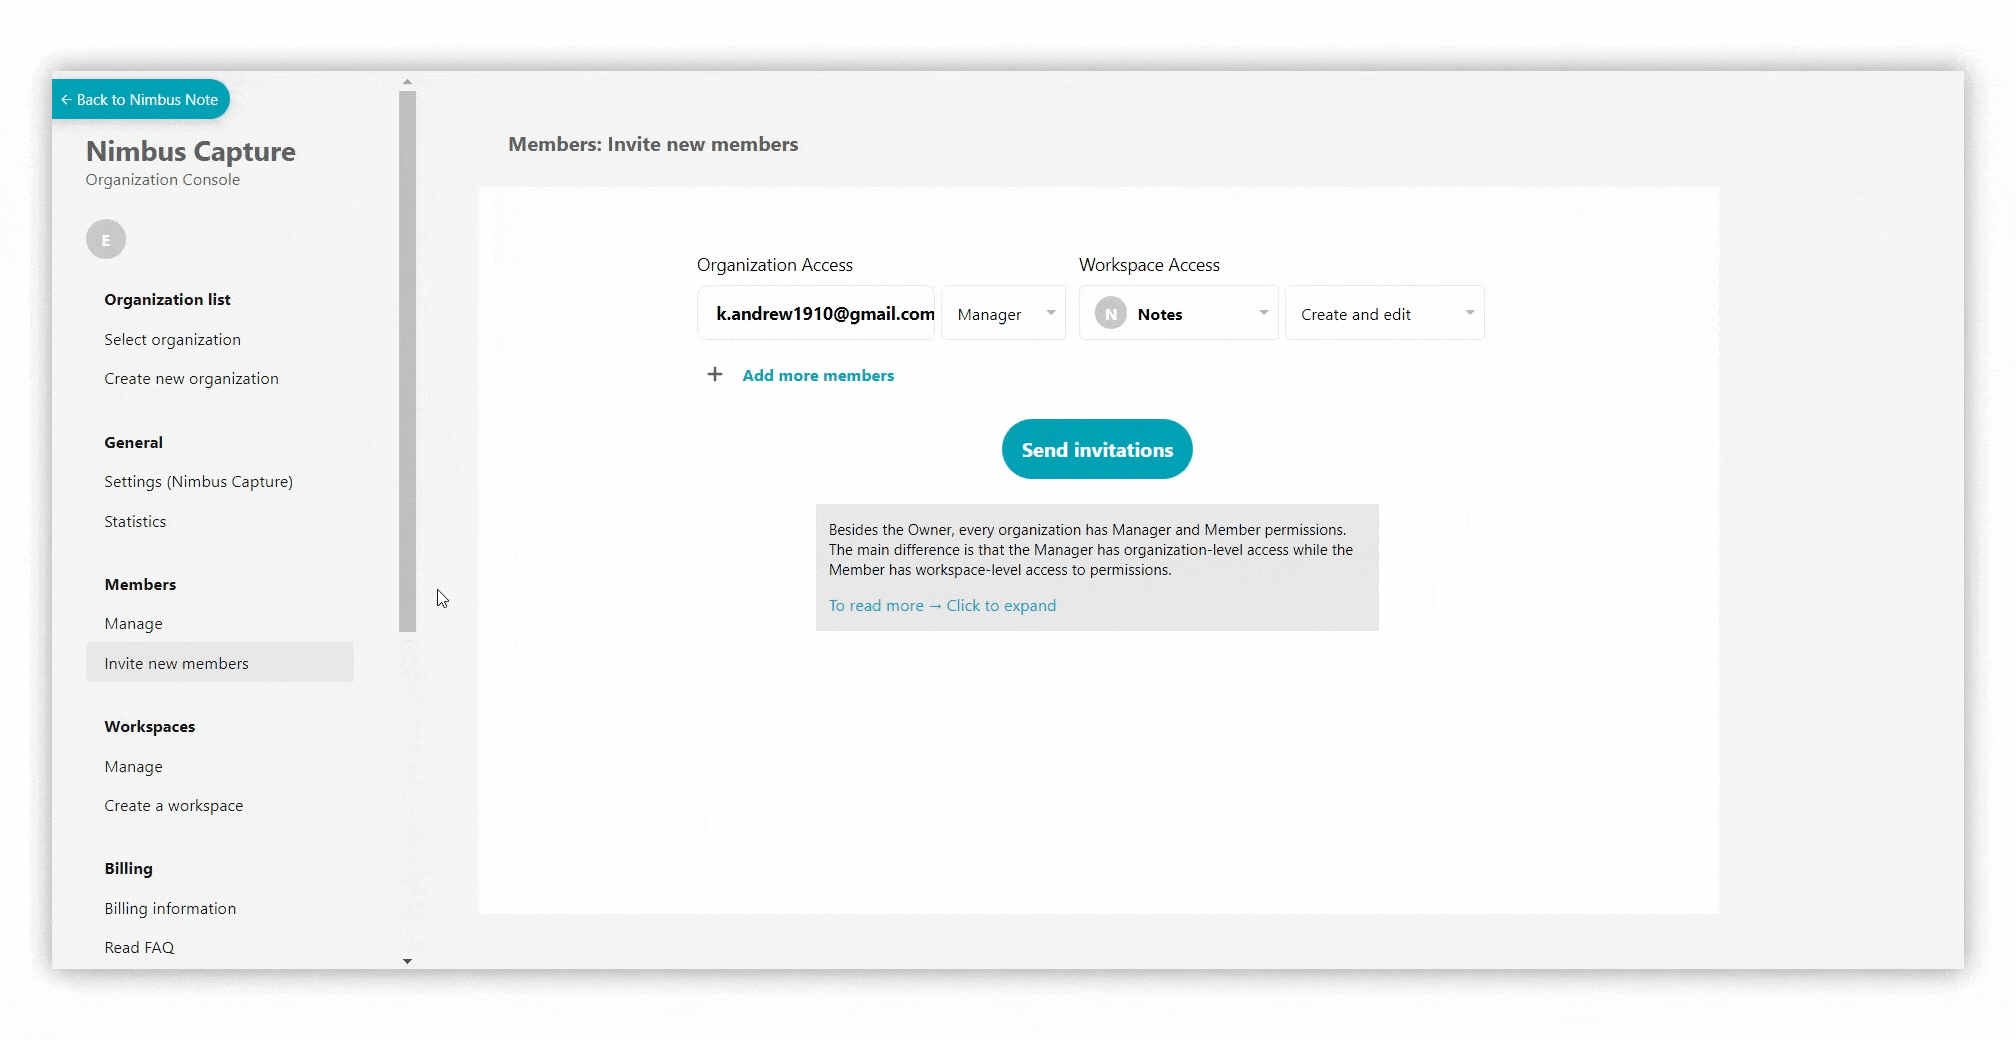
To add a member to the organization, follow these steps.
- Go to https://teams.nimbusweb.me/.
- Navigate to Members – Invite new members.
- Enter the member’s email address.
- Choose a nessesary role in the organization.
- Select the workspace to which you want to add the member. If you want to add a guest or a member without a workspace, select “without workspace.”
In the future, you can manually add guests / members to the desired workspace through the workspaces page. - Select permissions for the user.
- Send an invite.
- The user will receive an email with an invitation to join. After accepting, the user will become a member of the organization.
☝Note: An invite is sent only the first time a member is added to the workspace. In the future, the member will be automatically added to the workspace.
.png)
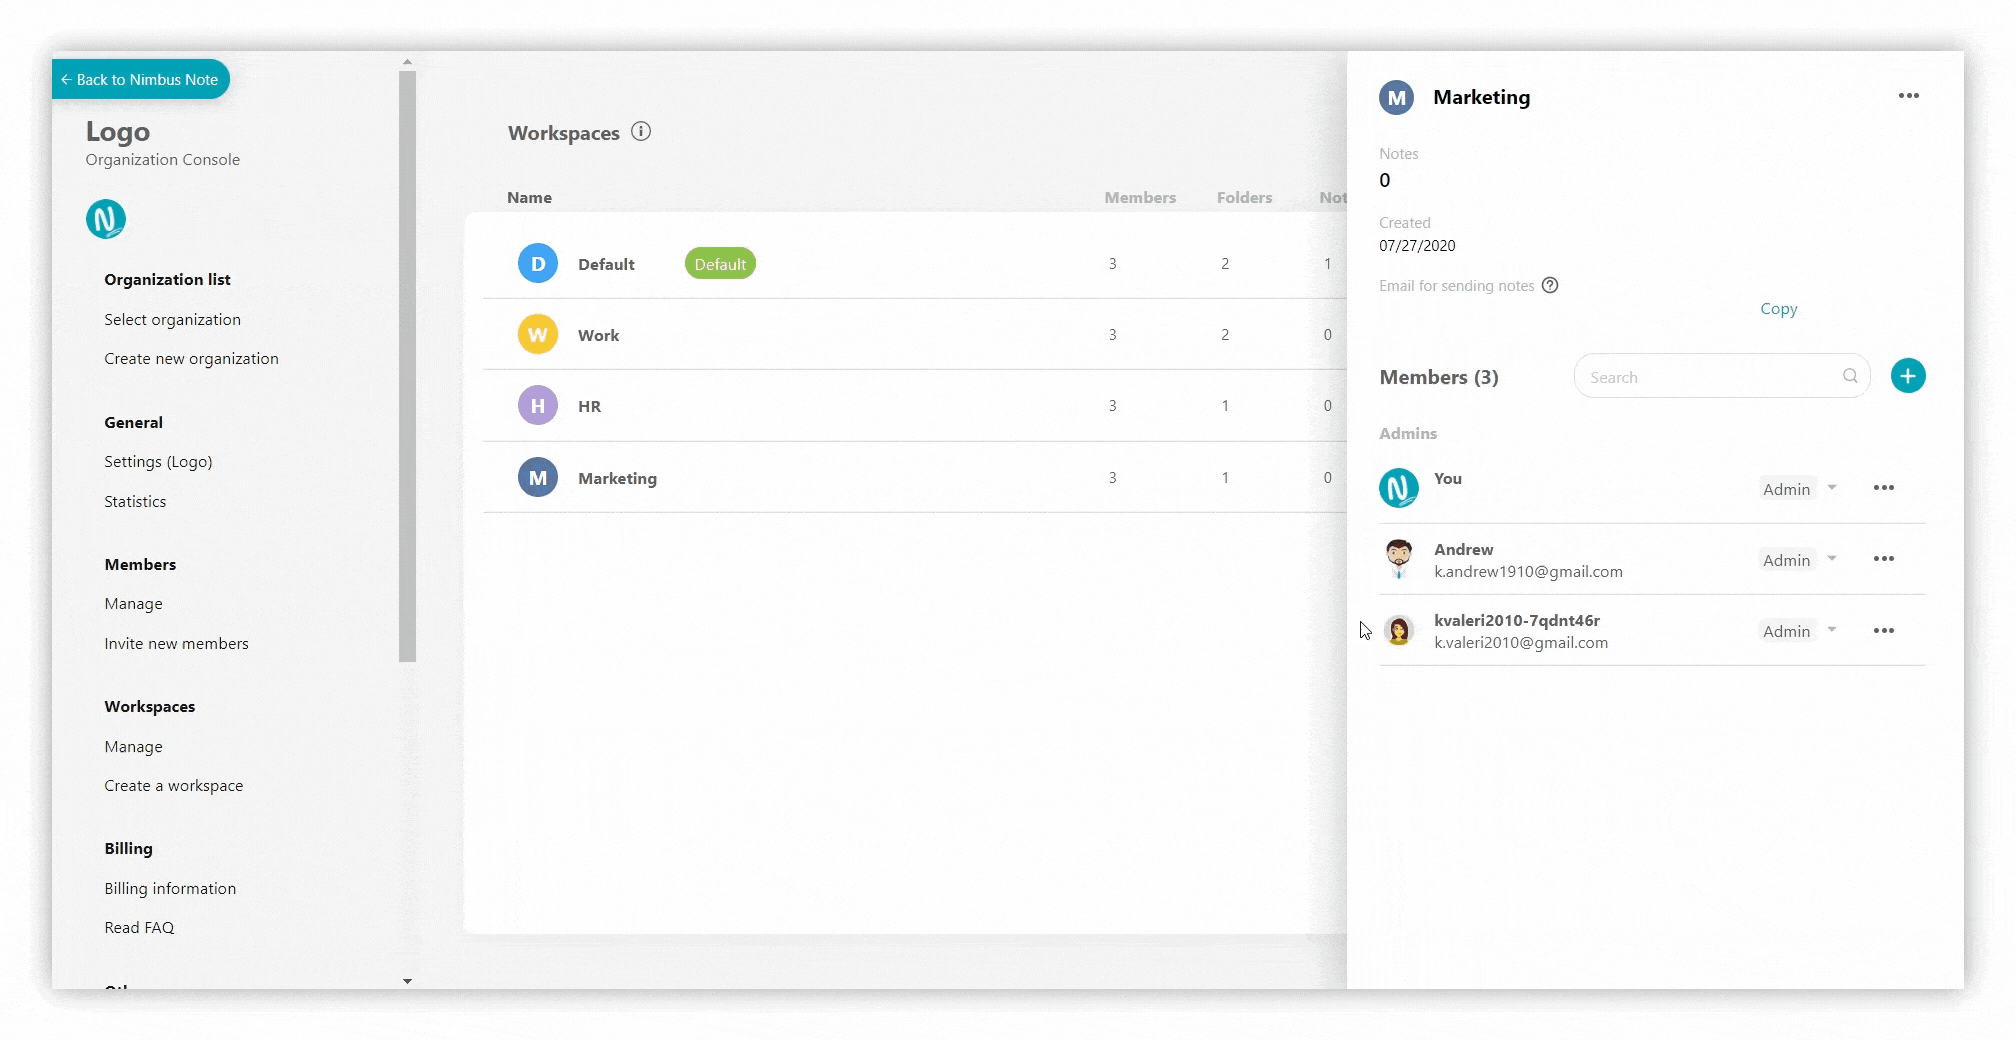
Add members in the workspace #
%20(1).gif)
To add a member directly to the workspace, you need to:
- Go to the section Workspaces – Manage.
- Next, select the workspace to which you want to add the user.
- Press on + in the Members section or select Invite members inside the three dots menu.
- Select New by email and enter the user’s email address.
- Choose a nessesary role in the organization.
- Select permissions for the user.
- Send an invite.
- The user will receive an email with an invitation to join. After accepting, the user will become a member of the organization.
☝ Note: After adding a member to the workspace, you can always change their permissions.
.png)
☝ Note: You can also add a member to the workspace from existing members.
.png)
Remove from workspace #
To remove a member from the workspace, you need to:
- Click on the three dots menu.
- Select Remove from workspace.
.png)
☝ Note: After being removed from the workspace, the user is NOT removed from the organization.
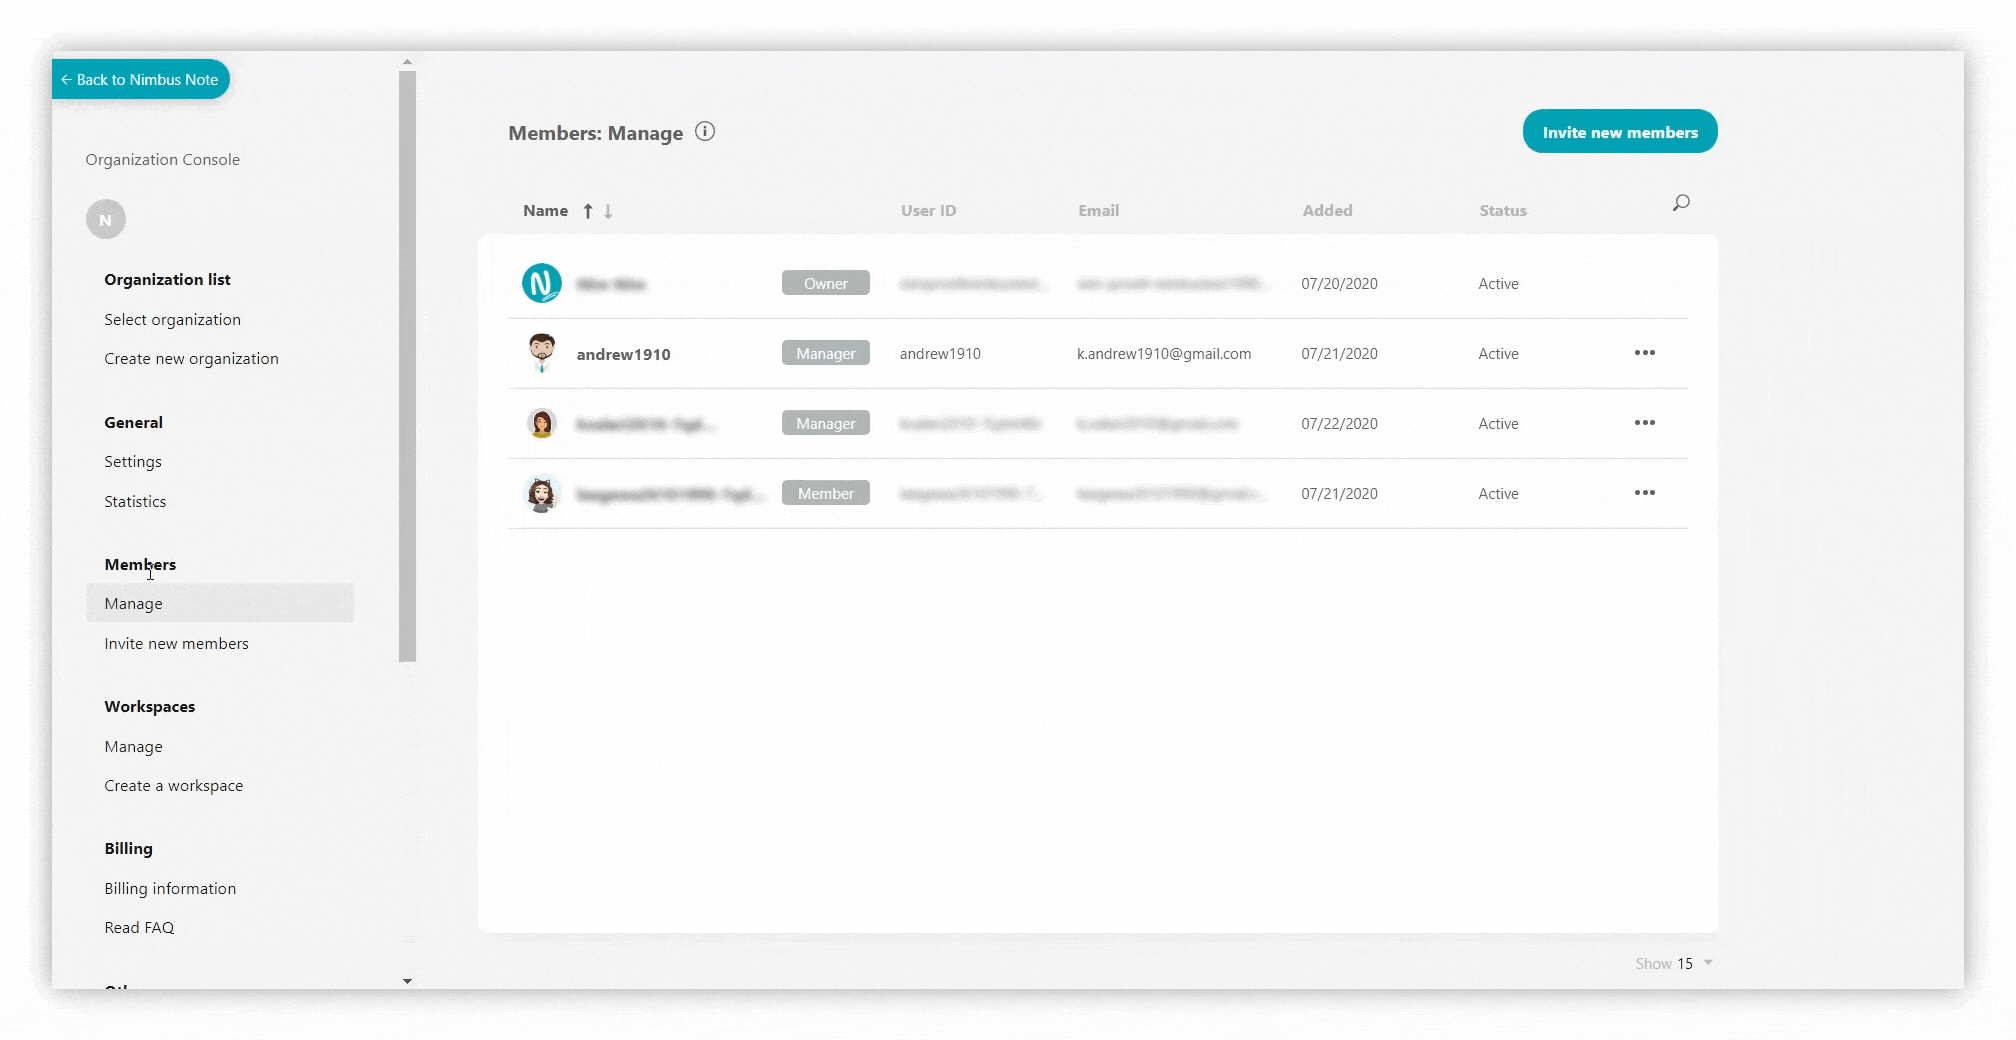
Manage Members in organization #
In the Members section, you can add members to your organization and manage them.
Edit user profile #
.gif)
To manage you need to go to the Members section.
- Select Manage.
- Then click on the member.
- The window for editing data will appear on the right. In it you can change:
- the role (Manager/Member)
- First name
- Last name
- Username
- To change the profile photo, hover over the avatar and click Upload
.png)
Reset password #
If you click on Reset password, the reset link will be sent to the member.
.png)
.png)
Delete from organization #
To remove a member from the organization, you need to:
- Go to the Manage section.
- Click on the three dots menu and select Delete from organization.
- Also you can click on the member and select Delete from organization.
.png)
.png)
☝ Note: After being removed from the organization, the user is removed from all workspaces.