File Manager allows you to aggregate files from all pages in the portal, as well as upload files to your customers directly into the portal for further processing.
How To Add a File Manager To Your Portal #
You can add a File Manager as a regular item in the sidebar/header/footer. To add it, click on the plus sign (+) in the desired section and select File Manager. You can rename the section name immediately. After adding or renaming it, you need to publish the changes:
File Upload #
File Manager displays files that have been added to portal pages—for example, through File Uploader or as regular attachments such as images or documents—as well as files that have been uploaded directly to File Manager. You can find more detailed instructions on uploading files via this link.
All customers invited to the portal can upload directly to the File Manager. This is very easy to do:
1. Click on Upload Files:
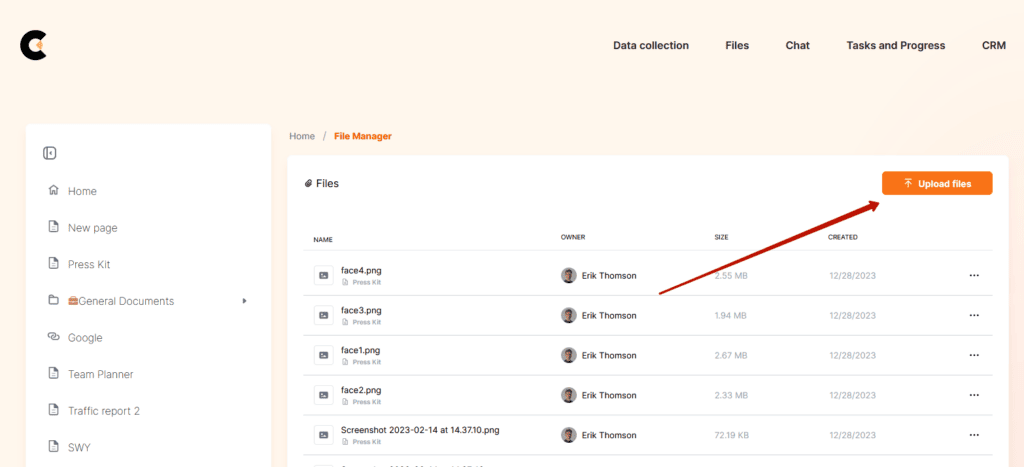
2. Select the files you wish to upload.
3. Wait for the upload to complete.
4. When the upload is complete, the files will appear in the File Manager.
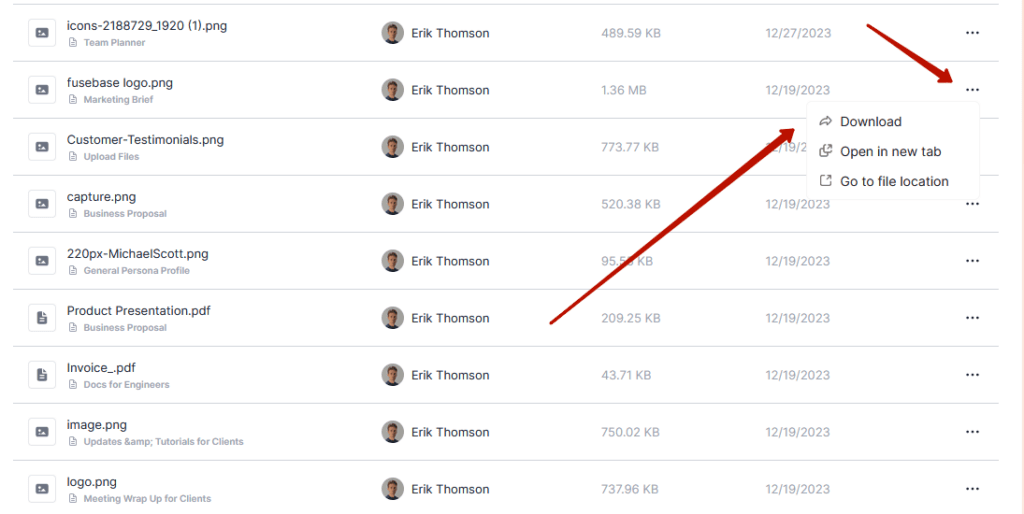
File Management #
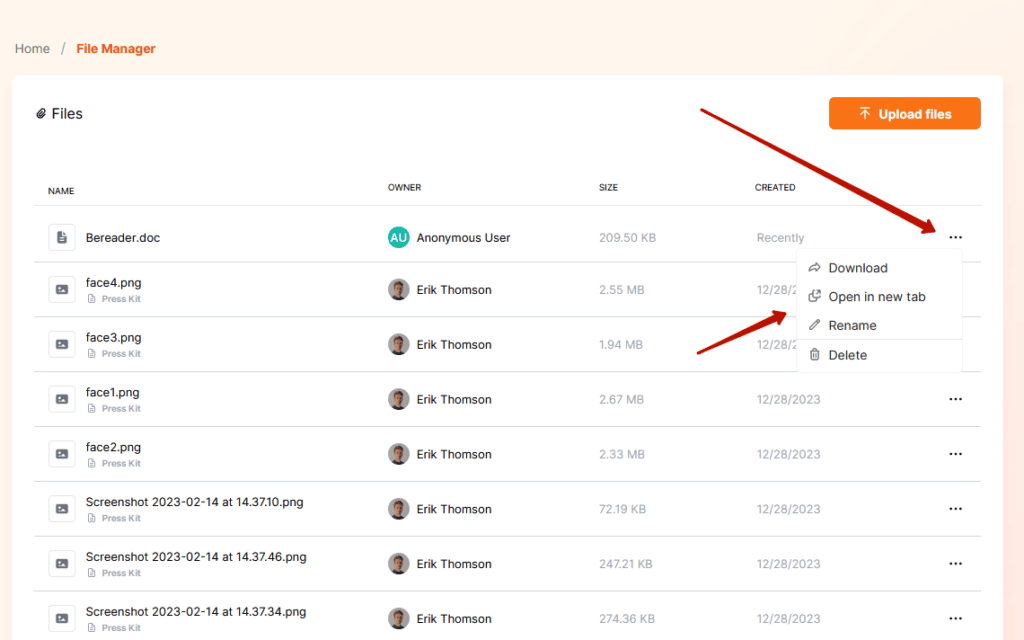
You can manage files using the File menu:
Renaming a file #
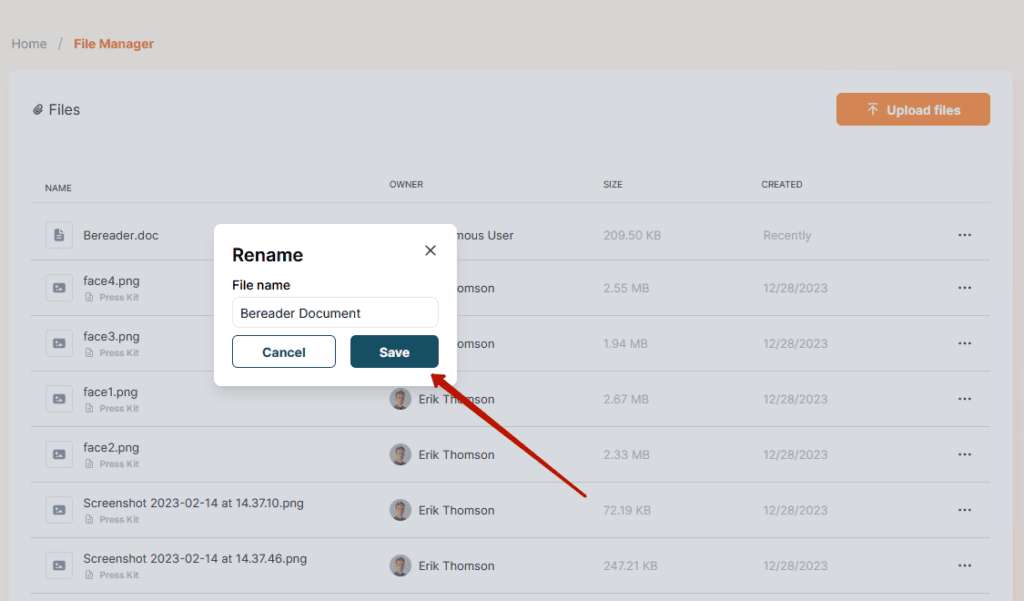
- Click on the menu of the desired file and select Rename.
- Enter a new file name and click Save:
Delete a file #
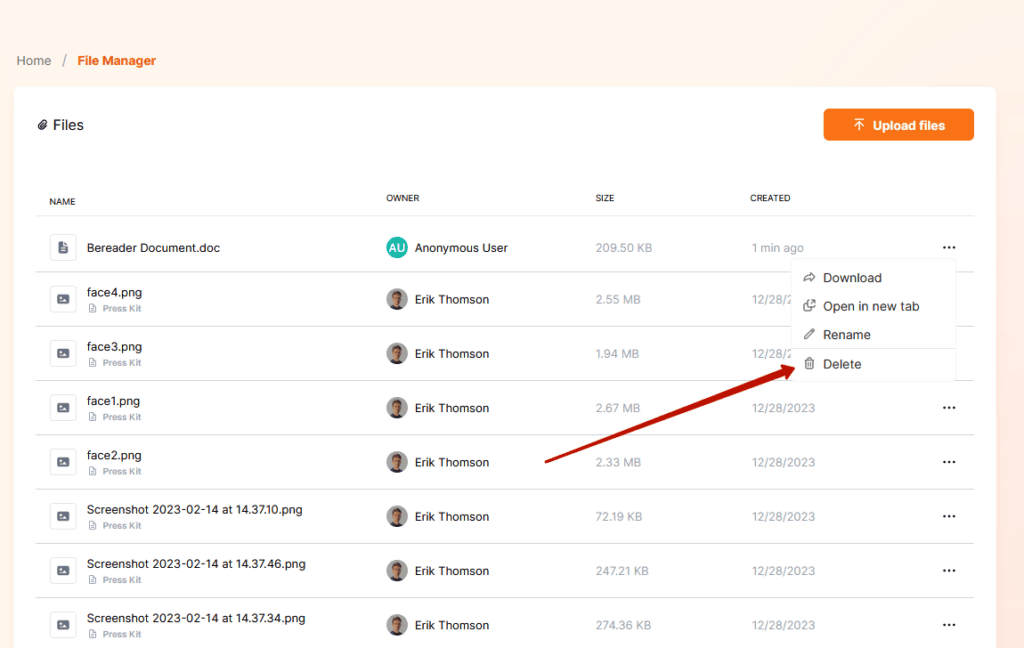
- Click the menu of the desired file and select Delete.
Downloading a File #
To download a file, click on the file and then click on Download.
You can also download the file from the File menu.
Widgets For Working With Files #
Other widgets for working with files are also available:
Latest Files – a list of the latest files uploaded to the File Manager.
File Uploader – a widget that allows you to upload and instantly view uploaded files. For example, you need to ask your client to upload all the data for the project: statement of work, design, supporting documents. You add a widget called Project Name, and the client uploads the files associated with the project. You can create a second widget for a different project, and so on.
You can add widgets in the standard way using the (+) option. You can specify your widgets’ names, and you can also write a description for the File Uploader widget.