- How to add a task list?
- How to change the name of the Task list?
- How to edit the task?
- How to mark a task as completed?
- How to assign a task to a workspace member?
- How to add labels to task?
- How to add a deadline to task?
- How to change the position of a task?
- Where can I see all my tasks in one place?
- Task Filtering
- Adding and Managing Files For Tasks
- Adding files to comments in tasks
- Assigning Estimates and Time Tracking In Tasks
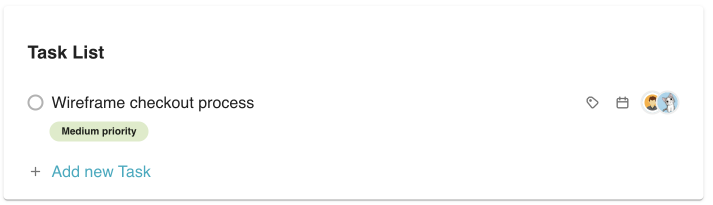
A task list is an element in a page that allows you to create tasks, add people to them and set labels & deadlines. Added tasks can be seen in a special dashboard for more convenient control over their execution.
How to add a task list? #
Got an idea for your project? Create a task for it. Then you can gather all your tasks together by adding the task list on your Nimbus page. Assign your team members, set deadlines and label each stage of your tasks.
Easily manage your tasks in Nimbus Note and enhance your productivity!
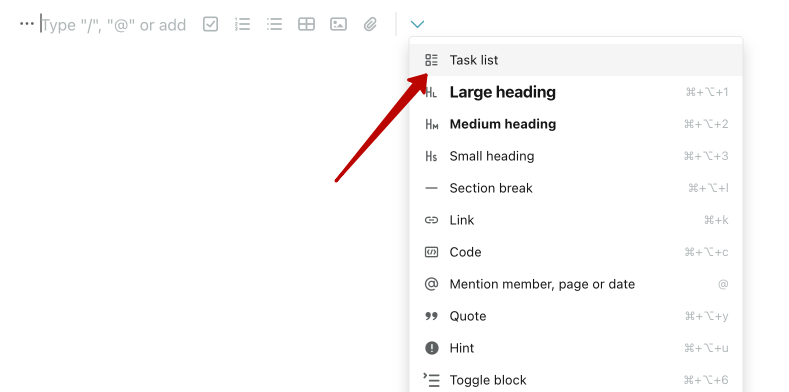
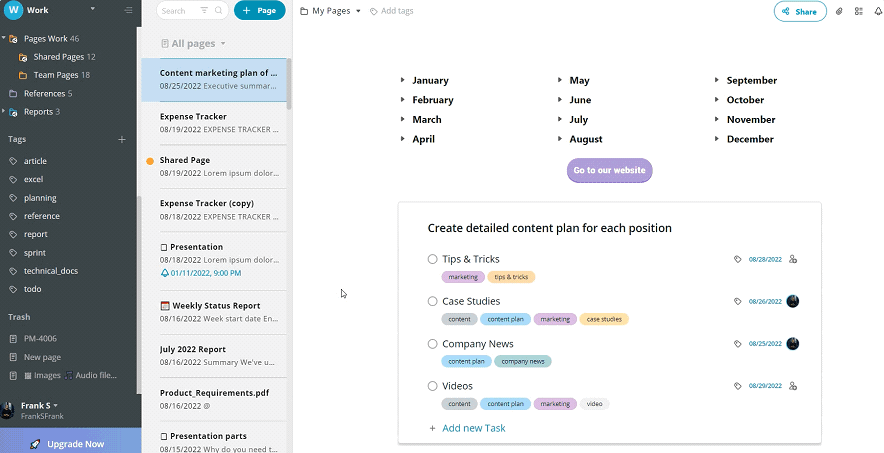
To create a task list, click on the object menu and select Task list.
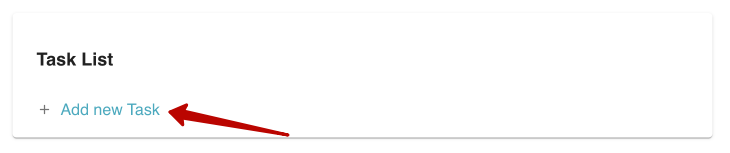
To add a new task, click on Add new Task.
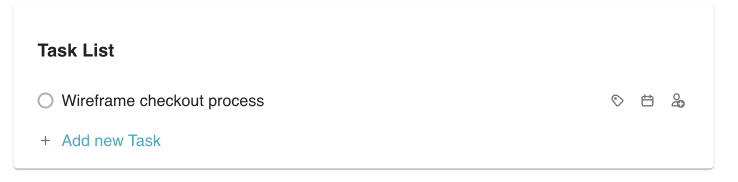
Enter the task title and press on Enter. The task will be added to list –
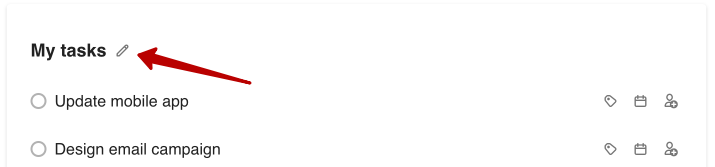
How to change the name of the Task list? #
- Hover the mouse over the Task list name and click on the pencil icon that appears.
- Next, change the task list name and press Enter.
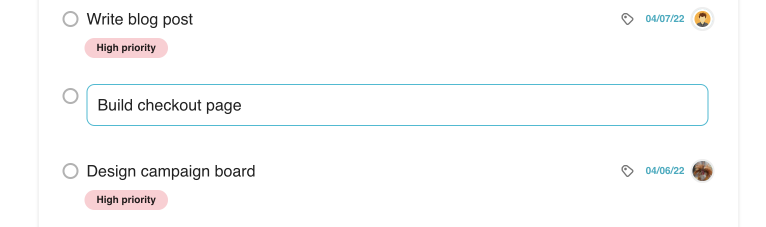
How to edit the task? #
To edit a task, just click on it, make the necessary changes and press Enter.
How to mark a task as completed? #
To mark the task as compared, click on the circle next to the task –
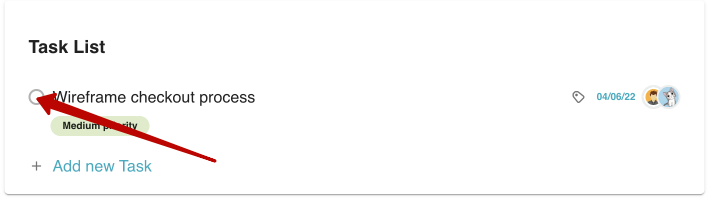
The completed task will be crossed out.

How to assign a task to a workspace member? #
To add responsible members to a task, click on the Assignee icon next to the task.
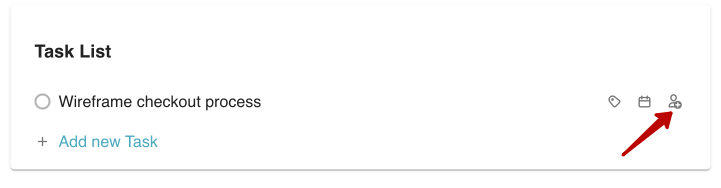
In the popup that appears, select up to 3 workspace members that you want to assign to the task.
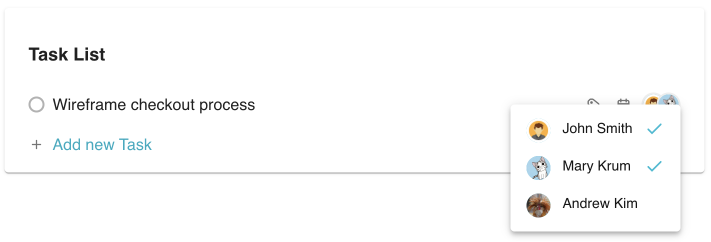
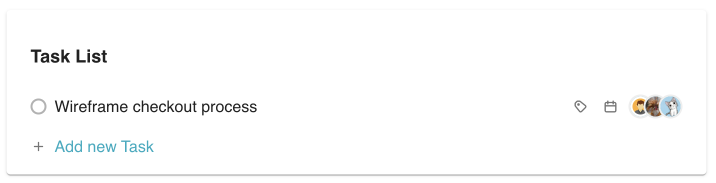
The selected members’ avatars will be shown next to the task.
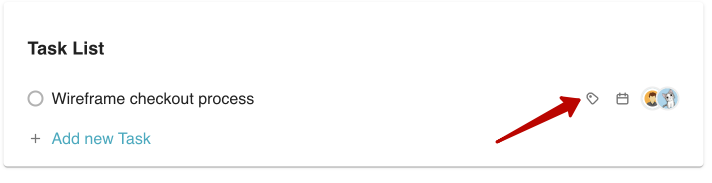
How to add labels to task? #
To add labels to a task, click on the Label icon next to the task.
In the popup that appears, select as many labels as you want. You can also create a new label by entering its name into the “Type label name” field and pressing Enter.
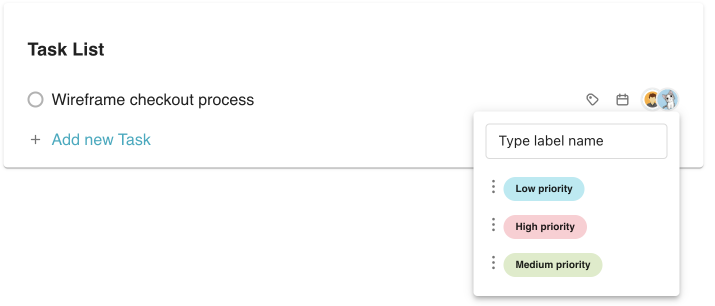
The selected labels will be shown under the task.
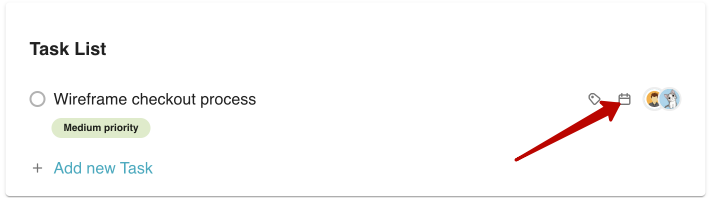
How to add a deadline to task? #
To add a deadline to a task, click on the Date icon next to the task.
You will see a pop-up, where you can choose a date –
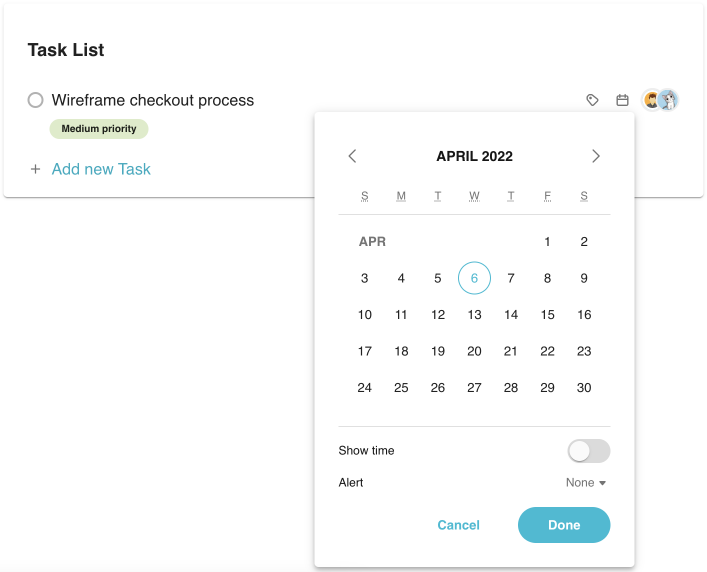
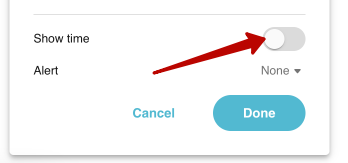
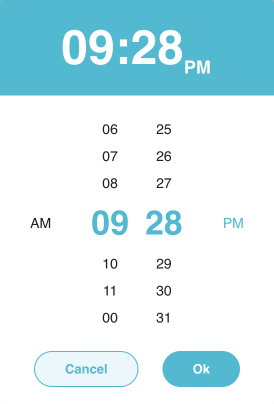
If you want to see the time next to the date, enable the Show time toggle.
You can click on time to change it.
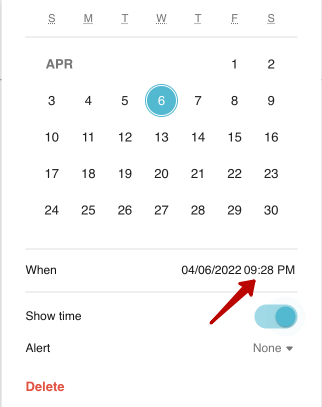
You can also add reminder to the date. For this, select reminding options in the Alert block.
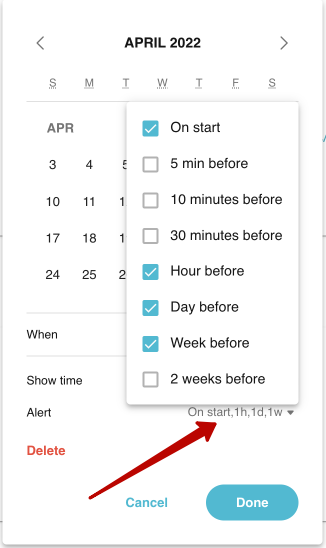
The selected date will be shown next to the task. By hovering over the date, you will see the added reminders.
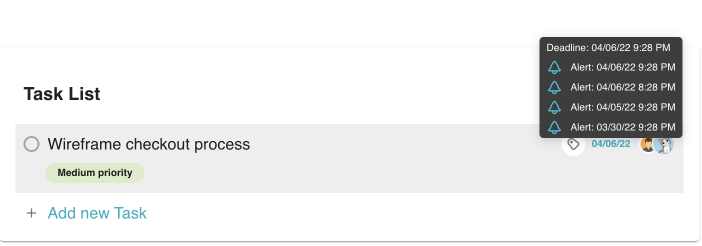
On the selected reminder time, all assigned members will receive a notification about the task.
You can read more about the reminders here.
How to allow email notifications for task list? #
To allow email notifications for tasks, go to Settings – Notifications and enable the “Allow email notifications for task list” toggle.
How to change the position of a task? #
To change the position of a task, just tap and hold on the task and drag it to the desired position.
This works for changing the position of the task both inside an individual task list, and drag and drop tasks to other task lists through the dashboard.
.gif)
Where can I see all my tasks in one place? #
In Nimbus Note, you can see all tasks in one common Dashboard. To see it, click on the Tasks in the left tab bar in the web client.
That’s a separate control center for all your tasks. Click on it and you’ll see all task lists, assignees, deadlines and labels.
On top of it, you can create new tasks right there.
You will see a general list of all your tasks. Here you can also mark tasks as completed, assign responsible members, add labels and set deadlines, edit the task list & task name or add a new task (in the same way as you do from inside the page).
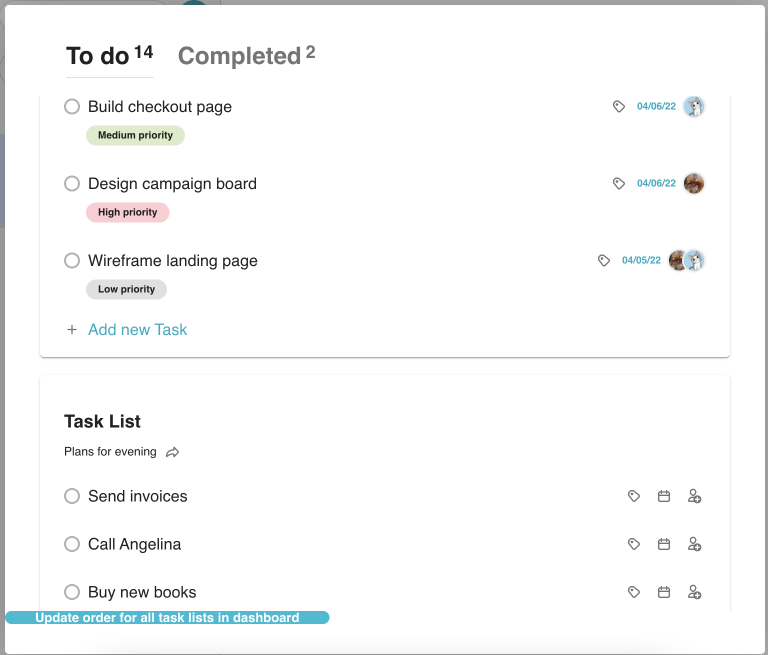
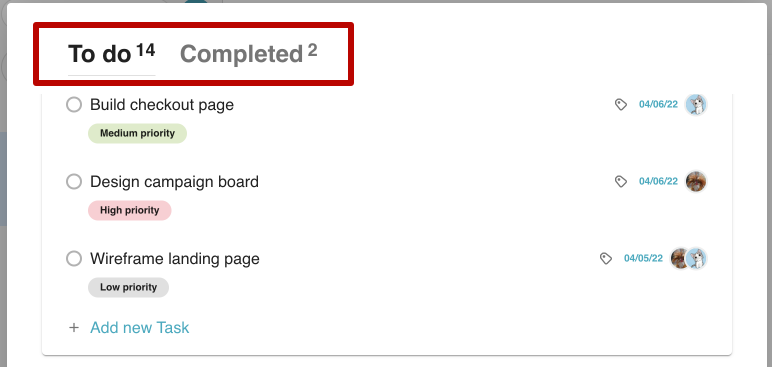
Completed and uncompleted tasks are separated in the dashboard. Use the tabs on the top to navigate between them.
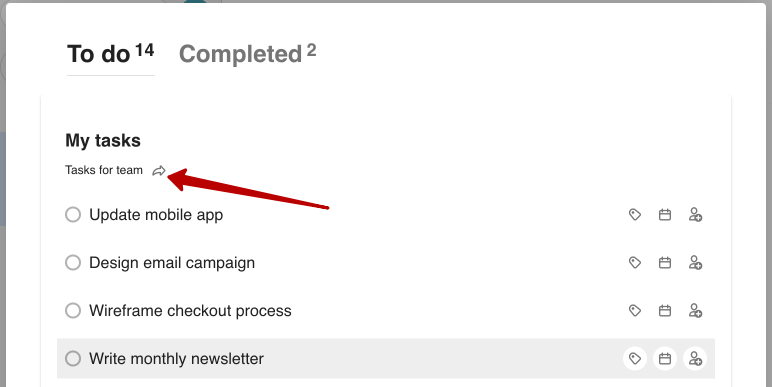
If you want to navigate to the page, just click on the arrow next to the task list name and the desired page will open.
Task Filtering #
Task filtering in the dashboard #
If there are a lot of tasks in the dashboard, you can filter them according to various attributes using the filter panel.
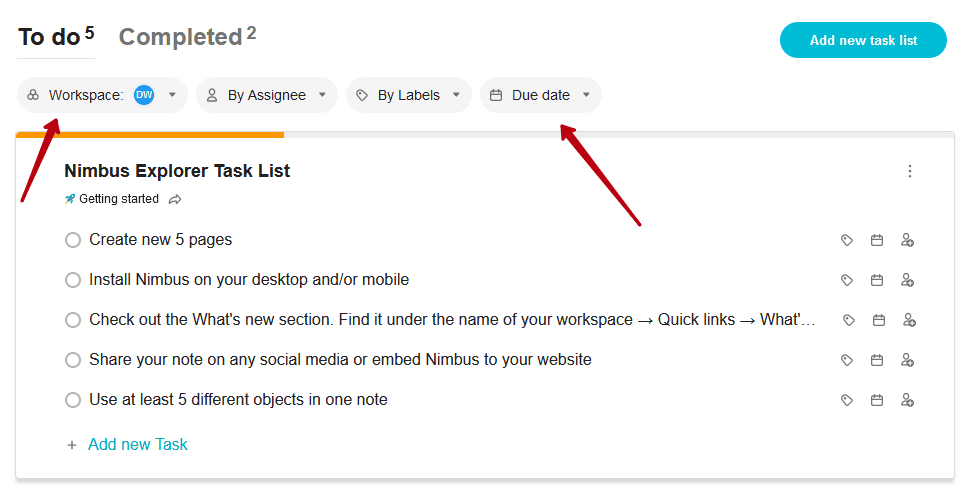
Types of filters #
Nimbus Note has several filters for the task list:
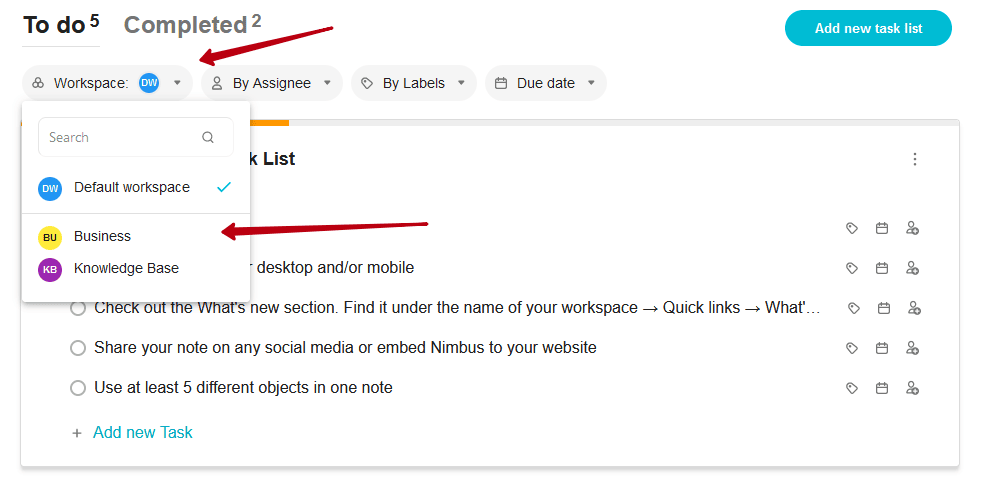
By Workspaces – you can filter your tasks by workspaces. You can display tasks not only from the current workspace but also from other workspaces or from all workspaces of the organization within the dashboard. Click on the filter and select the desired workspaces.
By assignee – here you can filter by tasks that are assigned to workspace participants. You can even select several participants at once.
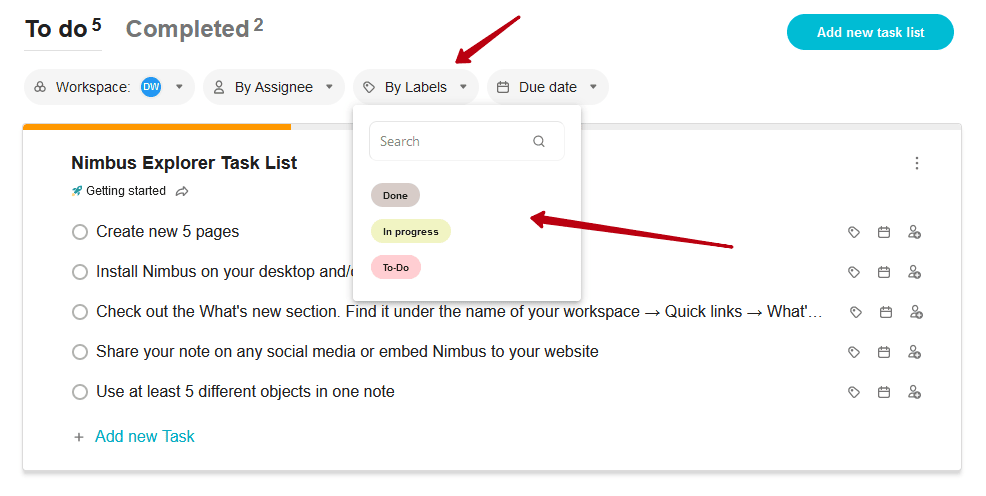
By labels – filtering by labels. You can select the labels you want and the dashboard will display the tasks with the selected labels.
Due date – here you can find three different deadline filters:
- Overdue – tasks that have already passed their deadline
- Due in the next 2 days – tasks with deadlines in two days
- No deadline – tasks without a deadline.
You can select multiple filters at once.
How to filter tasks? #
To filter tasks, you just need to select the filters you want and the tasks will be automatically filtered.
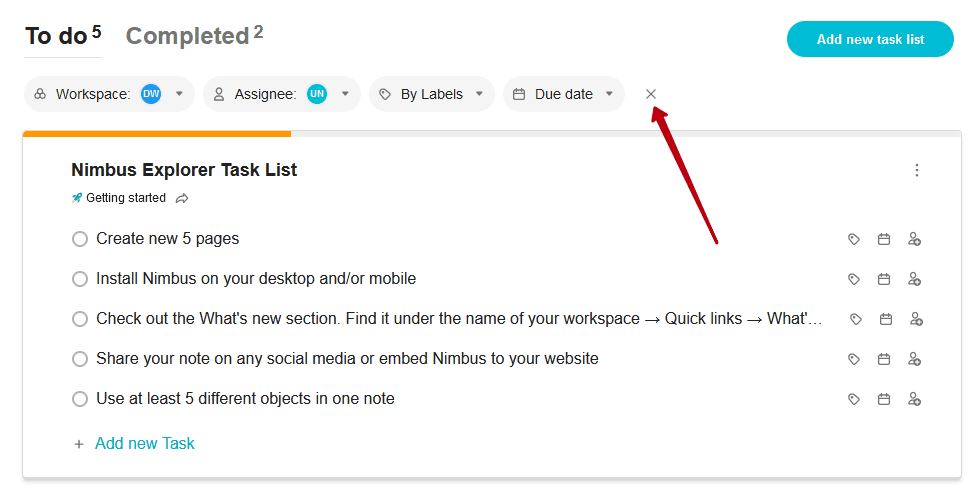
How do I reset filters? #
You can reset filtering at any time. To do this, click the X icon to reset task filtering.
Adding and Managing Files For Tasks #
Also, you can add different types of files to tasks. For example, it can be a screenshot, a video, or a presentation file.
Adding a File #
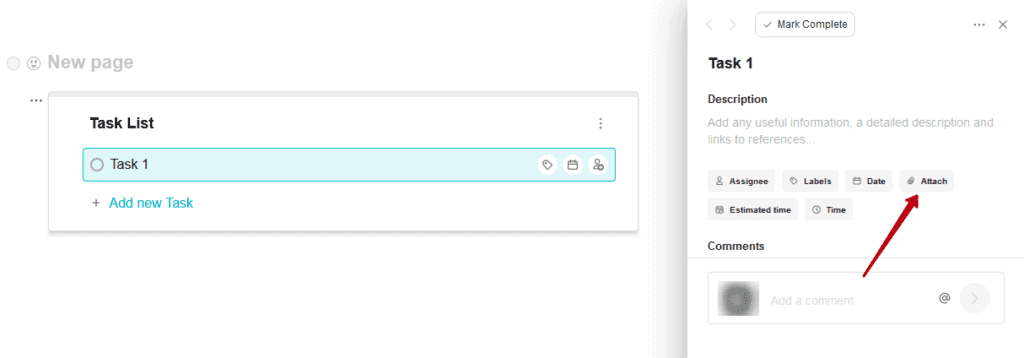
1) Click the task name to go to the detailed view.
2) Click Attach.
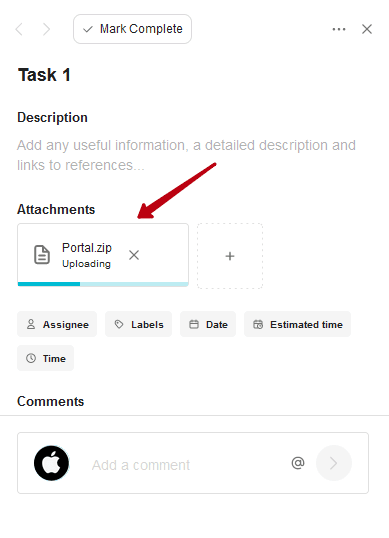
3) Select the files you want.
4) Wait for the download to complete (you can stop the download by clicking on the X).
How do I Download the File? #
You can download the file in several ways:
1) By clicking on the file name.
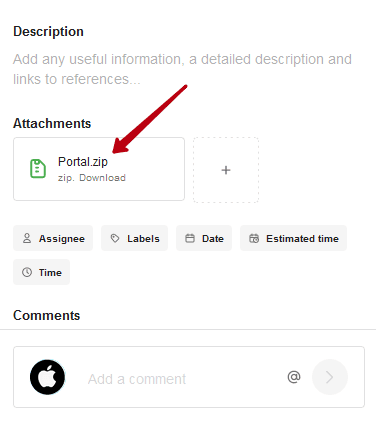
2) Through the file menu (you need to click on the 3 dots when hovering over the file).
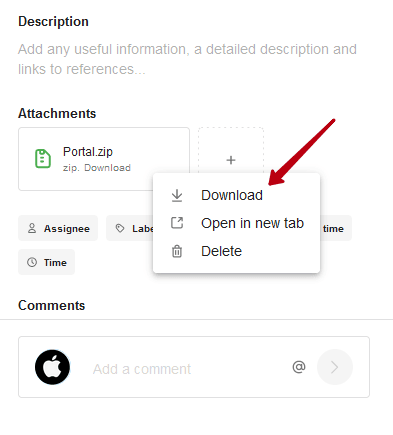
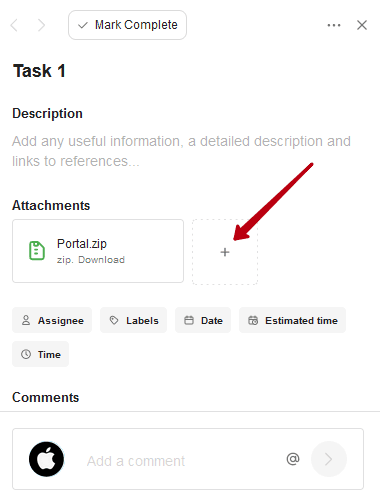
How do I Add a New File? #
Click on the + to add a new file.
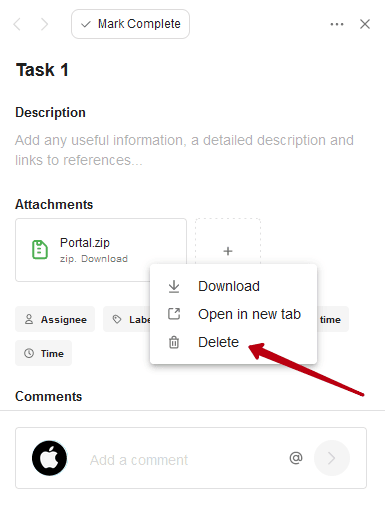
How do I Delete a File? #
You can delete a file through the menu (you have to click on the 3 dots when hovering over the file).
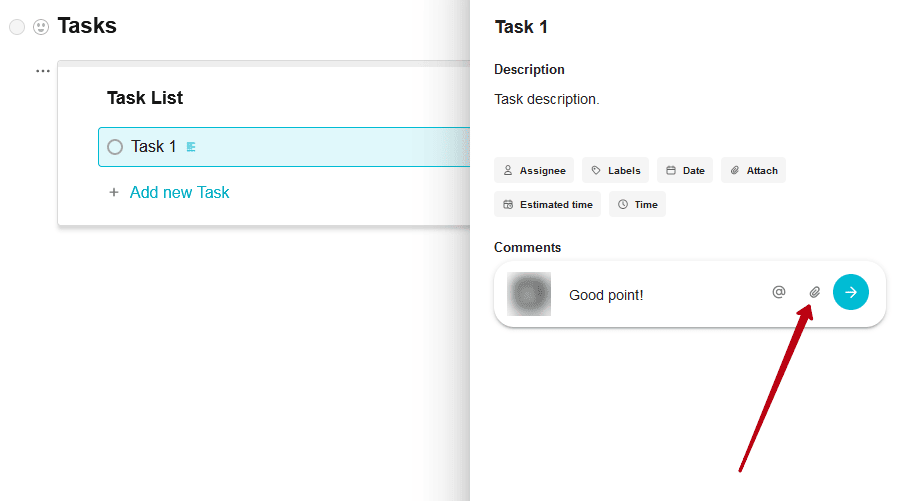
Adding files to comments in tasks #
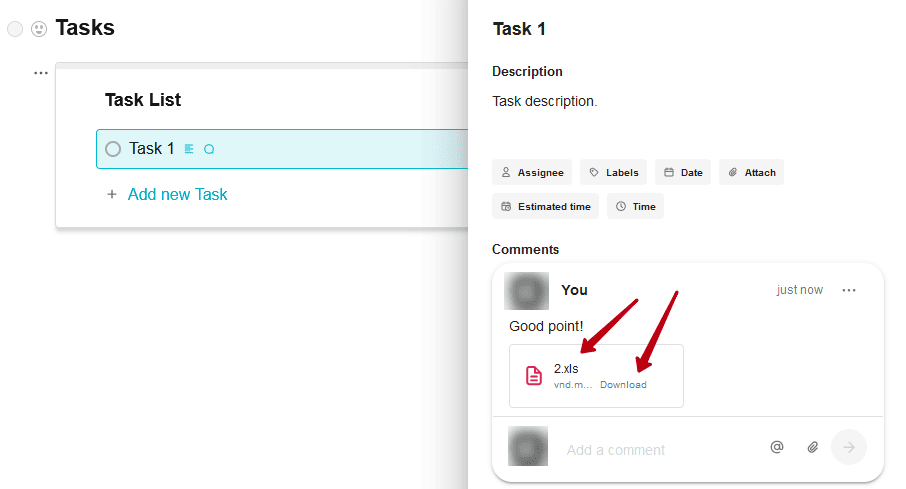
In addition to text, you can add files to your comments in tasks. For example, they can be screenshots with a description of the problem or an archive with a design.
Adding a file #
To add a file, click on the attachment icon in the comment input.
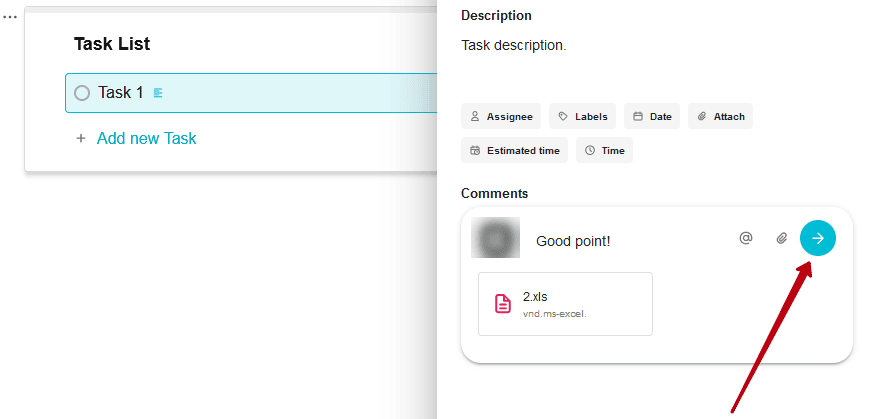
Next, select the desired file and wait for it to load, then it will be displayed in the comment card.

Click on the submit comment button to add it to the thread.
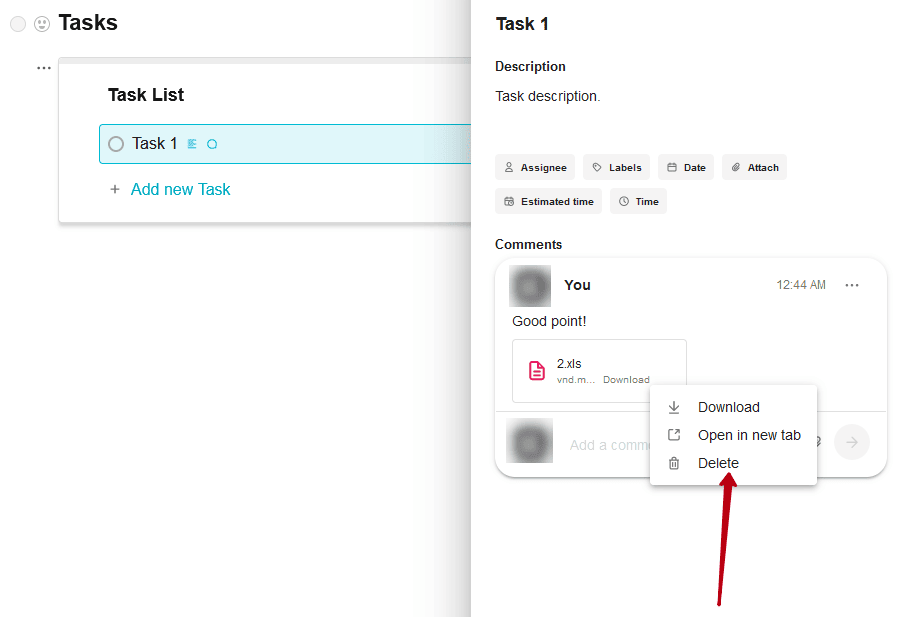
Downloading a file #
Click on the file name or on Download to download the file.
Deleting a file #
If you want to delete a file, click on Delete in the file menu (displayed when you hover over the file).
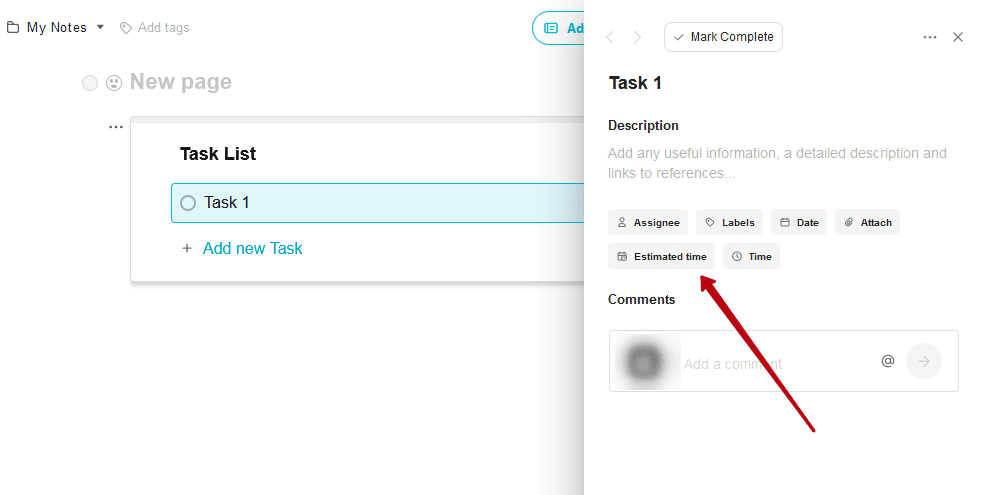
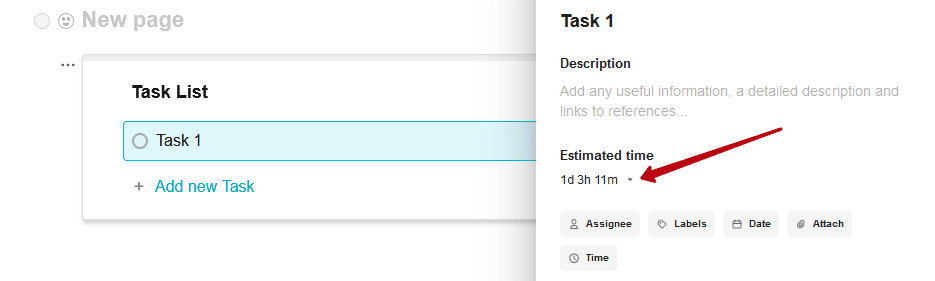
Assigning Estimates and Time Tracking In Tasks #
To add a file, click on the attachment icon in the comment input.
For tasks in Nimbus Platform you can specify the time you plan to spend on the task, as well as track the time already spent. You can do this through the detailed view of the task.
Task Estimates #
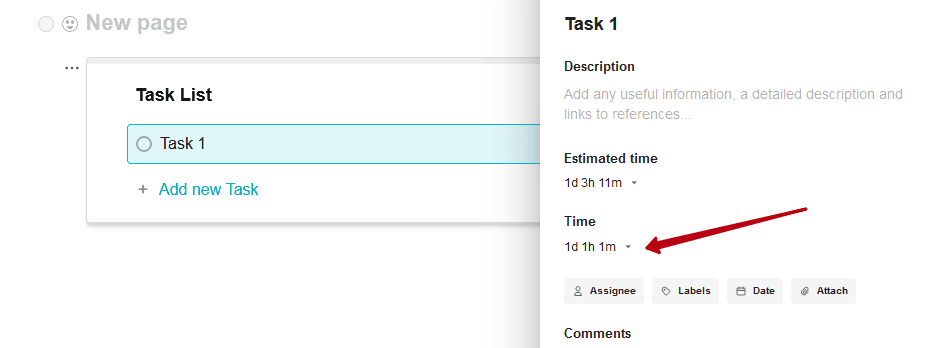
For tasks in Nimbus, you can specify the time that is planned to be spent on implementation. You can do this through the Estimated Time option.
In the menu, you can specify the desired time in minutes, hours or days.
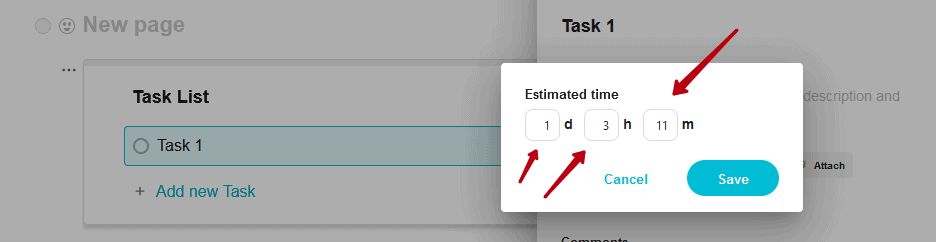
Clicking Save stores the value. After saving, the specified time is displayed in detail. To specify a new value, click on the Time.
Afterwards, enter the new values and save it.
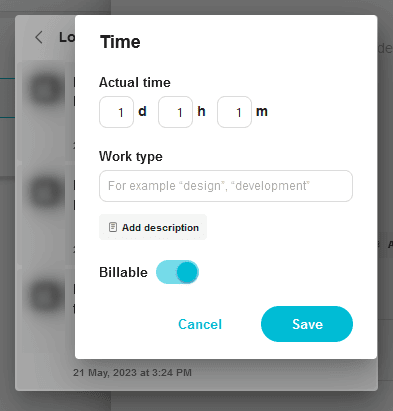
Time Tracking #
You and your team members can also track the time it took to complete the task. You can do this through the Time Tracking option.
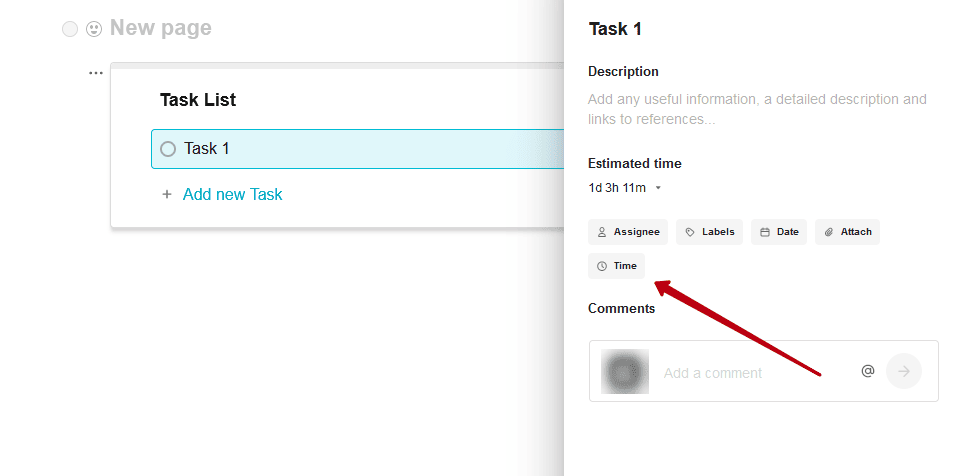
In the menu, you will be able to:
- Specify the time in minutes/hours/days.

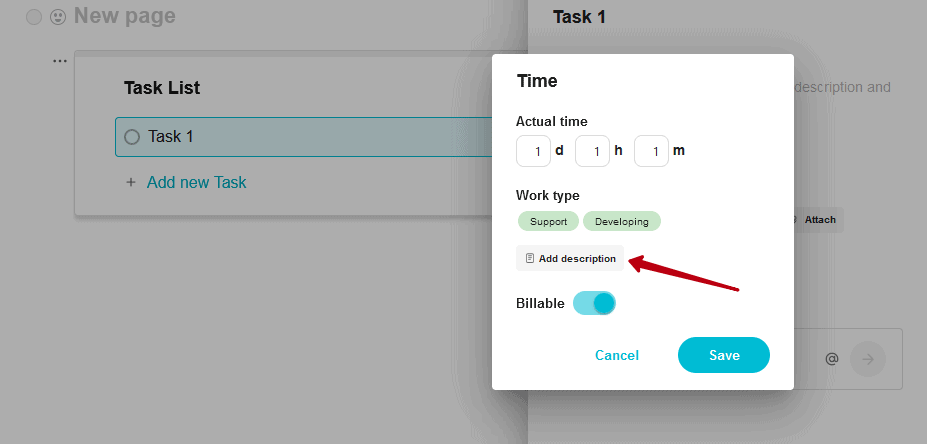
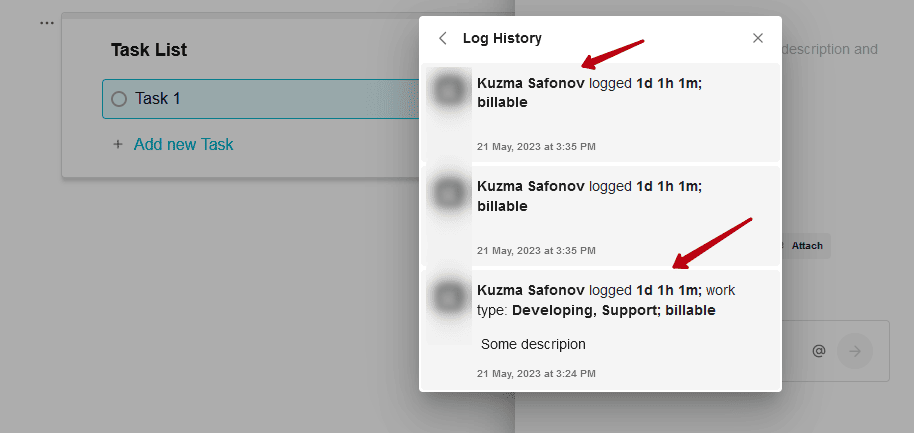
- Specify the type of work with labels, such as Support or Developing. Just type the label you want in the input and press Enter.
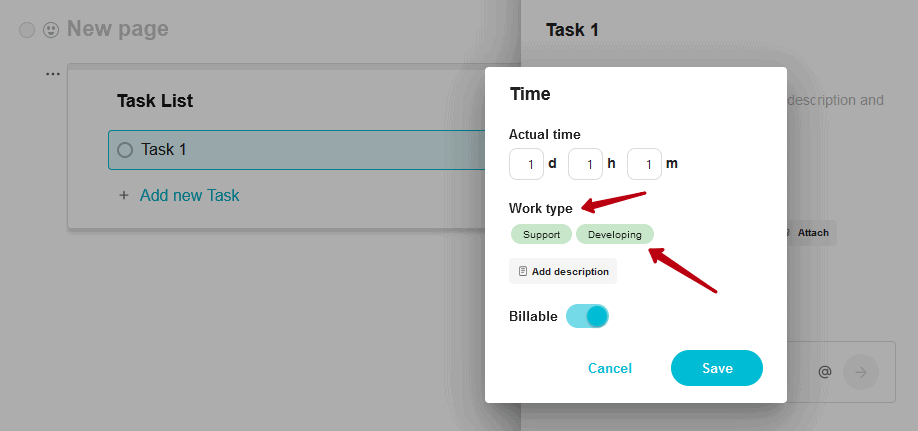
- Describe what the time was spent on.
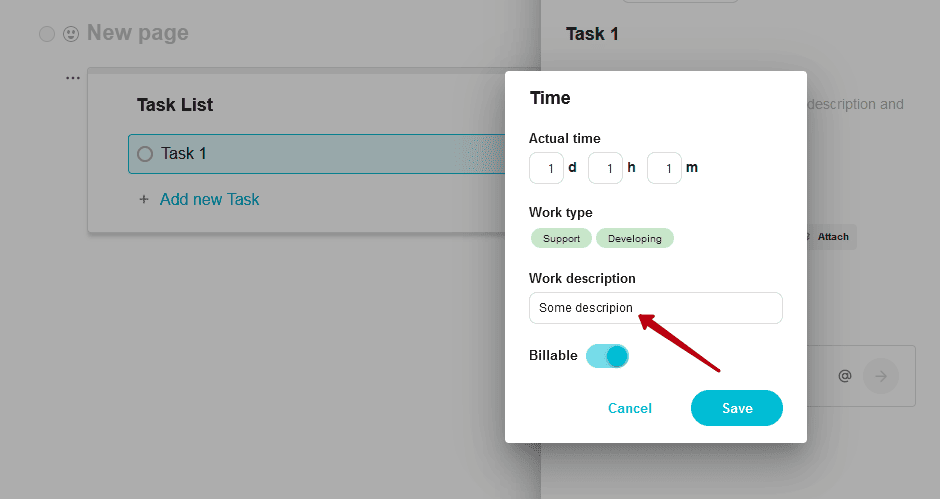
- With the Billable switch, you can specify whether the time spent is billable or not. Later on, you will need this to generate an invoice.
Click Save to save the time. After saving, the time will be displayed in detail.
Adding Time #
You or a team member can add a tracked time. To do this, click on the time and specify new values.
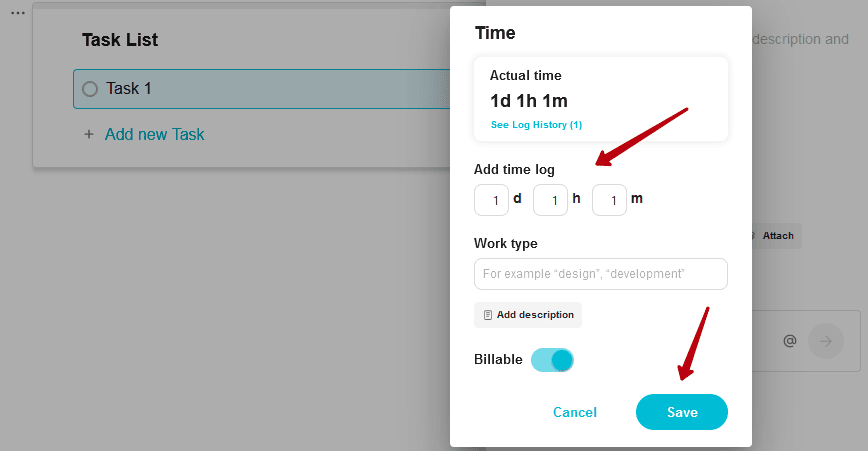
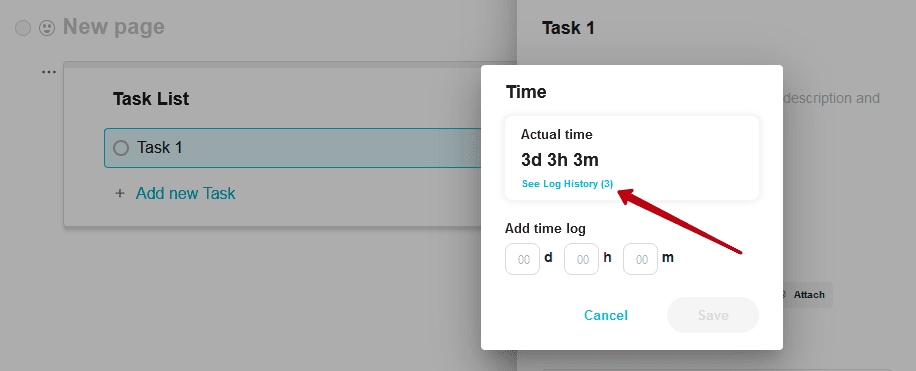
Work Log #
With the Work Log you can track changes in the tracked time.
Editing and Deleting Tracked Time #
If you hover over a log card, the card menu is displayed.
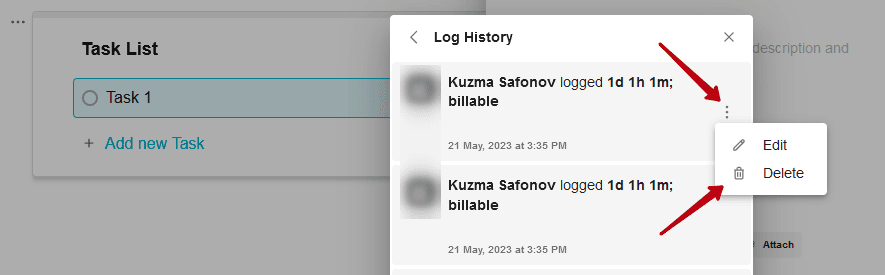
In it, you will see two points:
- Edit – when you click on the item, a menu will open where you can edit an earlier tracked time.
- Delete – after confirmation, it will delete the tracked time and update the total time spent on the task.