This action allows you to send custom email notifications to team members and/or clients of your portal. You can send individual notifications as well as sequences of notifications.
For example, you can send newsletters to your clients (using a scheduler trigger) or send custom messages based on client actions. Below, we will show you how to create such an email notification.
Creating an Email Notification #
Let’s try sending custom email notifications to all new clients who have accessed the portal for the first time.
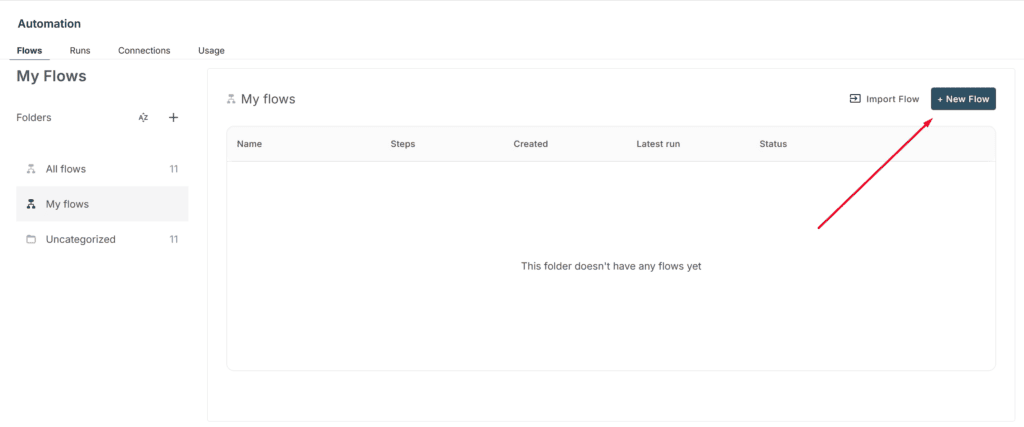
1) Begin by clicking the ‘+ New Flow’ button located in the upper right corner of the automation platform’s interface. This action will initiate the process of creating a new automation flow from scratch.
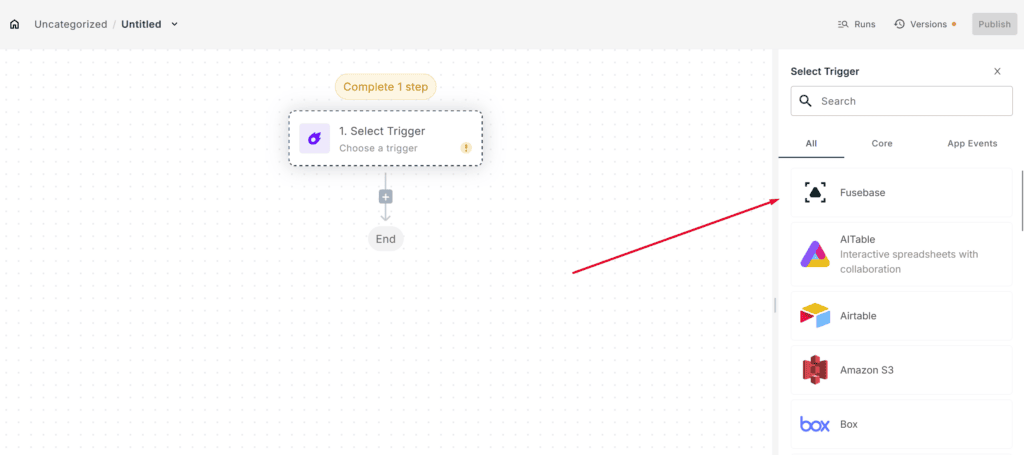
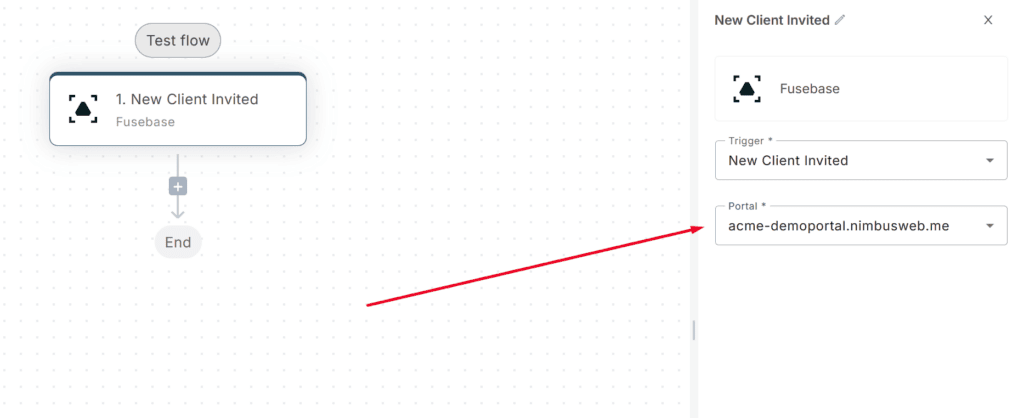
2) In the ‘Select Trigger’ section on the right side of the screen. This designates Fusebase as the trigger for the automation flow, meaning that the flow will be initiated by events occurring within the Fusebase environment.
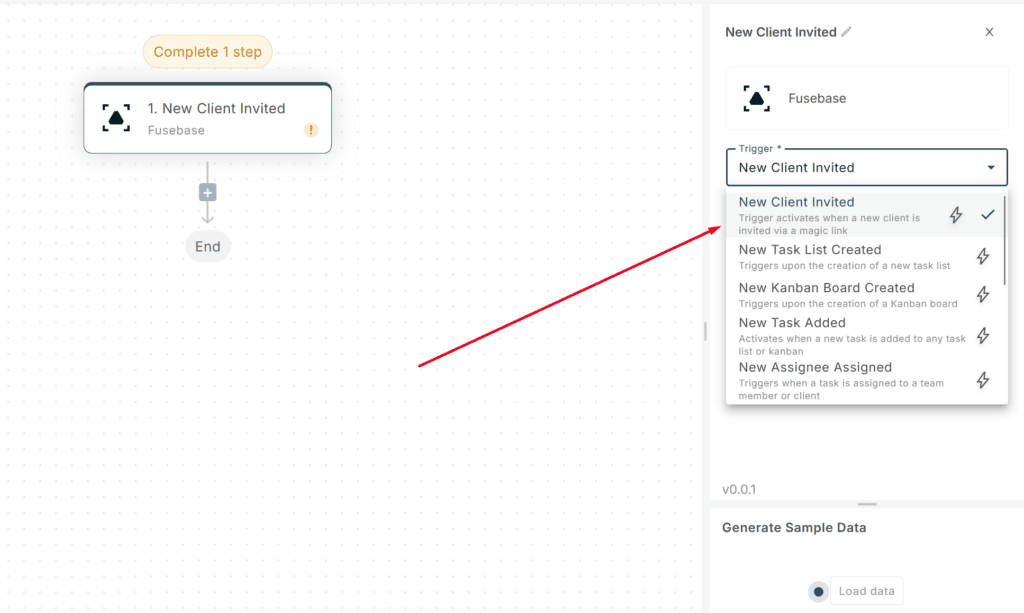
3) Within the ‘Trigger’ settings for Fusebase, choose ‘New Client Invited’ from the dropdown menu. This specifies that the automation flow will be triggered specifically when a new client is invited to the portal.
4) Under the ‘New Client Invited’ trigger settings, select the relevant portal from the ‘Portal’ dropdown list. This step ensures that the automation flow only executes when a new client is invited to the designated portal.
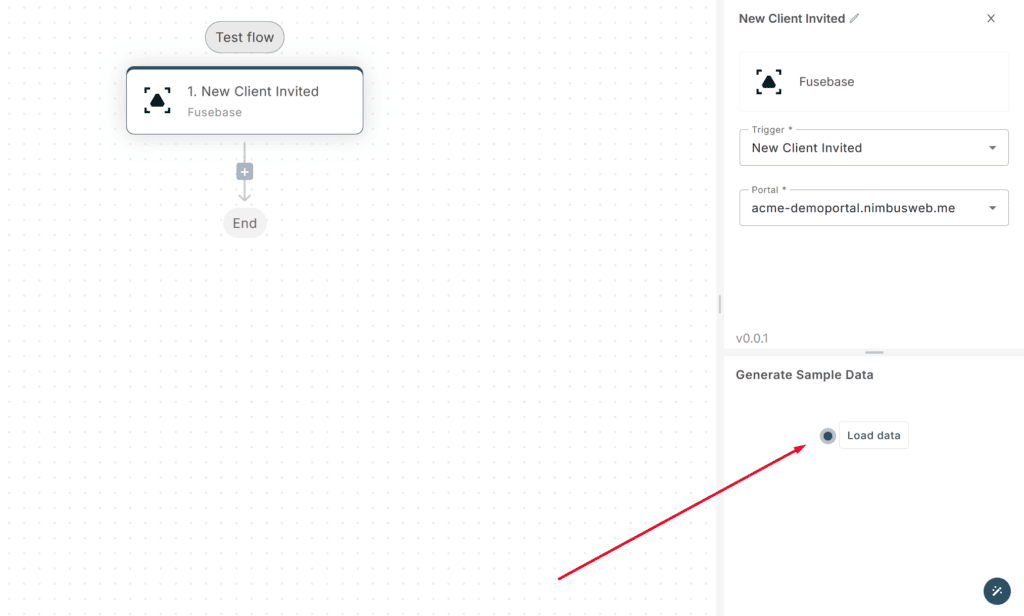
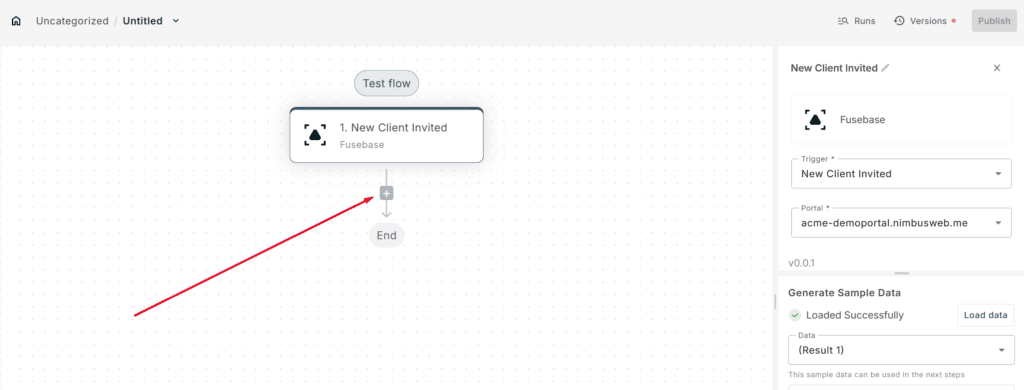
5) To test the flow, click the ‘Load data’ button. This will generate sample data based on the chosen trigger and portal, allowing for simulation and validation of the automation flow’s behavior.
6) Click on + to create an action.
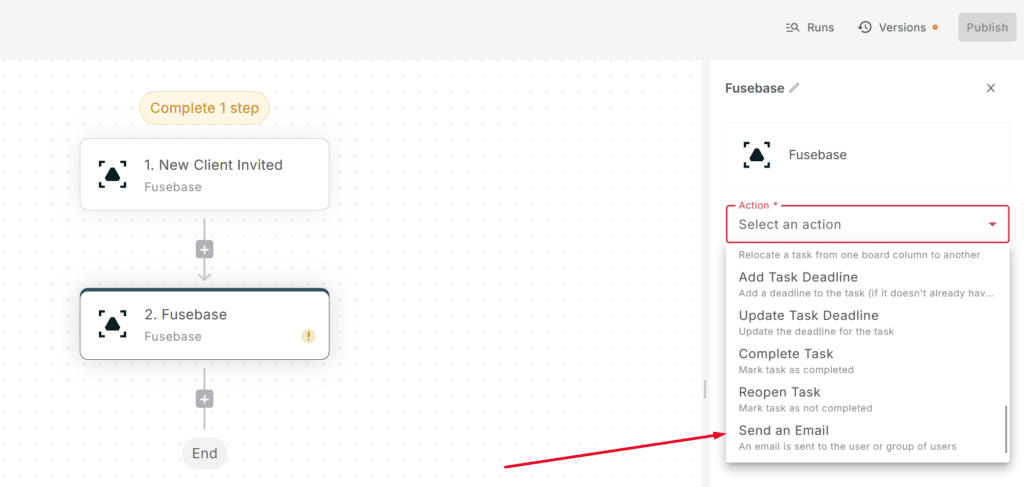
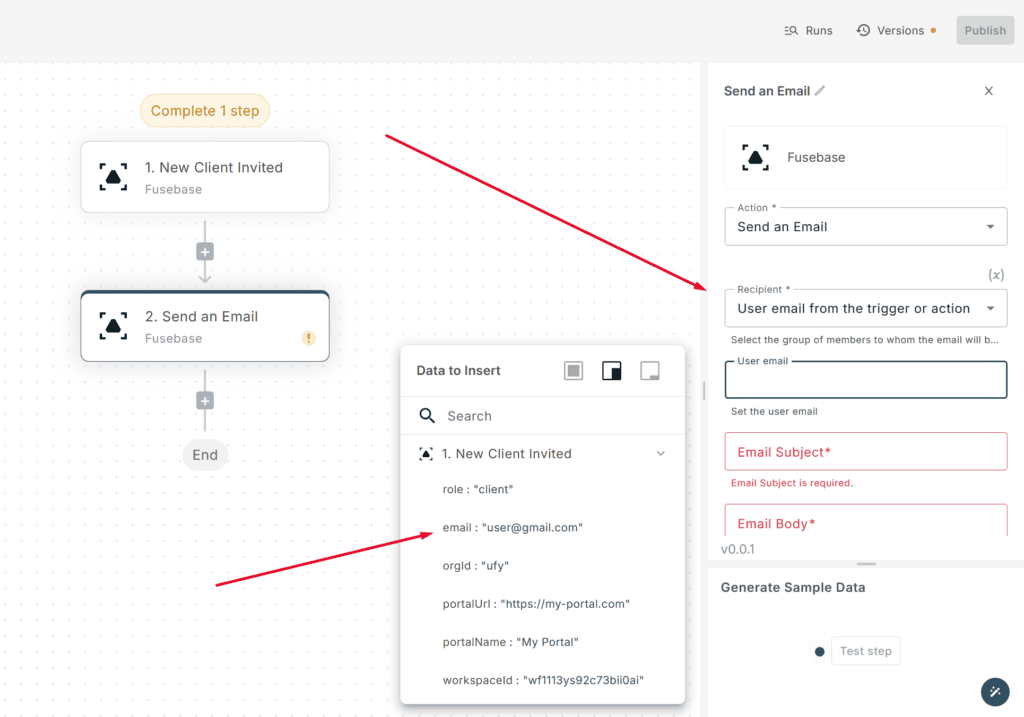
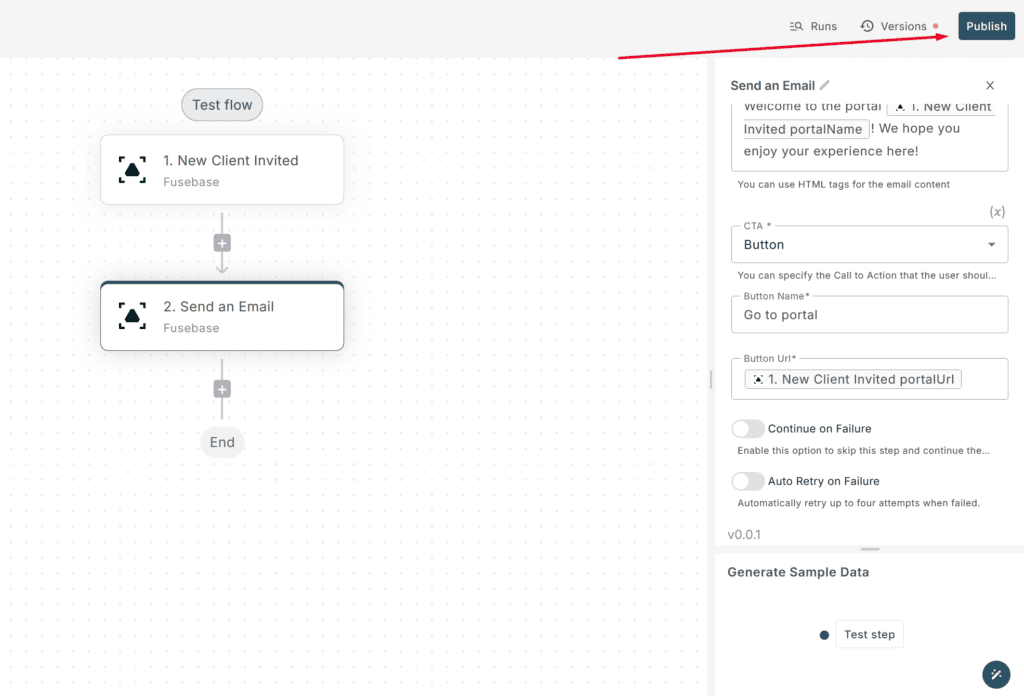
7) Select ‘Send an Email’ from the ‘Action’ dropdown menu. This configures the step to send an email as part of the automation flow.
8) Select ‘User email from the trigger or action’ by selecting it from the ‘Recipient’ dropdown. This dynamically fetches the email address from the trigger event, in this case, the email of the newly invited client.
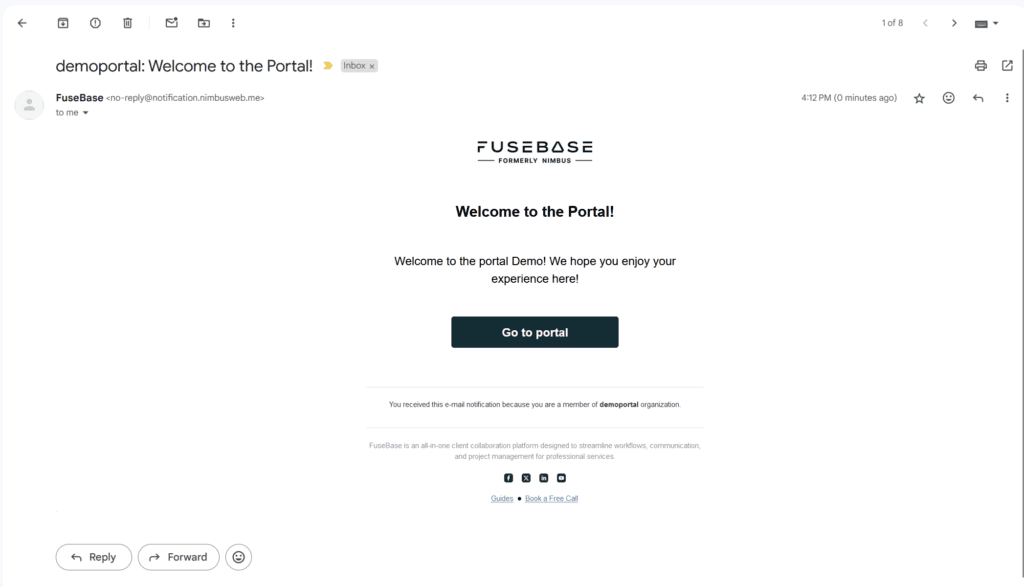
9) In the ‘Email Subject’ field, enter a concise and informative subject line for the email, such as ‘Welcome to the Portal!’. This subject line should clearly indicate the purpose of the email to the recipient.
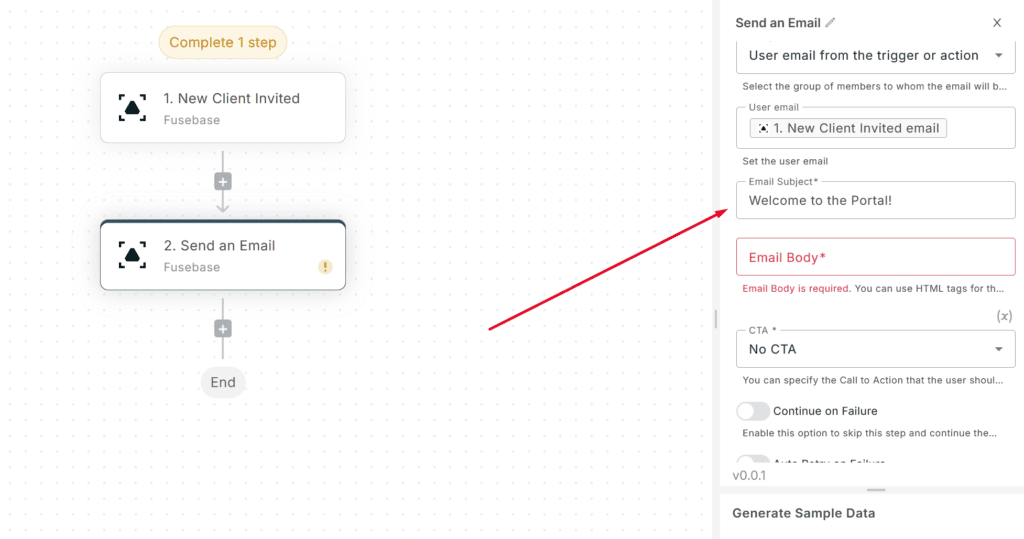
10) In the ‘Email Body’ field, craft the main content of the email, providing a warm welcome message and any relevant information for the new client. You can use plain text or HTML to format the email body as needed.
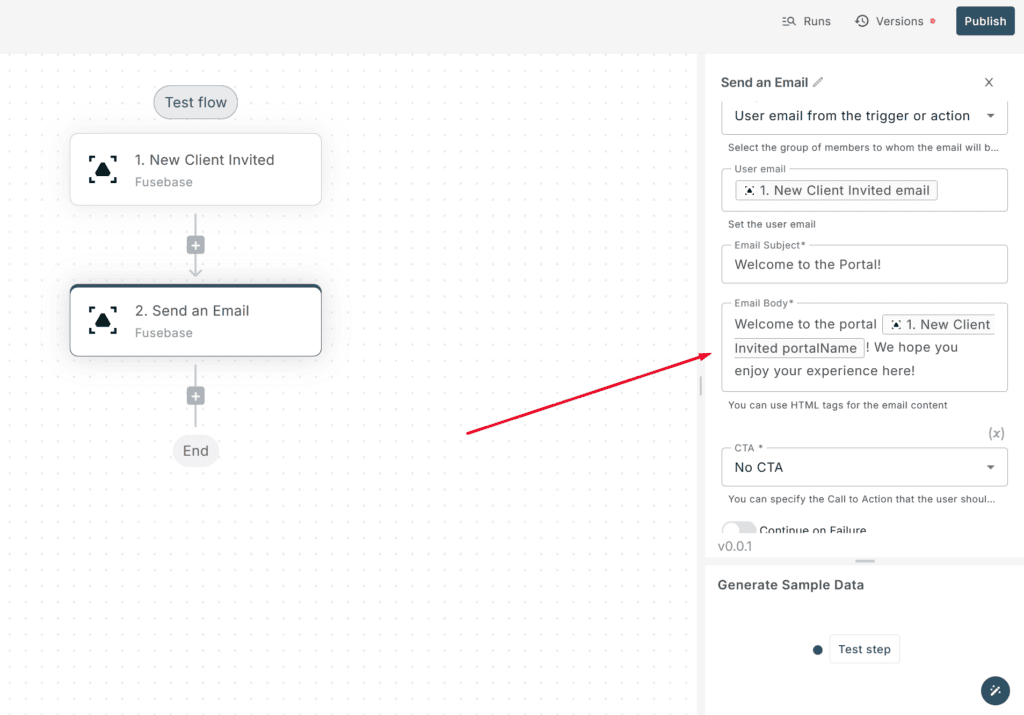
11) Select ‘Button’ from the ‘CTA’ dropdown to include a call-to-action button in the email. This button allows you to direct the client to a specific action, such as visiting the portal or accessing resources.
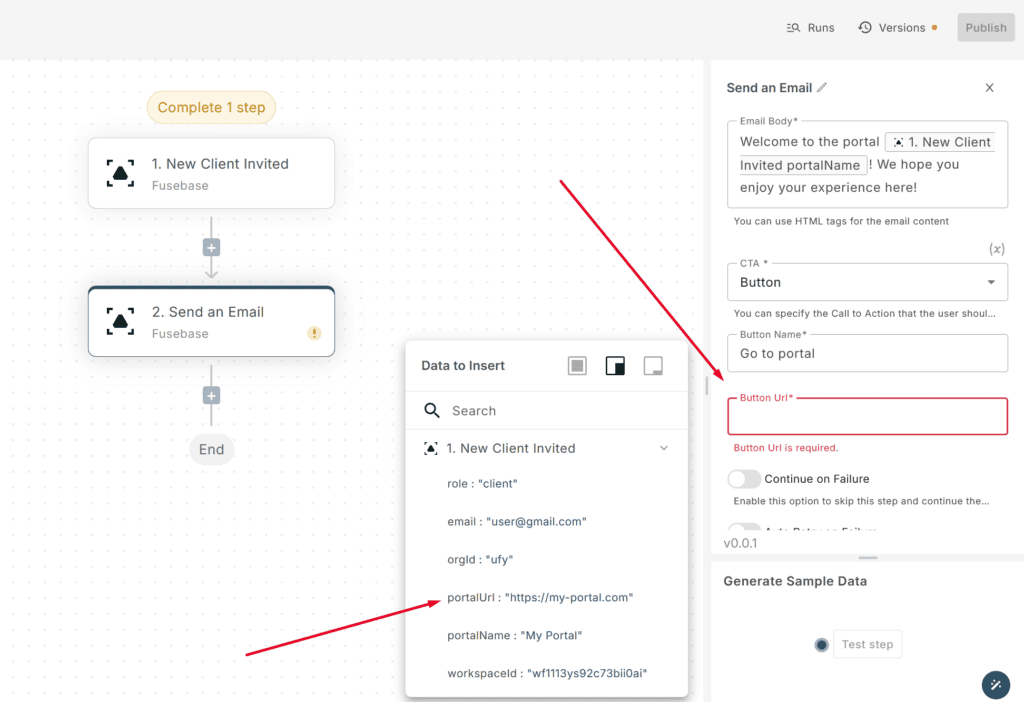
12) In the ‘Button Name’ field, enter the text that will be displayed on the button, for example, ‘Go to portal’. This text should be clear and enticing, encouraging the client to click the button.
13) In the ‘Button URL’ field, insert the URL that the button should link to, which could be the portal’s login page or a welcome guide. In this case, we selected the portal link from the trigger.
14) Double-check the flow configuration and click or ‘Publish’ to finalize the process.
15) After publishing, you can test the flow. We added a test client to the portal, and after they accessed the portal, a notification was sent to their email. Everything is working correctly!