Nimbus Note allows you to add pictures with various extensions (jpg, gif, png, etc.) to your page. You can also add files directly into tables, resize & move pictures, copy text from images and much more.
Add image and drop / resize / move it #
There are several ways to add a picture:
- Select the picture icon on the panel or use cmd/ctrl + shift + i.
- You can also drag and drop an image into your page.

- Alternatively, you can insert the URL using сtrl + v.

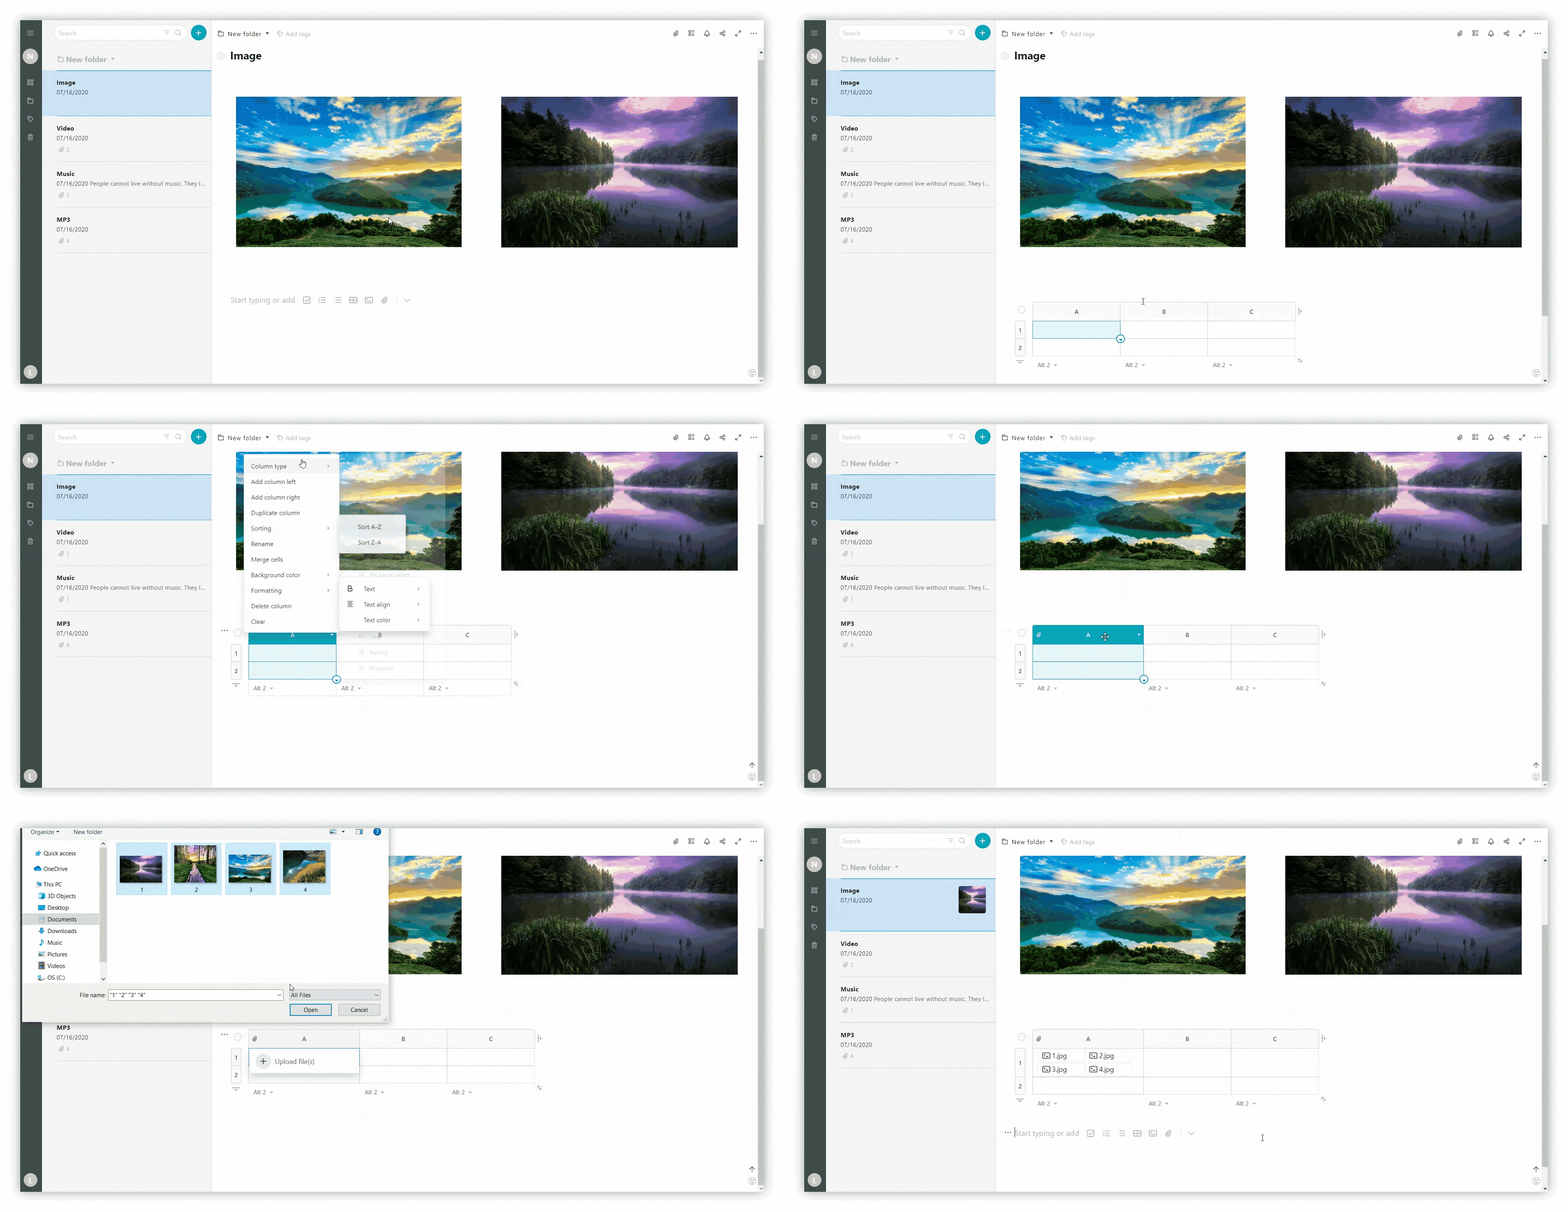
Add a picture into the table #
To add a picture into the table:
- Click the table icon or use cmd/ctrl + ⌥/alt + t.
- Select Attachment as the type of column or cell.
- Upload a file from your computer or drag and drop the file.
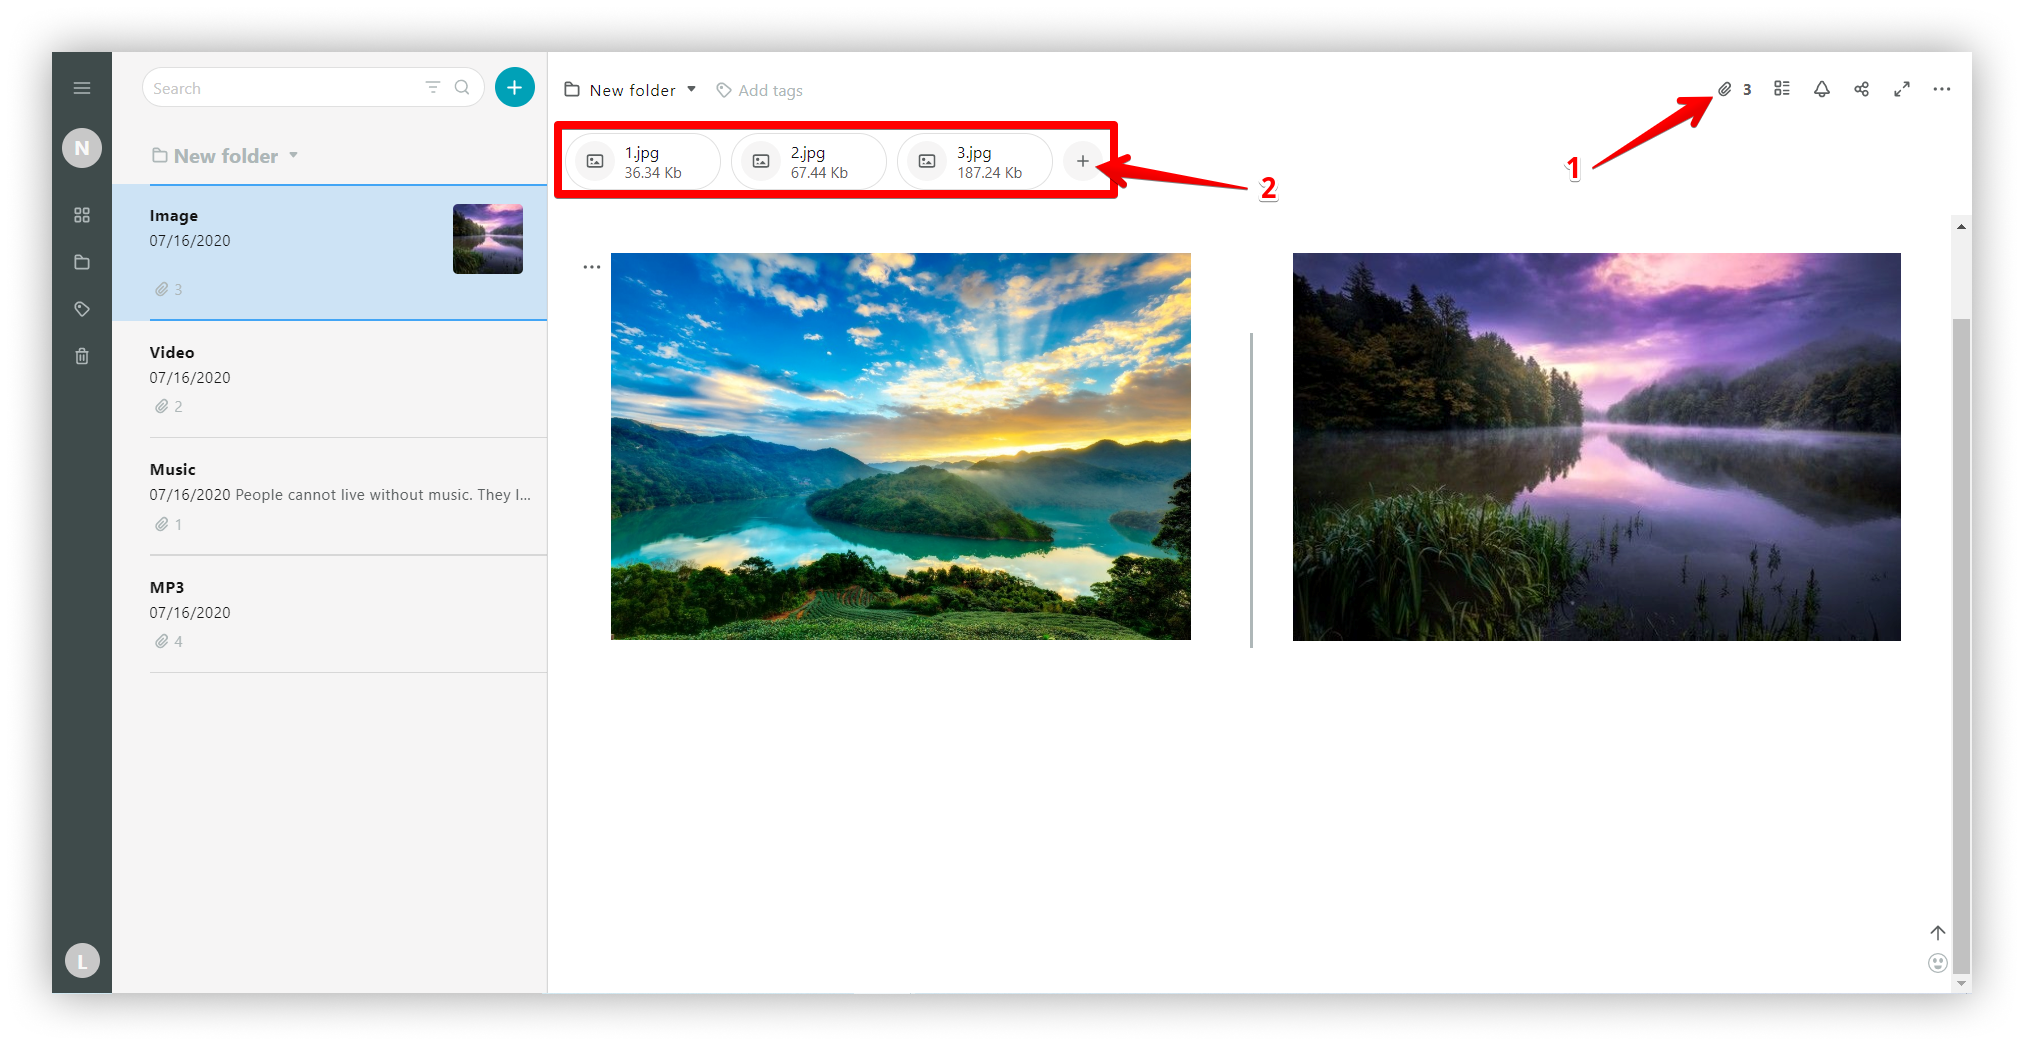
Add pictures into the attachment panel #
- Click on the paperclip icon and you will see the attachments panel.
- Upload pictures from your computer or drag and drop them.
.png)
Image file menu #
Attachments panel #
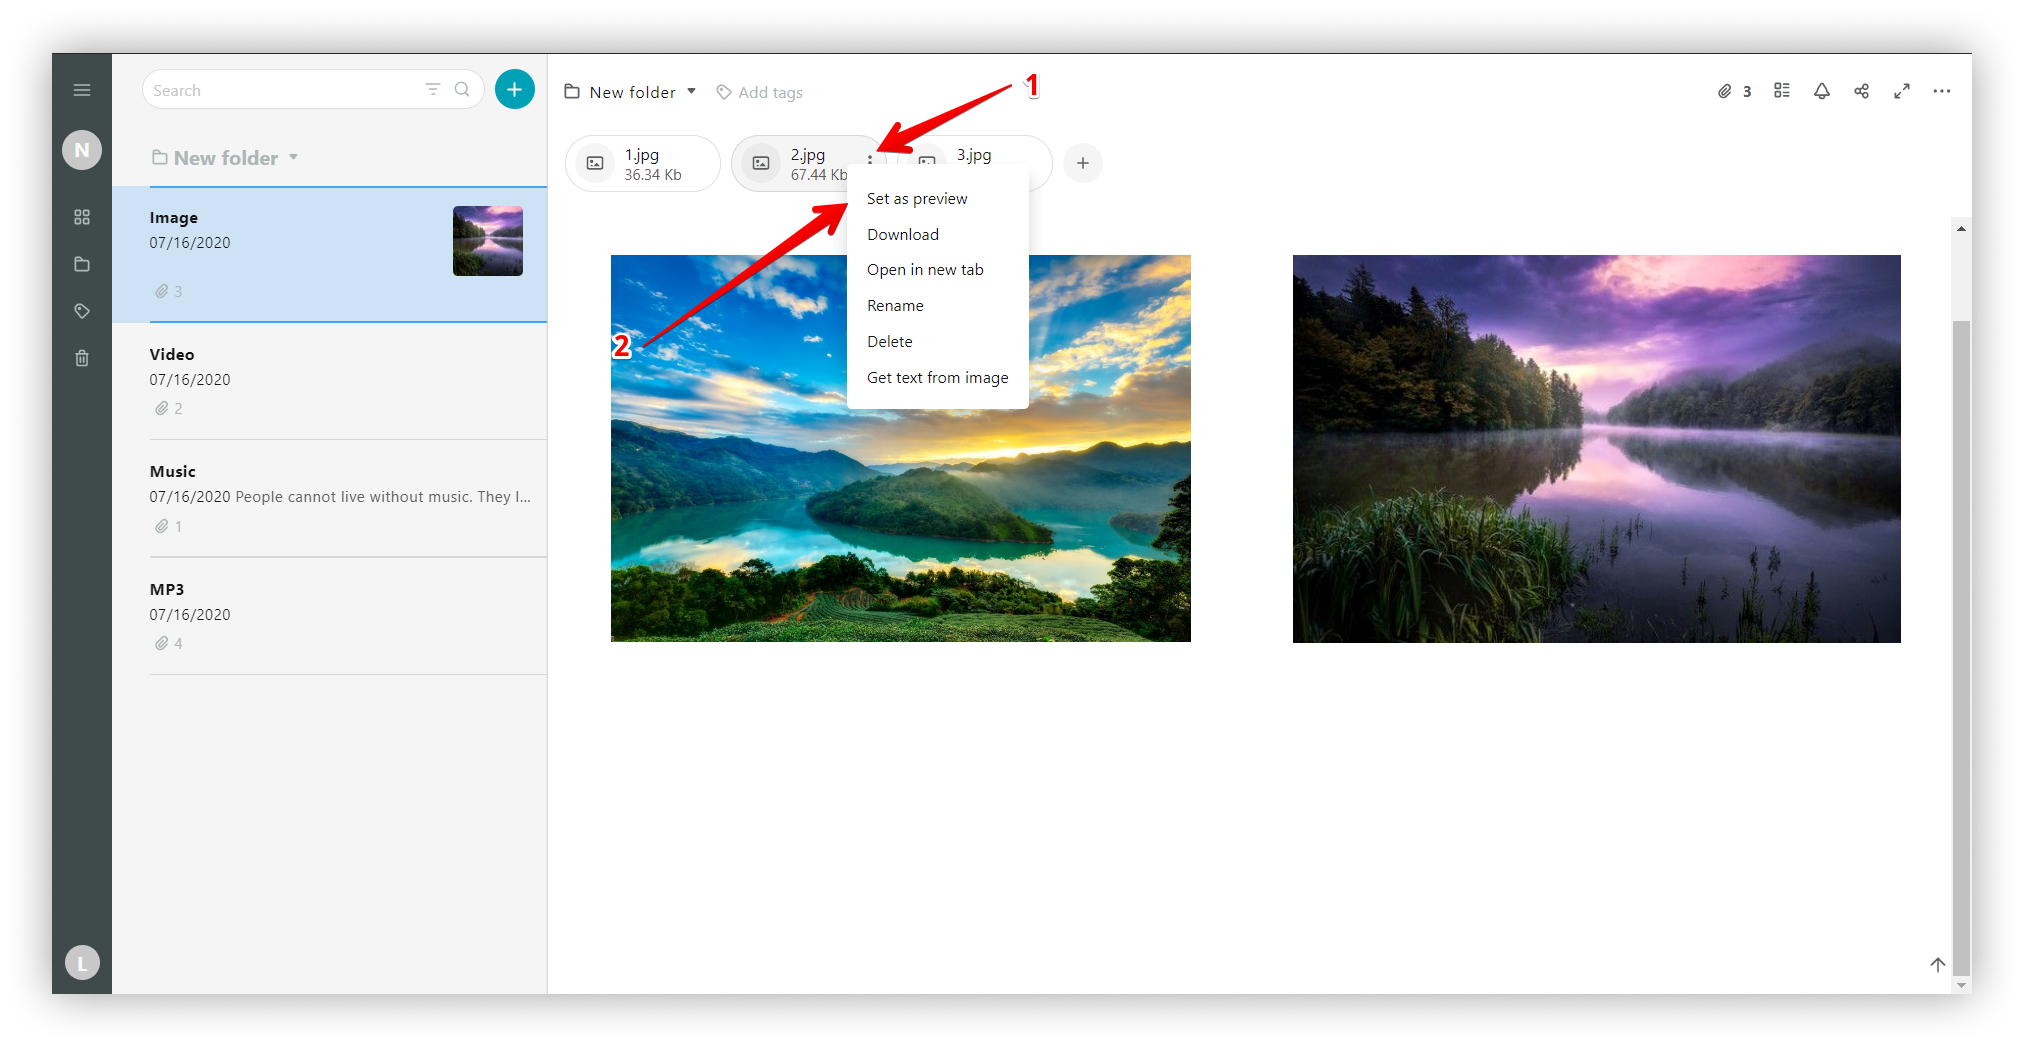
Click on the three dots to open the menu for pictures in the attachments panel.
.png)
You will be able to:
- set as preview,
- download,
- open in new tab,
- rename,
- delete, and
- get text from image (only available for Pro plans).
Menu in the editor #
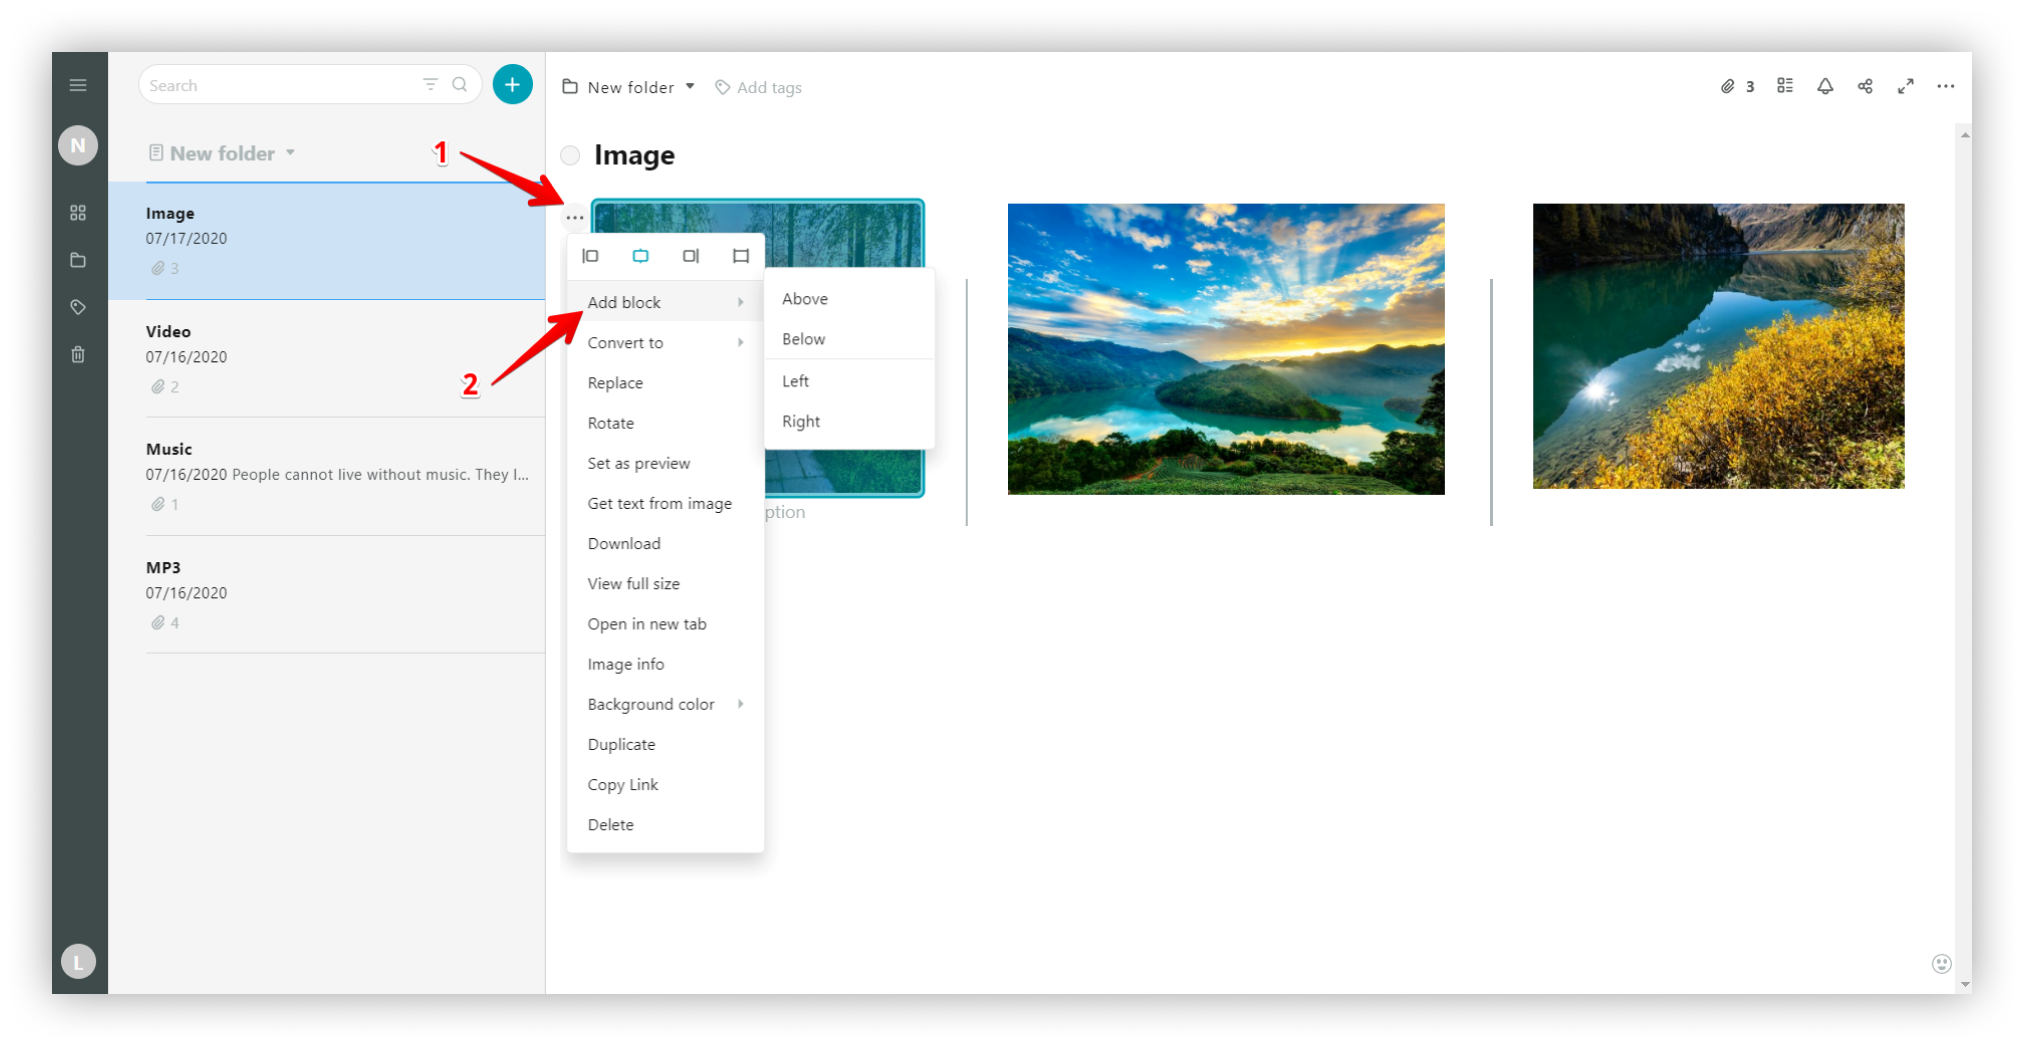
Click the three dots next to an image to open the menu for the picture in the editor.

Image alignment #
Click on the three dots menu and select left / center / right / full width alignment.

Default alignment for images #
All new images are center-aligned by default. However, it might be not convenient for all the users. You can choose the default image alignment settings that suit you best! ?
Just go to the Settings ??? Page Appearance and set the default image alignment you like!
Add block #
To add a block, select the three dots menu and press Add block.
.png)
Convert to file #
In Nimbus Note, you can convert images to files. Just click on the three dots menu and select Convert to.

Copy Link #
You can copy a link to a block and paste it into another page. Clicking on the block’s link will direct you to the block’s location in the original page.

Get text from image #
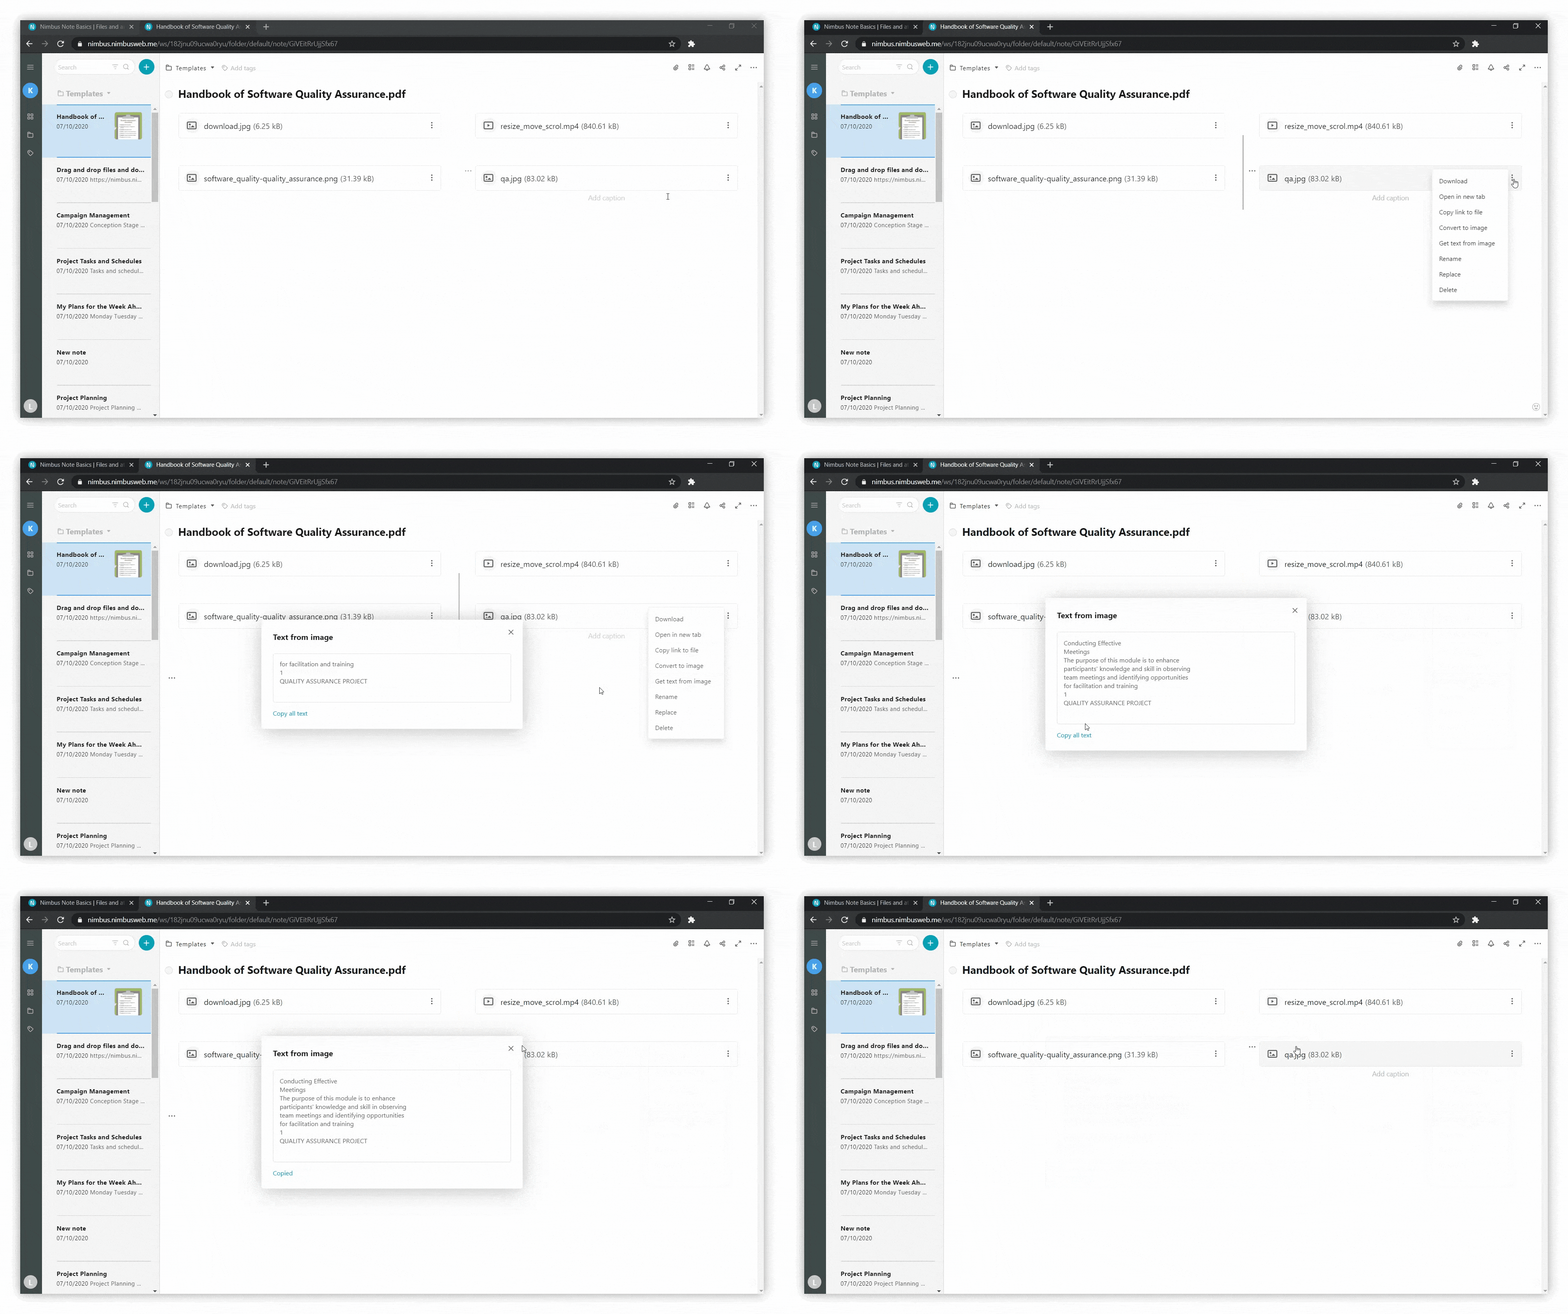
In Nimbus Note, you have the option to grab text from images. This text can later be copied and pasted wherever you need.
Image-to-text recognition is a powerful feature that enables searching for text within images. You may have always wanted to extract the text from some of your scanned photos or documents. The OCR capabilities in Nimbus Note can make this a reality for you.
.gif)
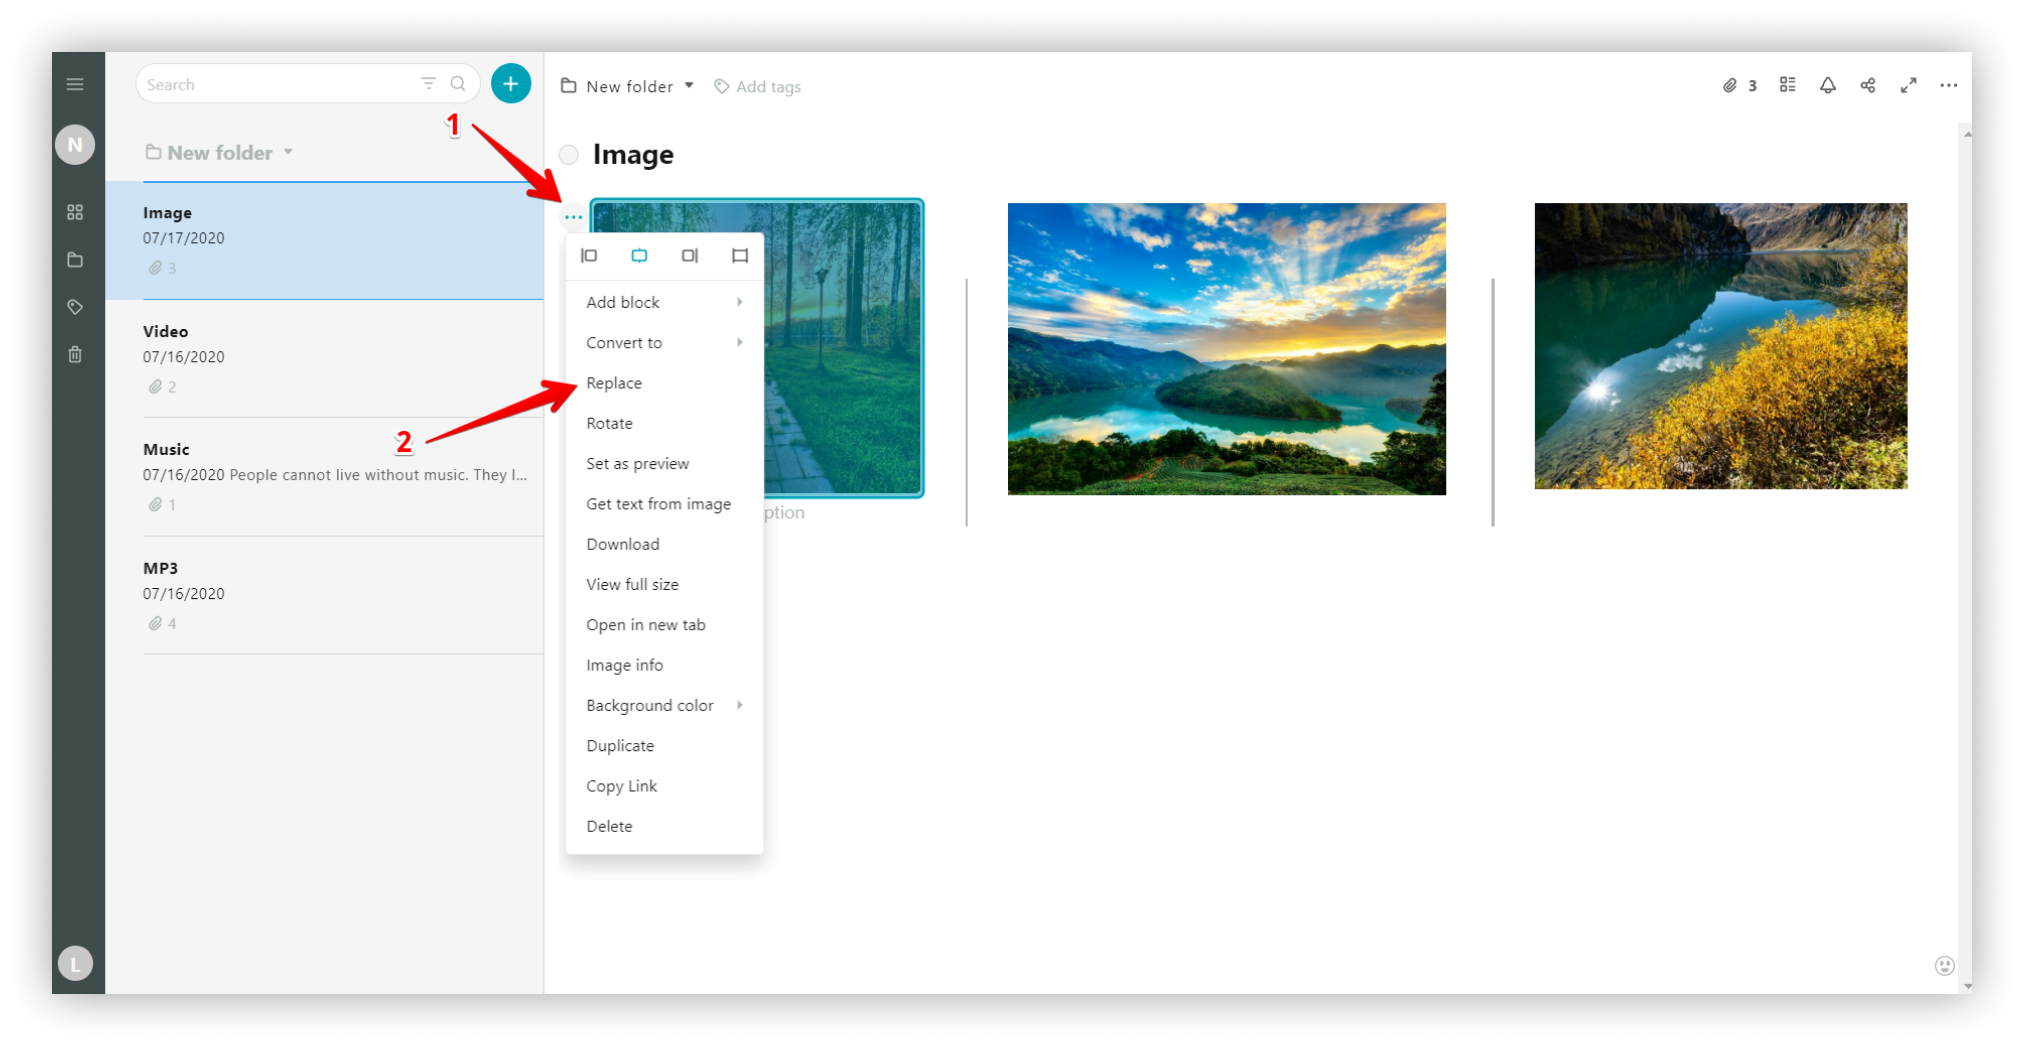
Replace #
To replace the picture with another click on the three dots menu and select Replace.
.png)
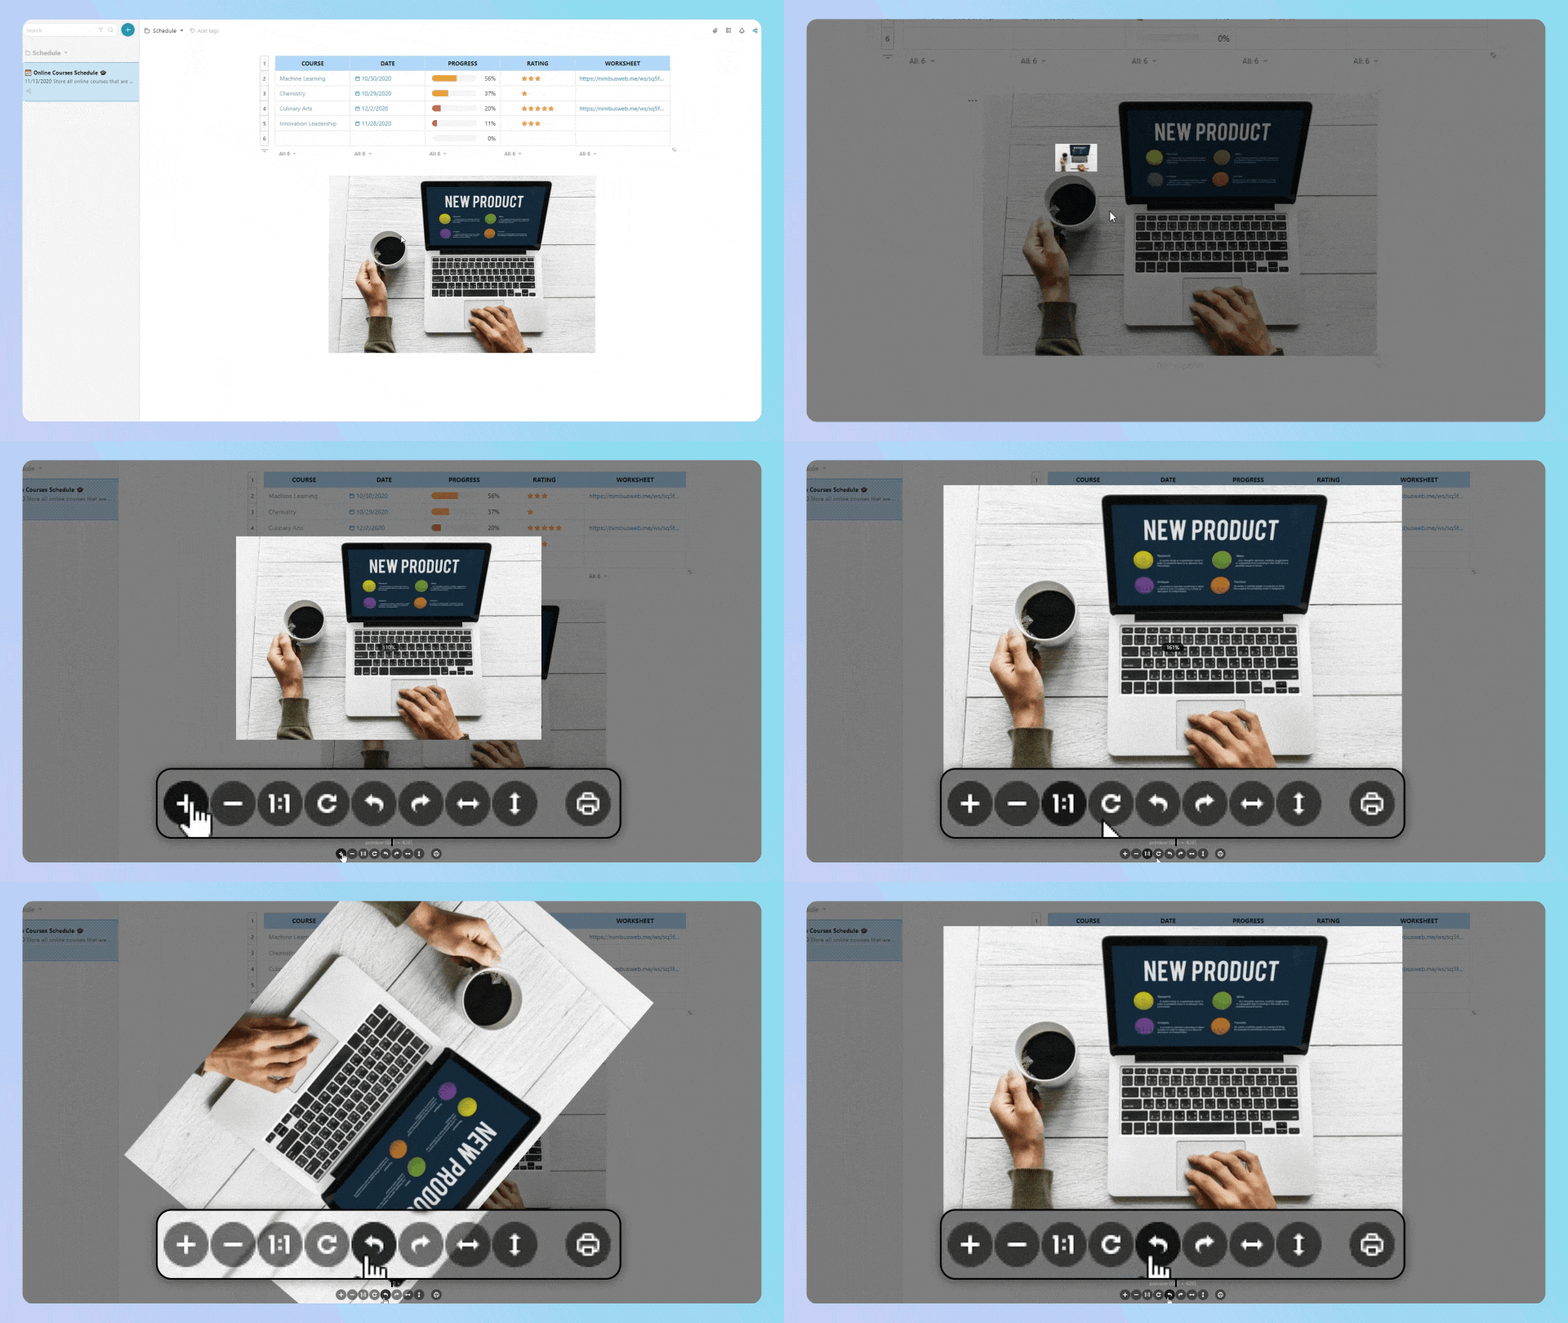
Rotate #
To rotate the picture choose Rotate.

Lifehack #
When you open a picture in full-screen mode, you can rotate it, zoom in or out, and print it. To open a picture in full-screen mode, double-click on it.
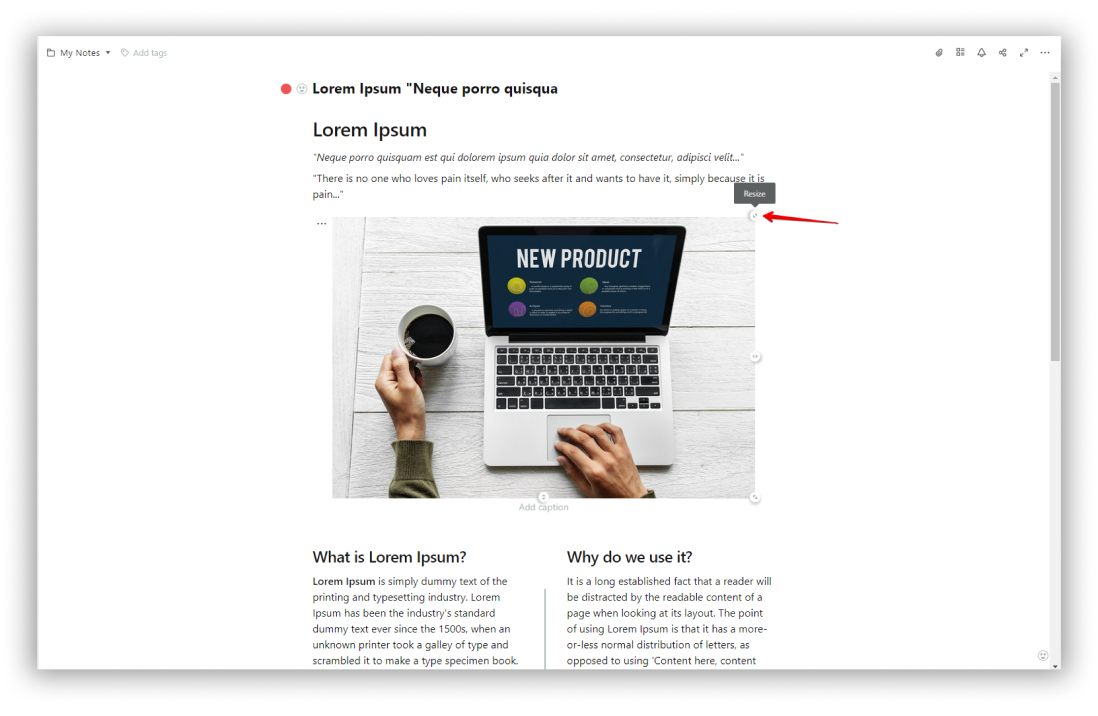
Resize images #
- Drag the upper-right corner and resize (all proportions will be preserved).
.png)
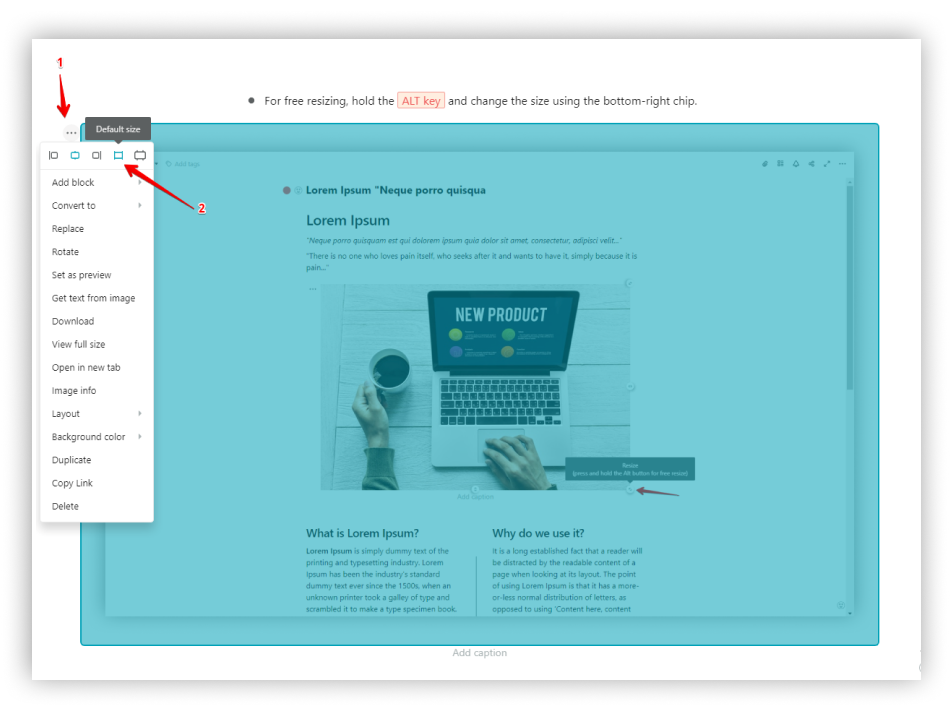
- For free resizing, hold the ALT key and change the size using the bottom-right chip.
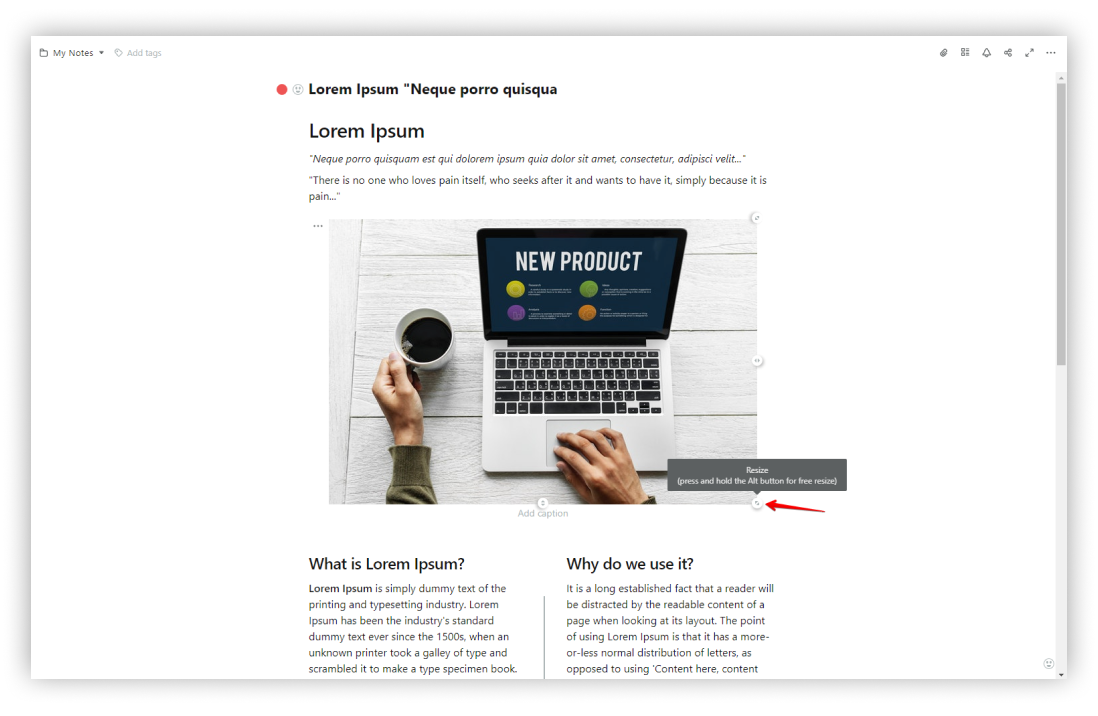
☝Note: To return the image to its original position, click on the block menu and select the Default size icon.
Set as preview #
To set the picture as a preview, select Set as preview.

☝ Note: Preview pictures are synced between clients. This means if you have installed previews in the web version, then the same preview will be in mobile clients.
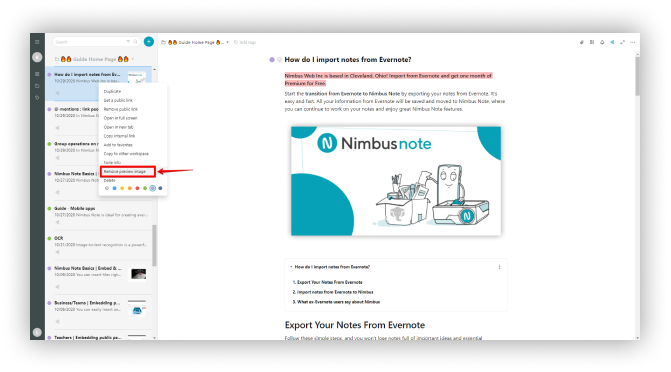
Lifehack #
Want to delete a preview picture? Right-click on a page in the list and select Remove preview image.
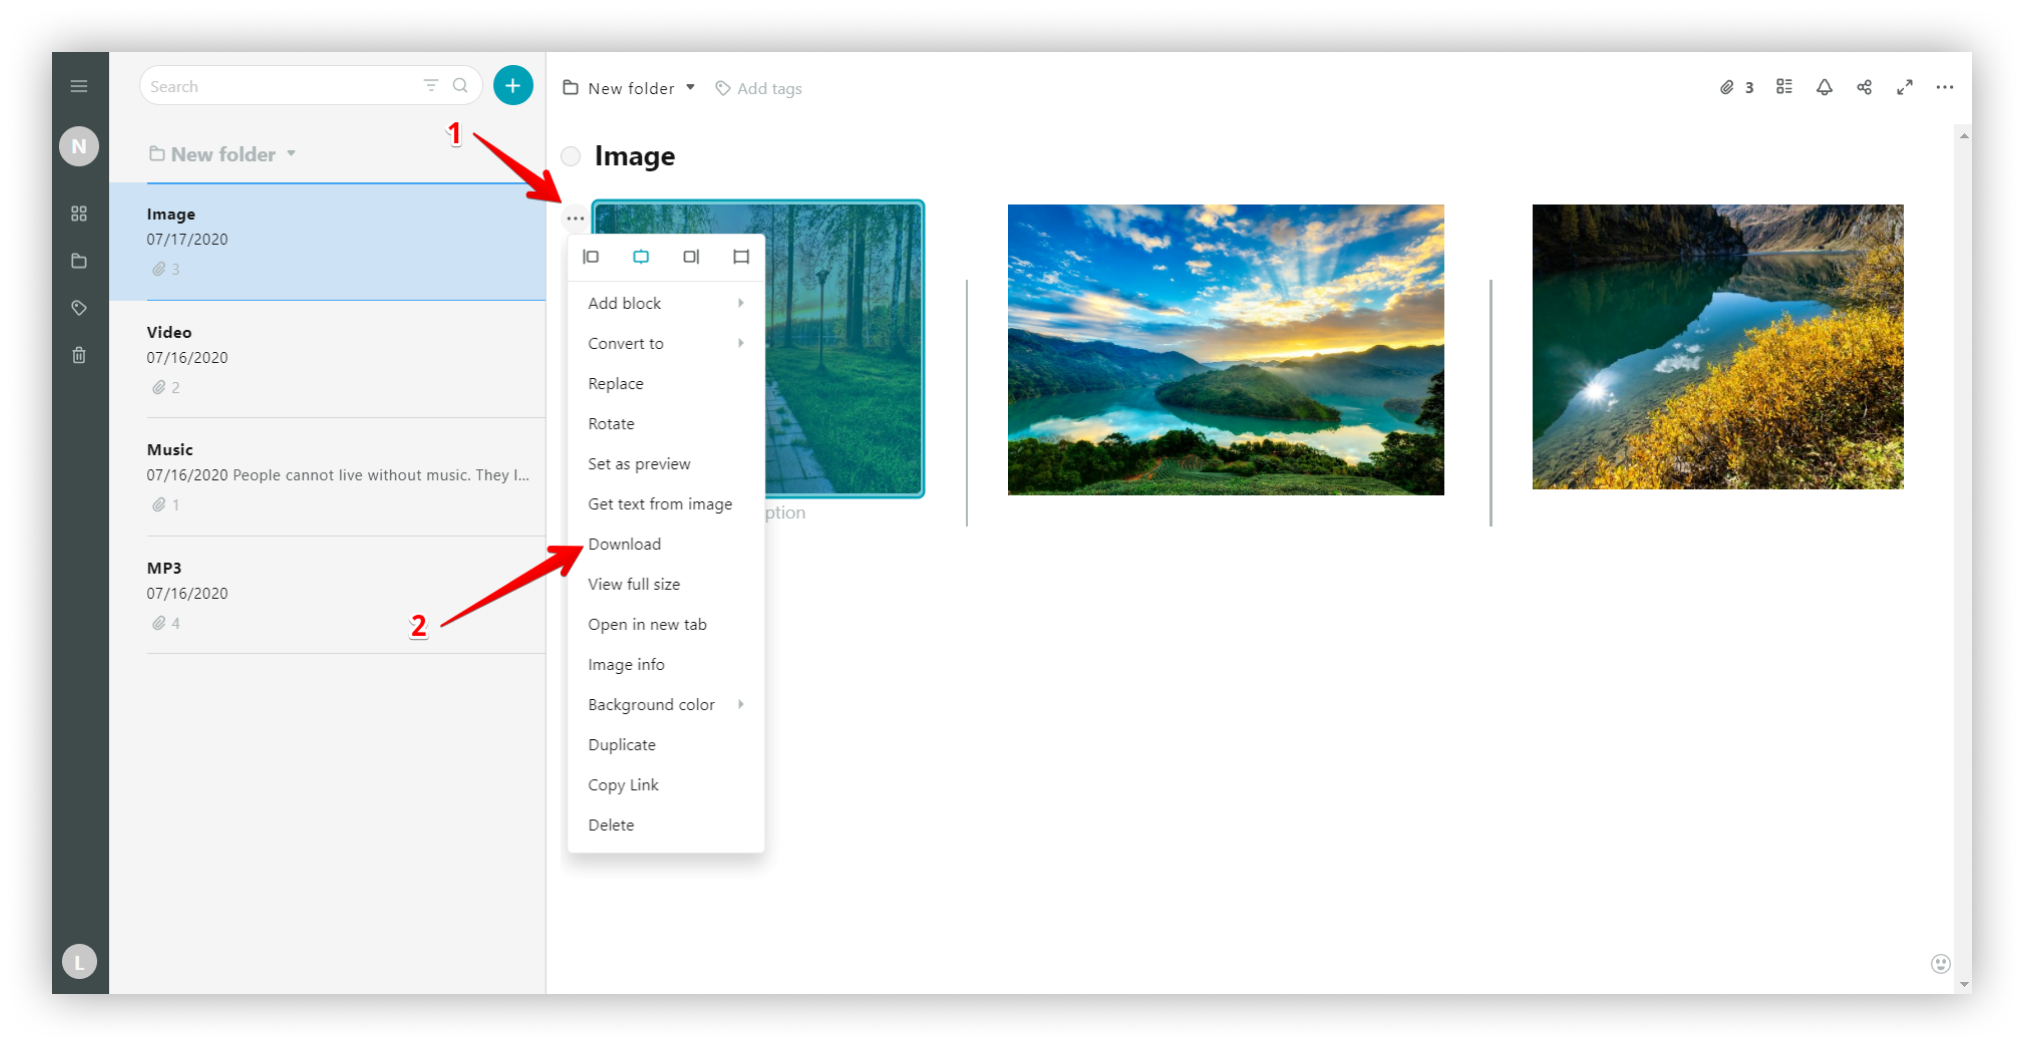
Download #
Download pictures into your computer – for this, select Download.
.png)
View Full size #
View pictures in full-screen mode.

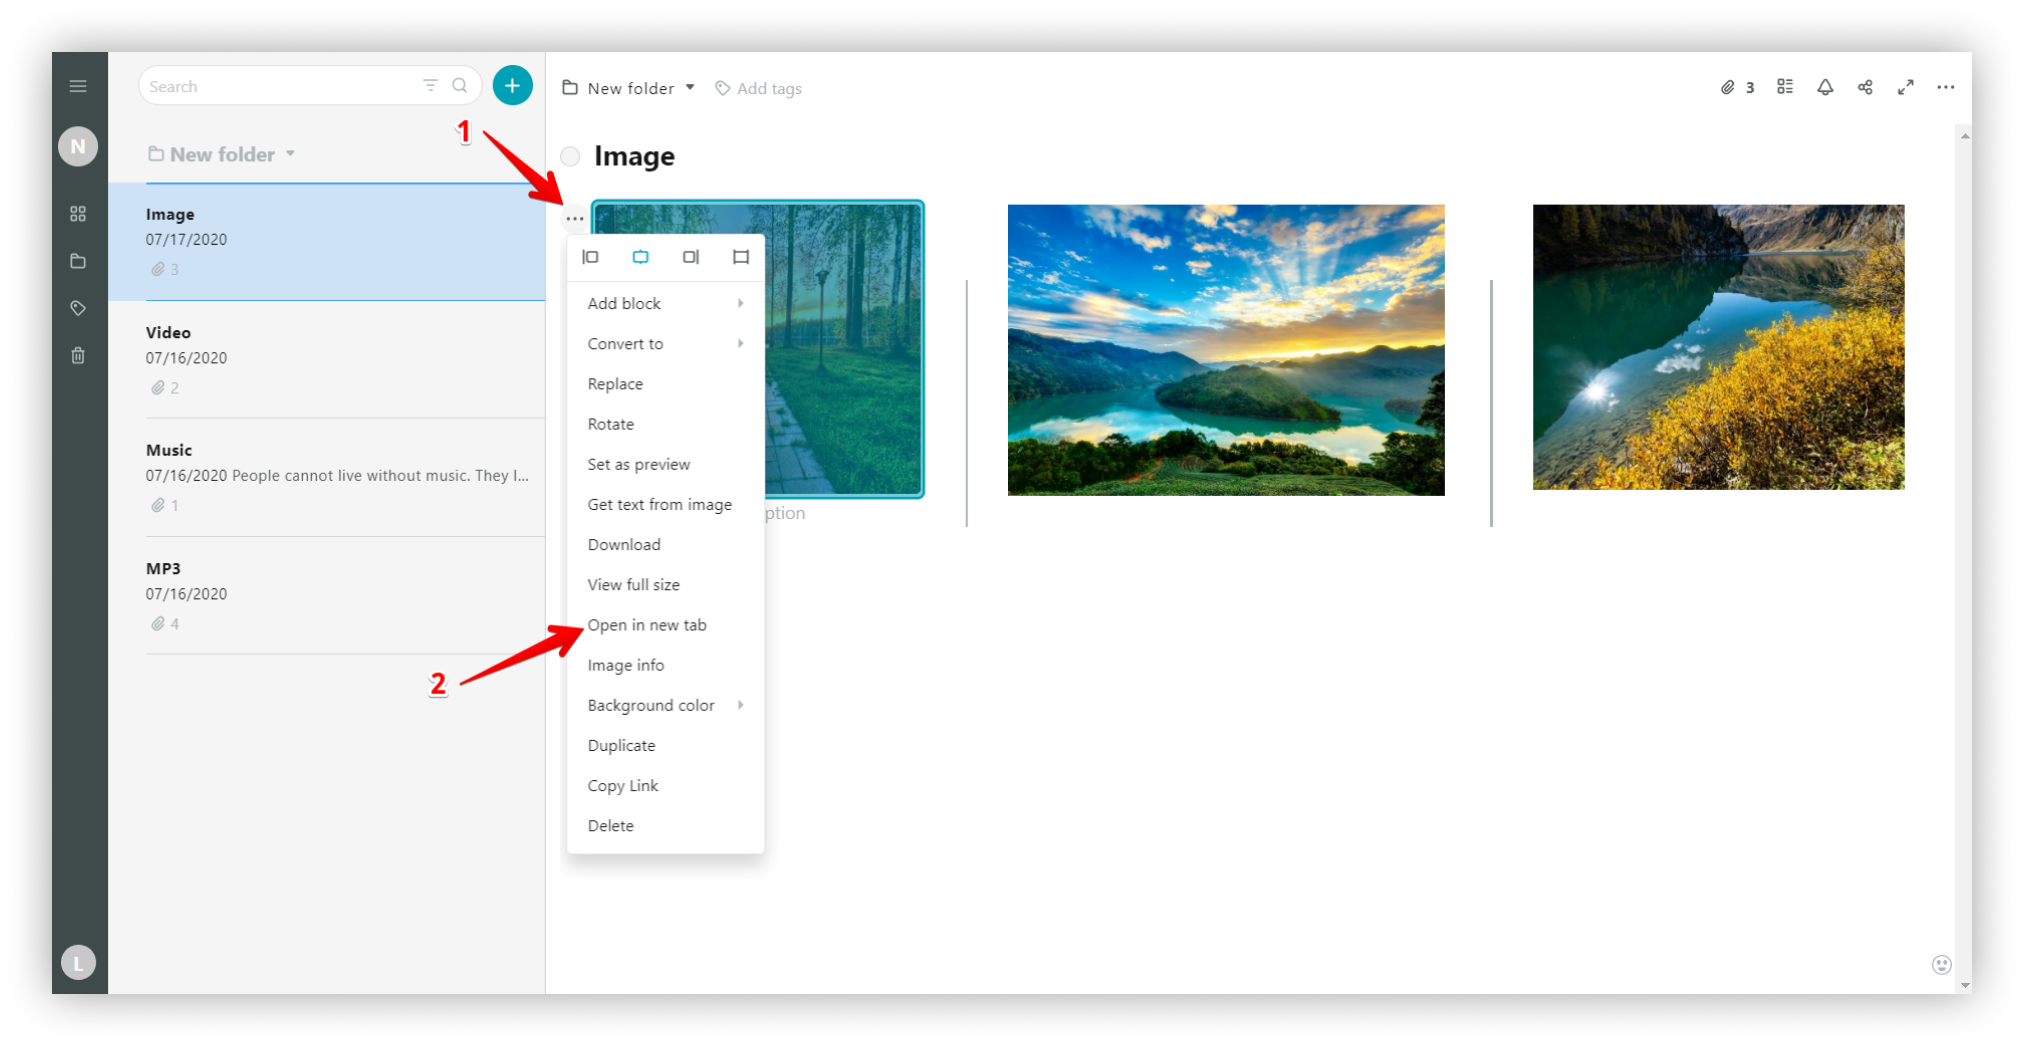
Open in new tab #
To open the picture in a new tab, click on the three dots menu and select Open in new tab.
.png)
Layout #
Shadow effect for image
In Nimbus Note, you can highlight not only text, but also pictures and video. This is possible with the help of Shadow effect.
- Click on the picture menu.
- Select Layout.
- Activate Shadow for image.
Full width #
Click on Layou/Style in the object menu and activate Full width.
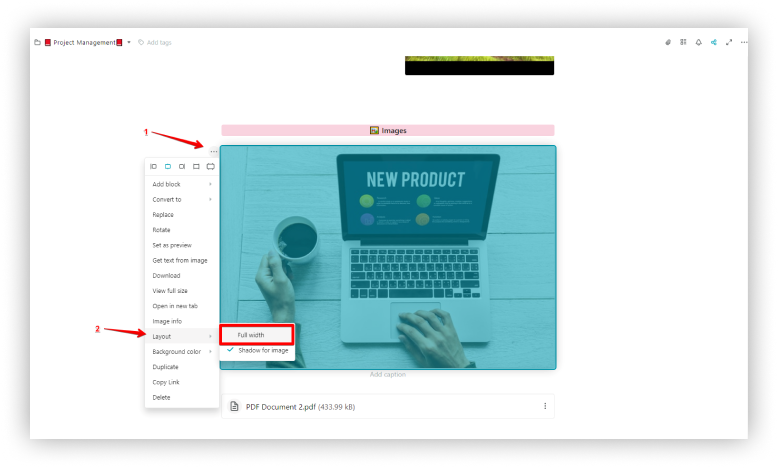
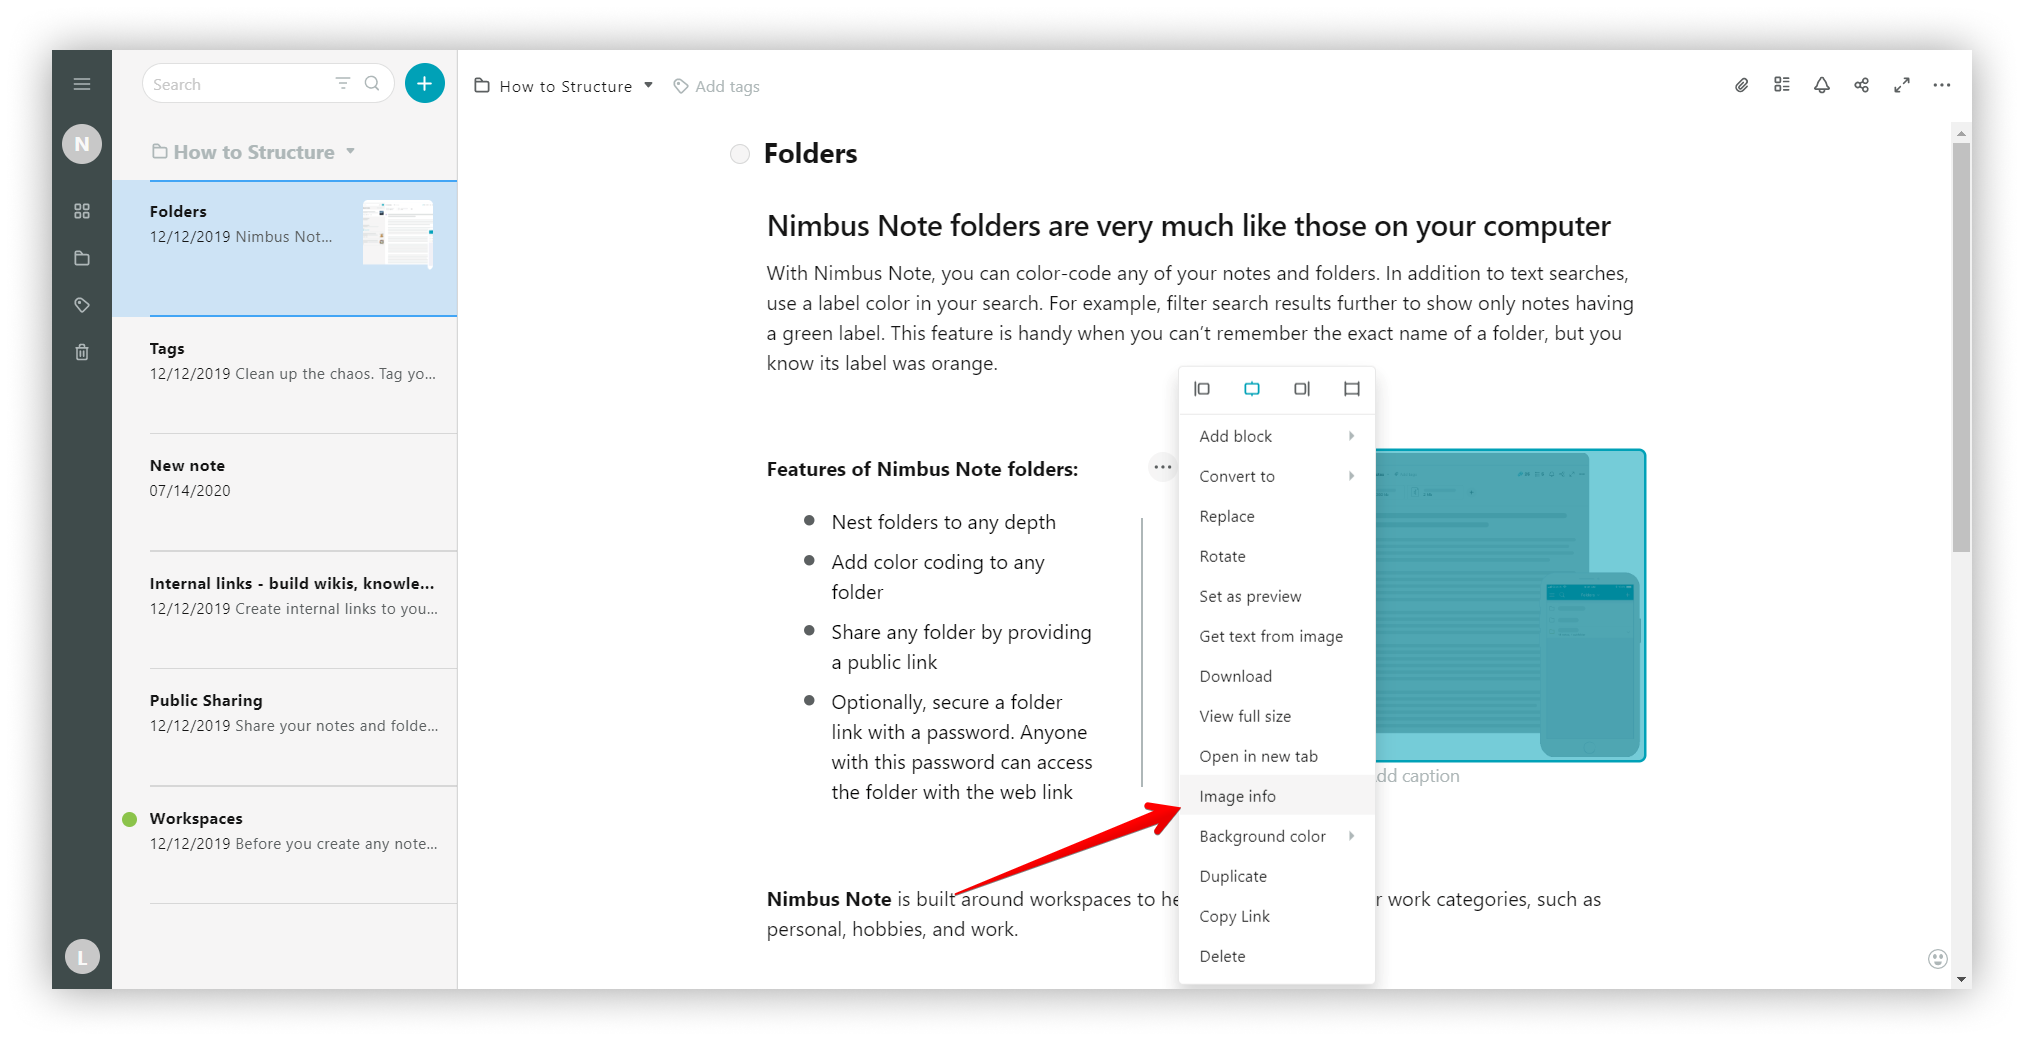
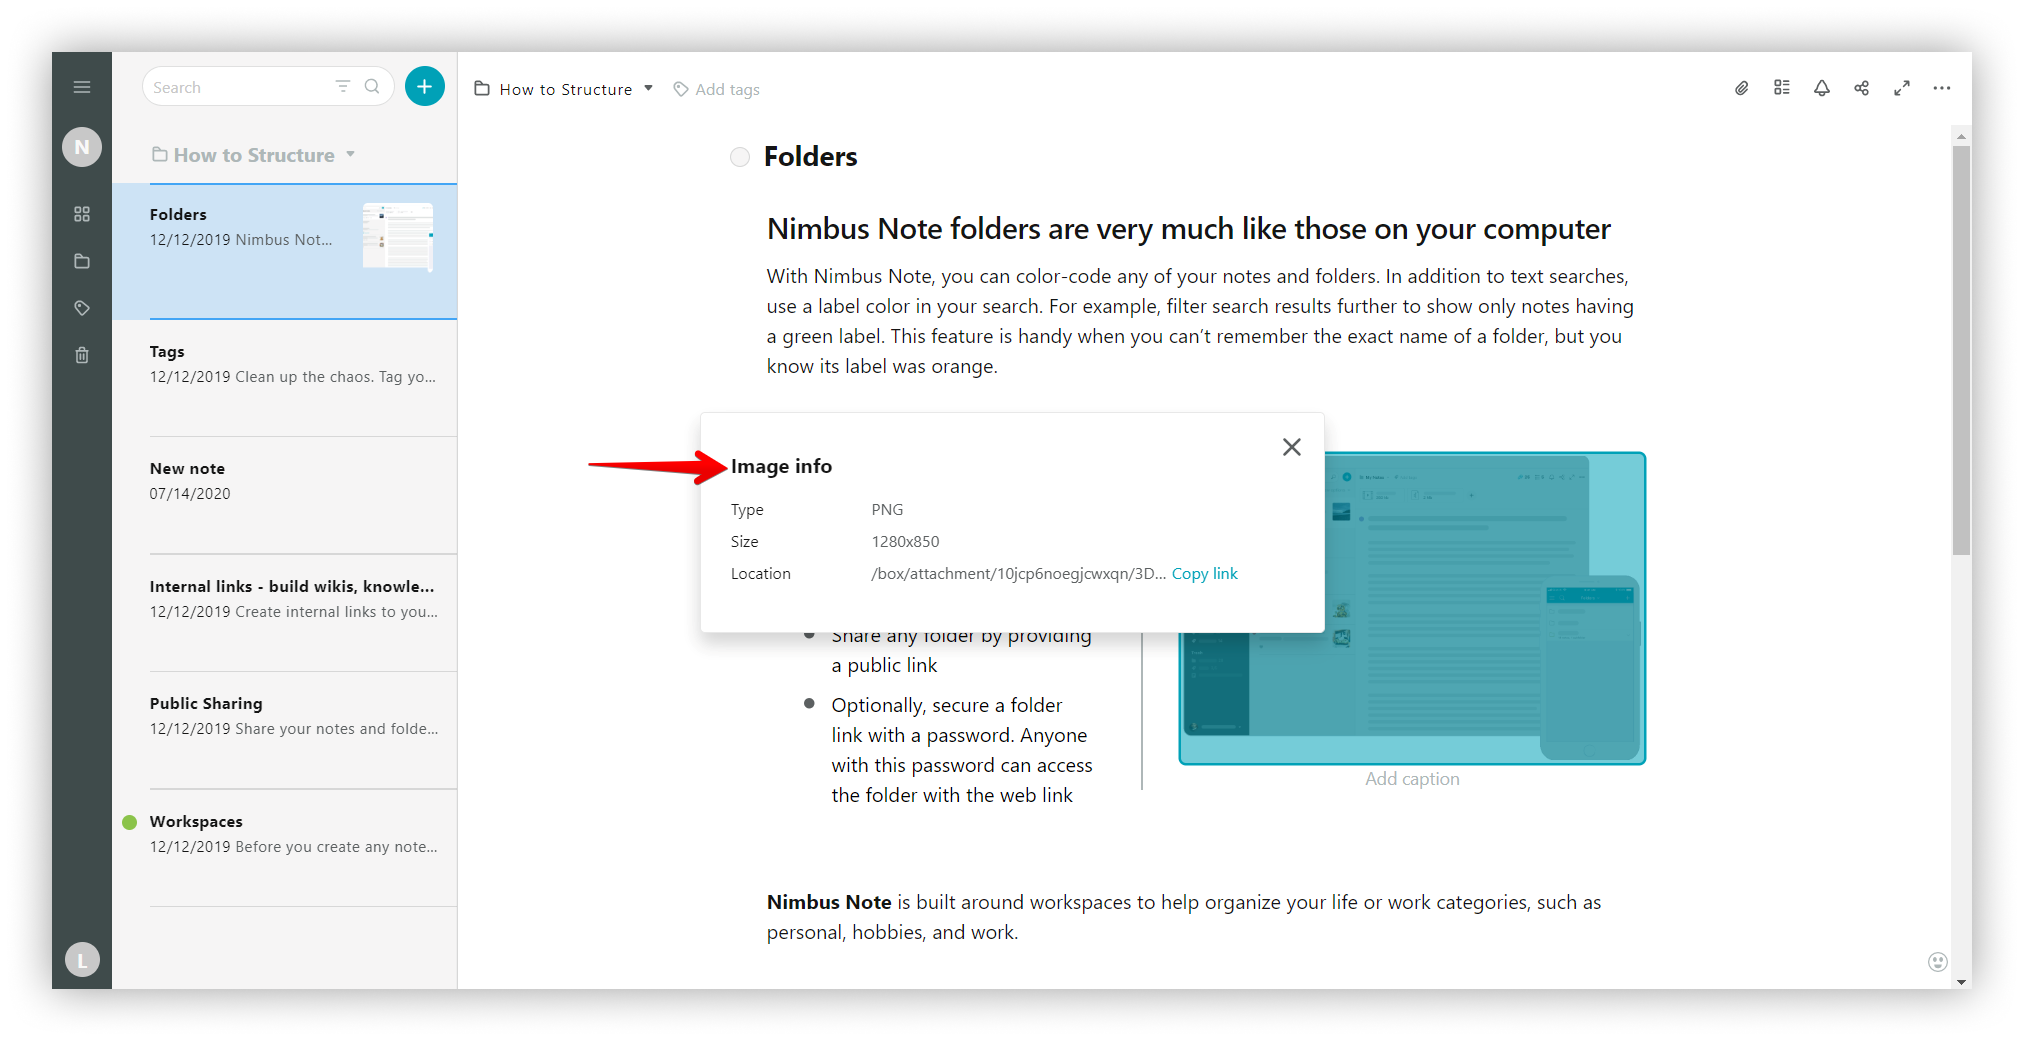
Image info #
You can see information about a photo, such as its type / size / location. Access by clicking on Image info.
.png)
.png)
Background color #
For each picture you can set the background color.

Duplicate #
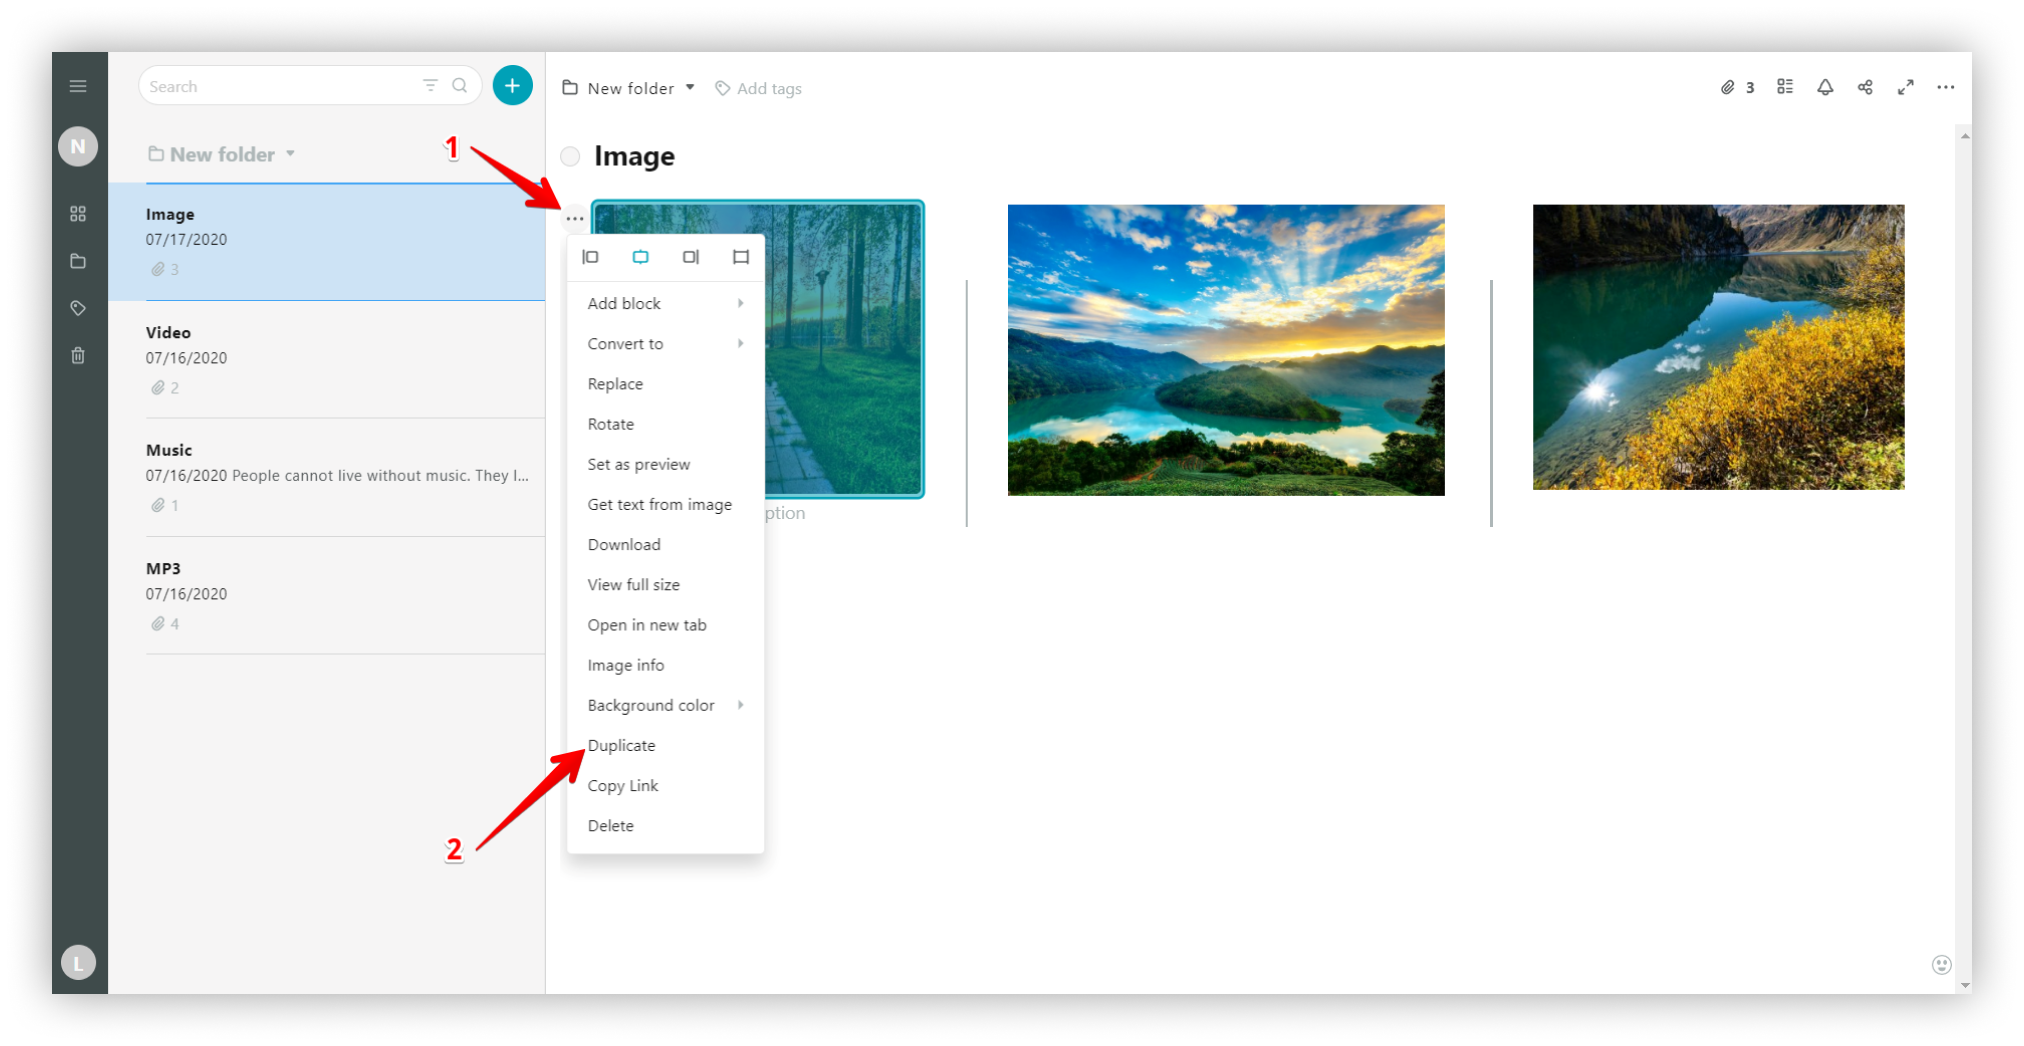
Duplicate a picture by clicking on the three dots menu and selecting Duplicate.
.png)
Delete #
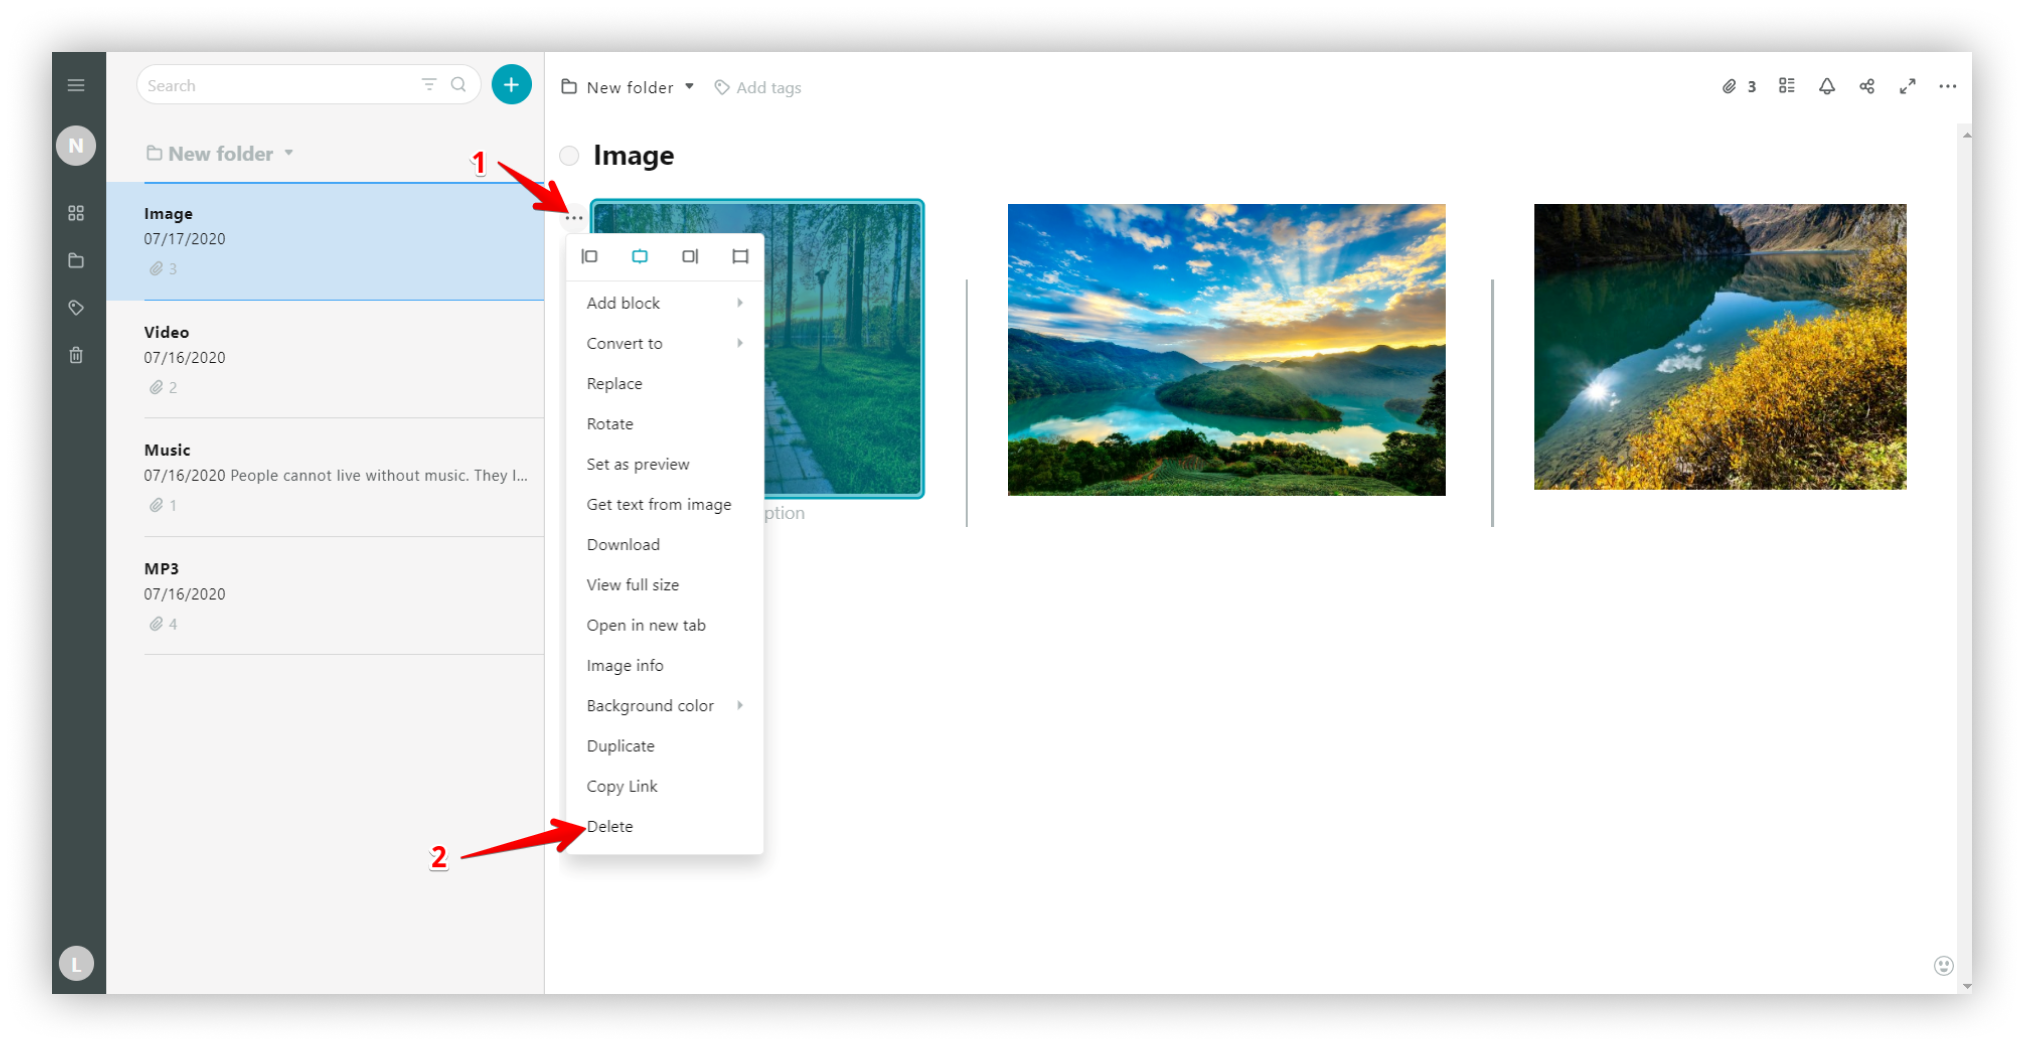
To delete a picture, select Delete.
.png)
Add a caption #
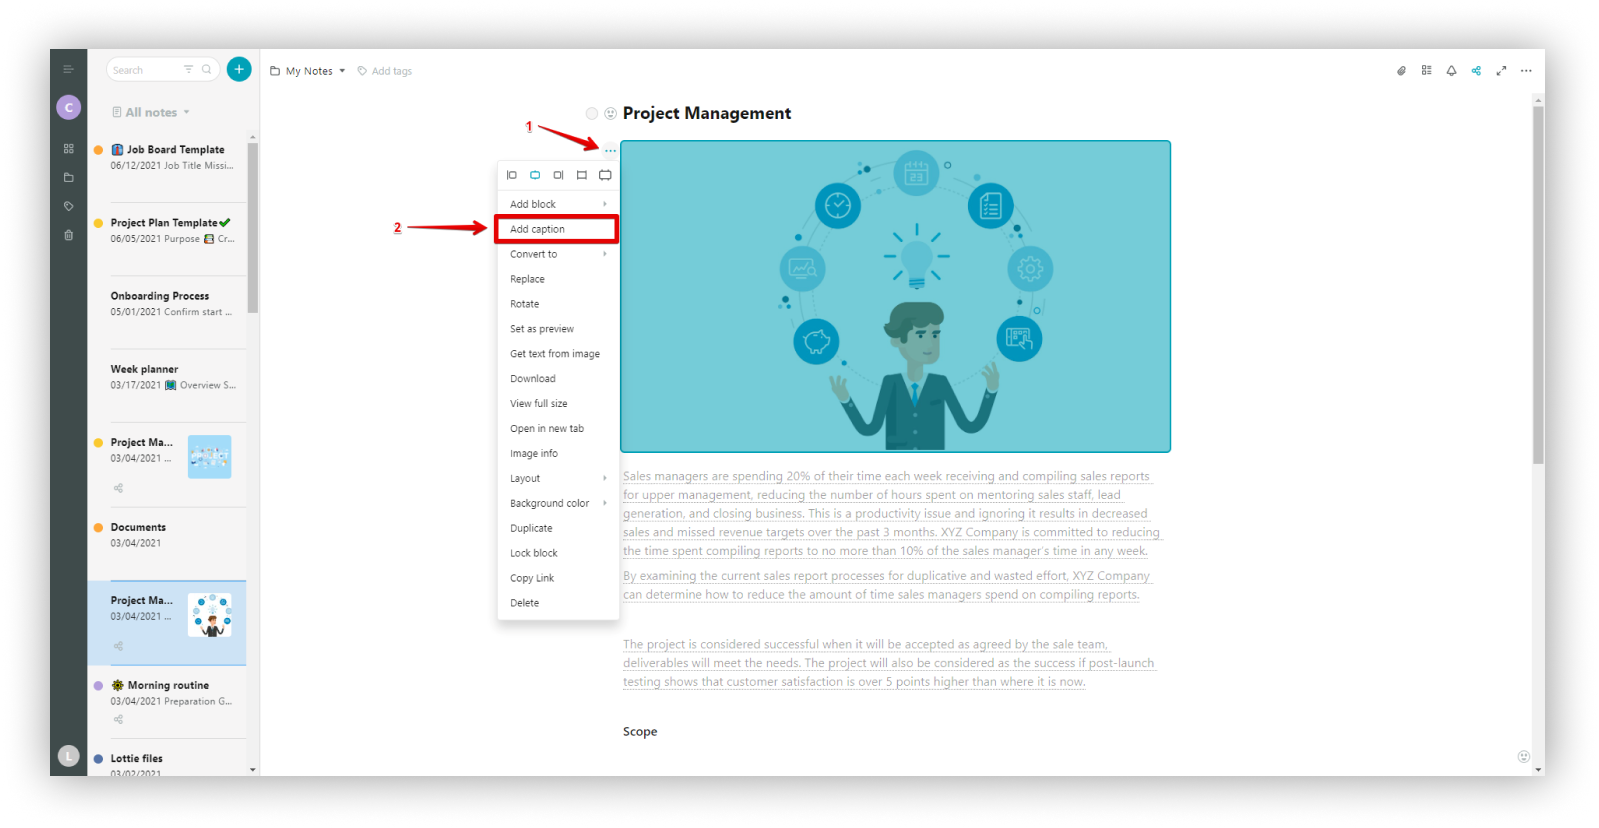
You can add a description to any picture by clicking on the three dots menu and selecting Add caption.
.png)