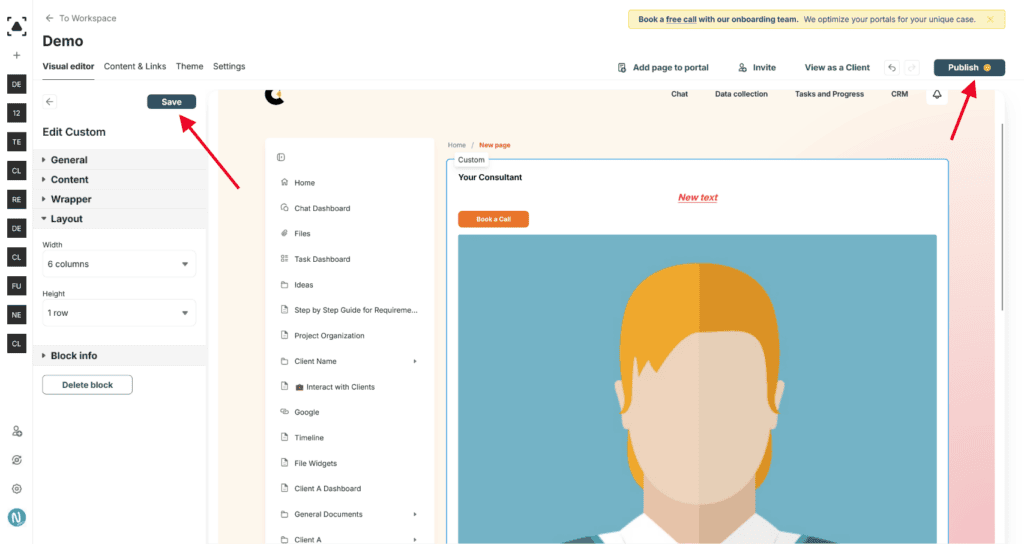
Using the Custom Widget, you can design a custom block of any complexity on the portal. These widgets are ideal if the ready-made widgets are limited for your case. Let’s try to add and set up a custom widget.
Adding a Widget to a Portal Page #
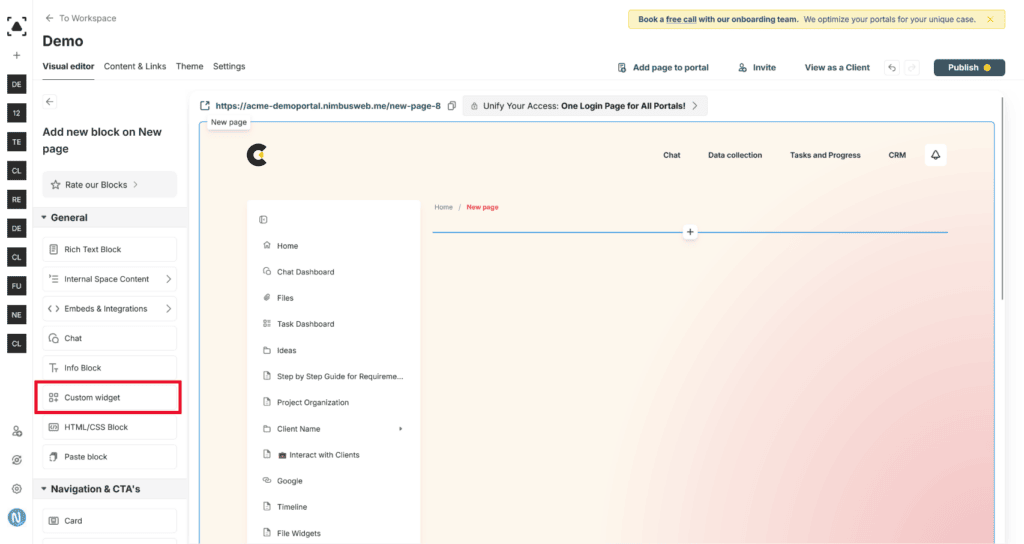
1) Open the page where you want to add a custom widget. Click on the “Add Block” button on the left sidebar. Scroll down the list of blocks and select “Custom widget”.
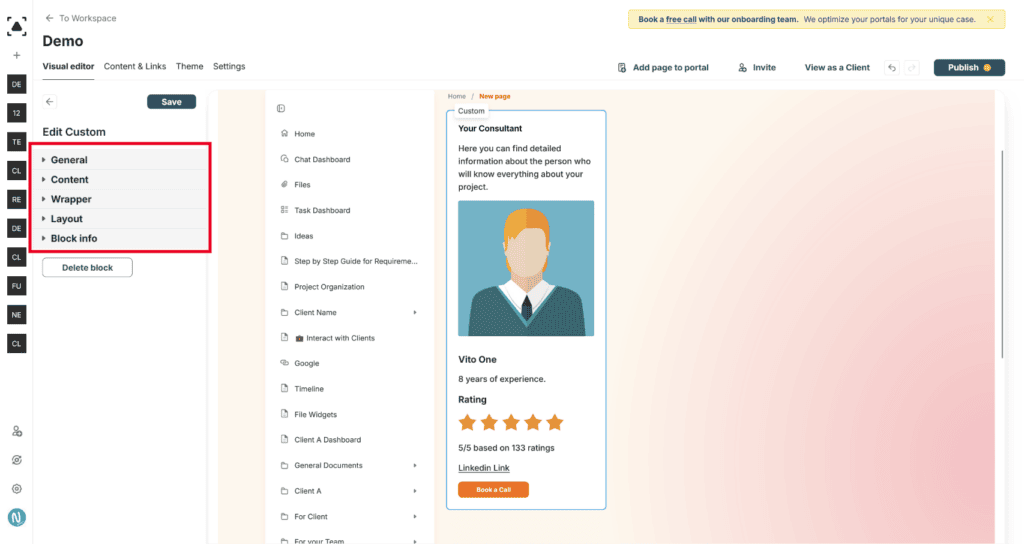
2) The widget settings consist of several sections:
- General – Here you can change the widget’s name.
- Content – Here you can manage the widget’s blocks.
- Wrapper and Layout – Controls the appearance of the widget.
- Block Info – Technical information about the widget.
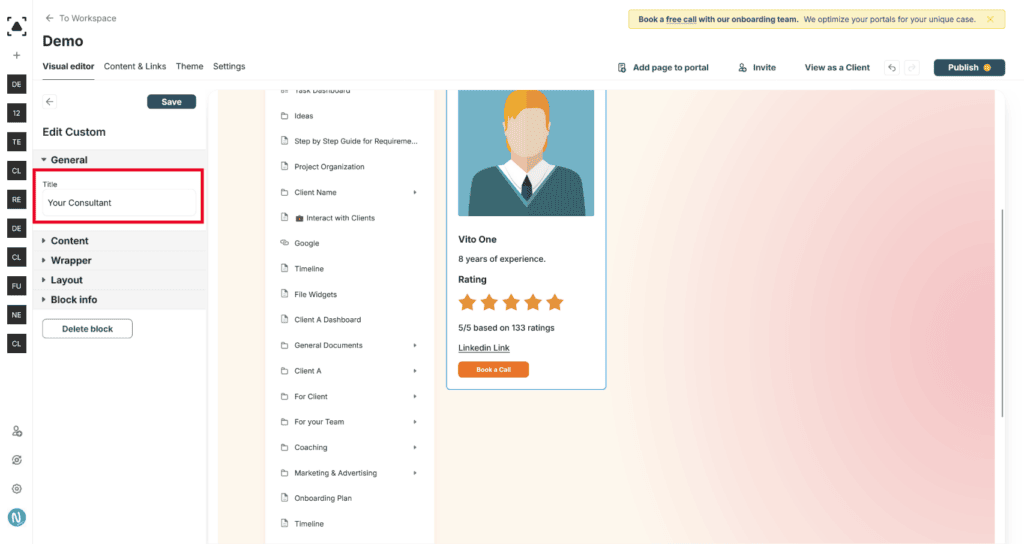
Edit the title of the widget #
Click on the title field in the “General” section of the widget settings. Type in the desired title for your widget.
Adding and Editing Blocks
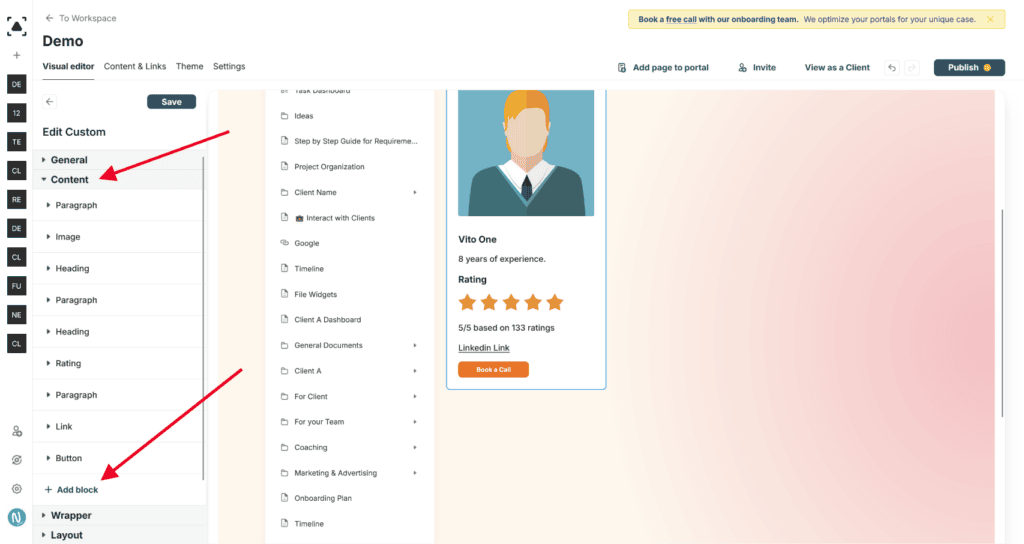
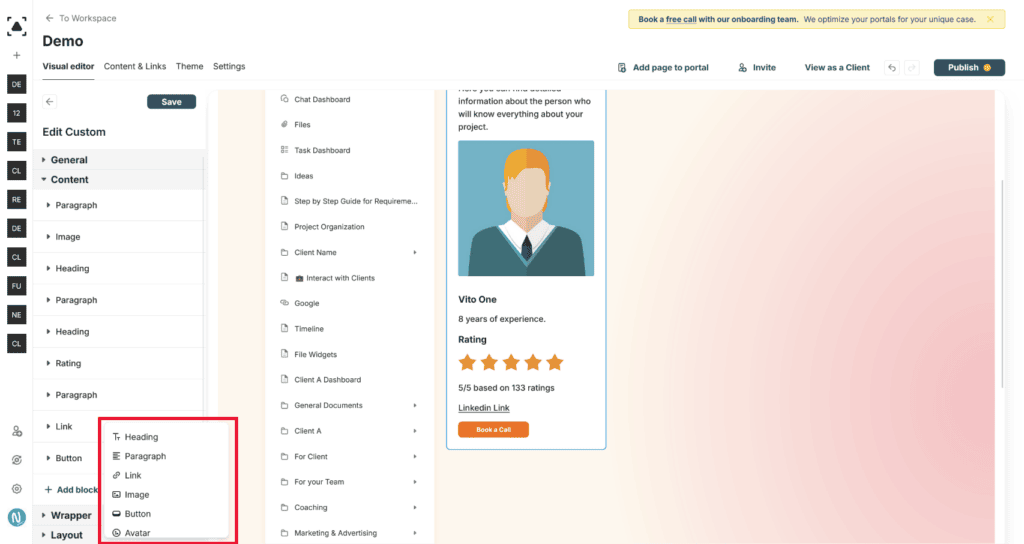
Each Custom Widget is made up of blocks (text, image, rating, etc.). To add a new block, click on Add block and select the desired block from the list.
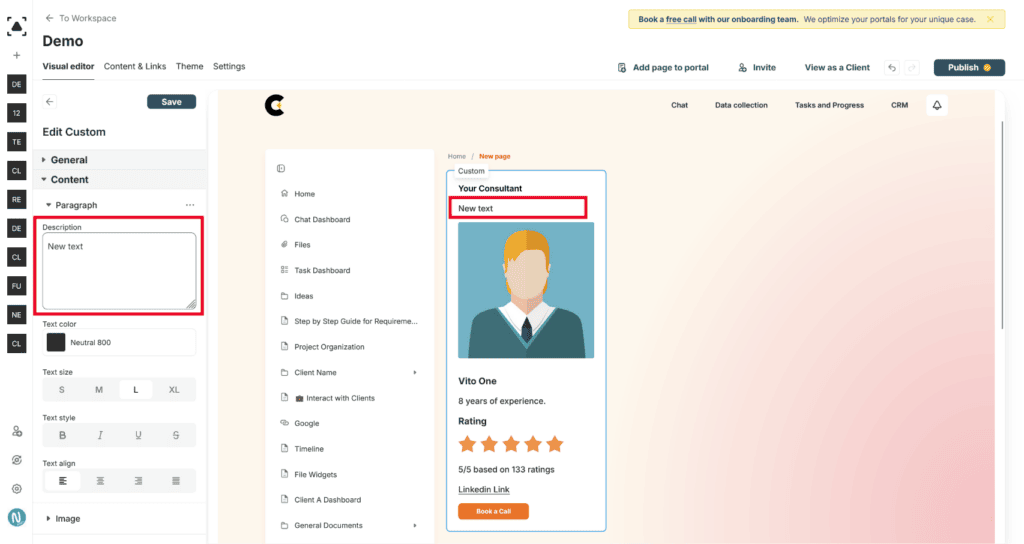
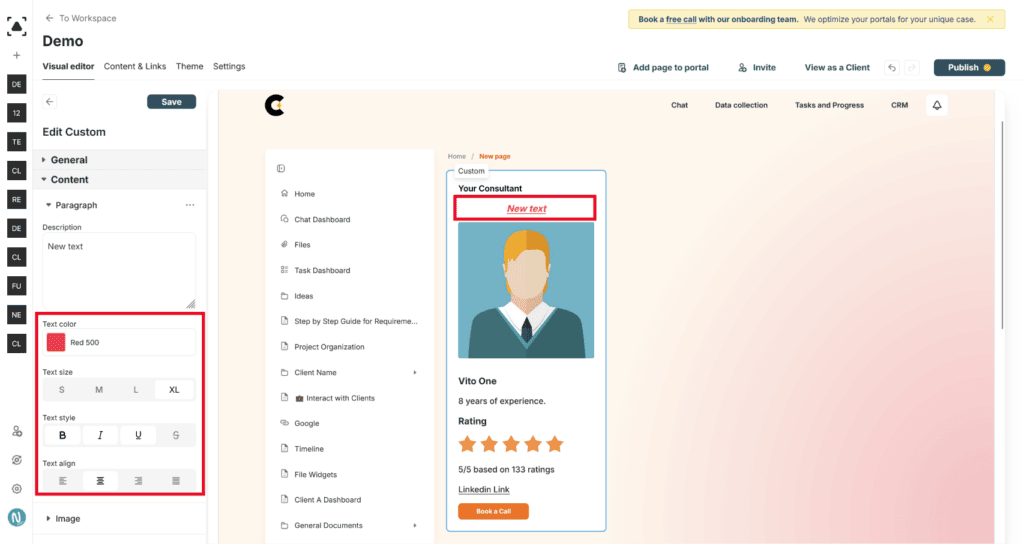
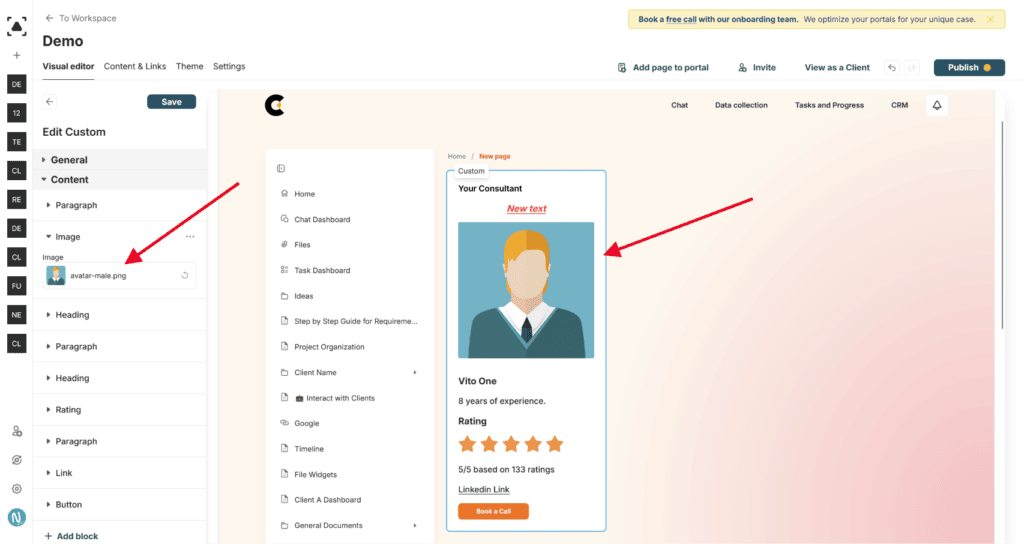
After adding a block, you can edit its content, for example, change the text and its formatting in a text block.
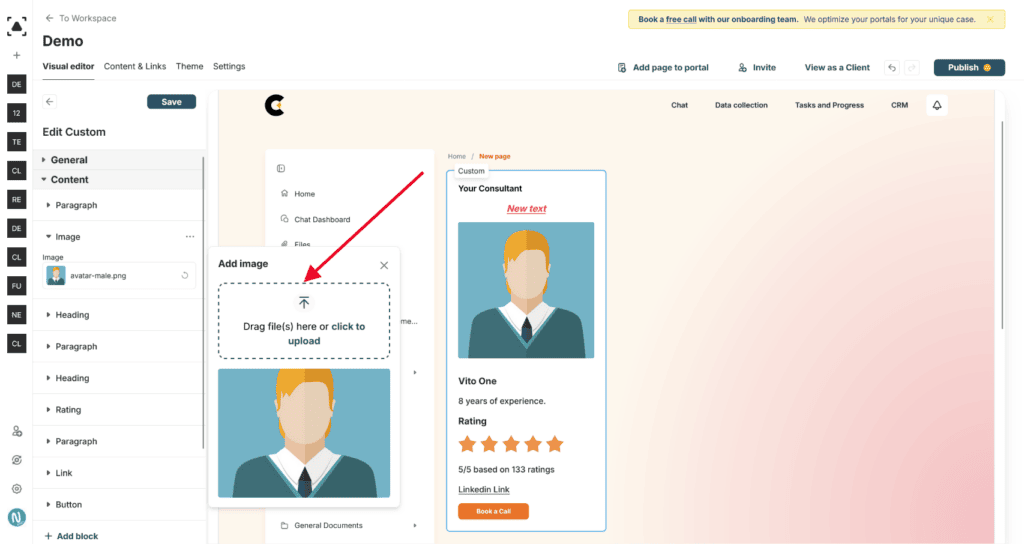
Or, for instance, replace the image in an image block.
Deleting or Hiding a Block
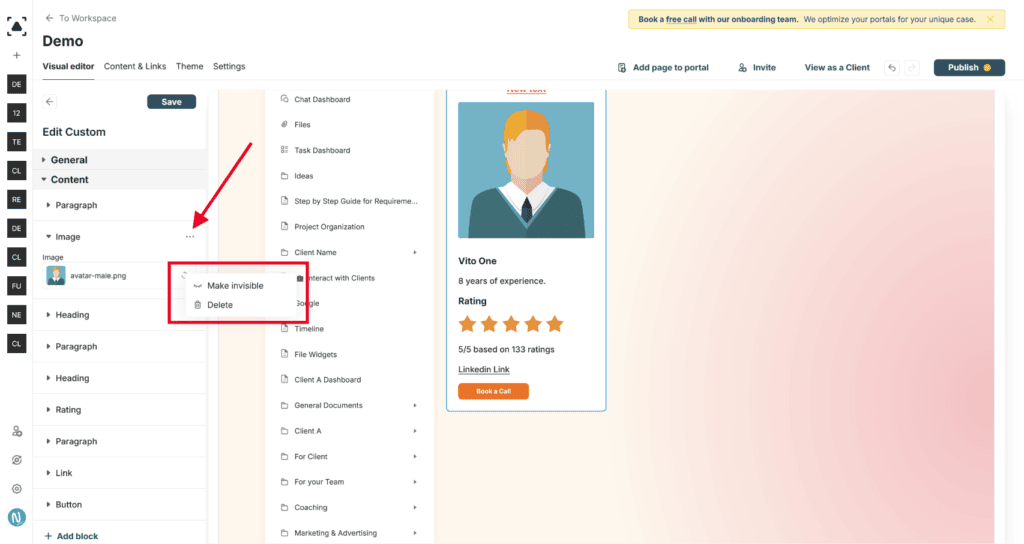
If you want to temporarily hide a block, you can do so through the block’s menu. You can also delete an unnecessary block using the same menu.
Moving Blocks
You can move blocks using drag-and-drop (DND). Click on the icon next to the desired block and drag it to the needed position.
Change the layout of the widget #
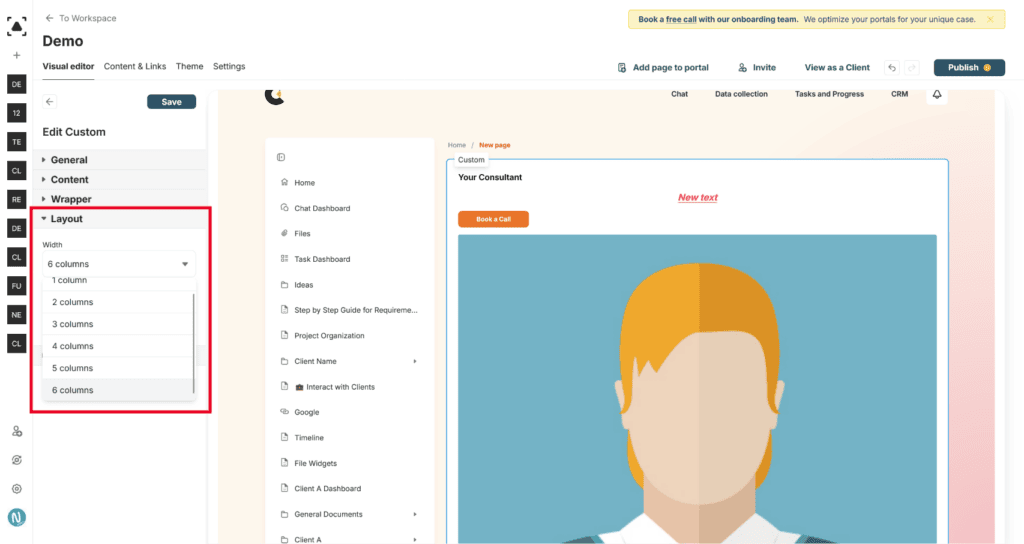
Click on the “Layout” dropdown menu in the “General” section. Select “6 columns” for a wider layout.
Managing Widget Background and Padding
Through the Wrapper section, you can manage the block’s background, adjust the padding, and disable the block’s title if needed.
Saving and Publishing Changes
Once you’ve made your changes, don’t forget to save them. After saving, you can publish the changes to make them visible on the portal.
