AI Agents are small applications that can perform various tasks using modern AI technologies. These can include text generation, analysis of textual and visual information, text translation, data extraction, and much more.
At the core of the application is a condition (prompt) that you provide and that needs to be fulfilled.
You can set the prompt/condition using simple natural language. For example: “Translate the text from English to German” or “Analyze the image and describe the processes taking place in it.” Our agent will use AI to understand what needs to be done and solve the task accordingly.
It’s important to note that the apps are tightly integrated into the Fusebase service, which allows you to:
- Use folders, pages, and files added to your organization as input for the apps
- Add apps to automations and build full-fledged workflows
- Generate content that can later be added to Fusebase pages and portals
- And much more
Creating Your First AI Agent #
Let’s start by creating a simple agent that allows you to translate input text from one language to another.
It’s important to note that apps can be used not only by you, but also by:
- Members of your organization
- Clients of your portal
- Visitors to your website (you can create a public embed)
1) Go to the Agents section and click “Add new.”
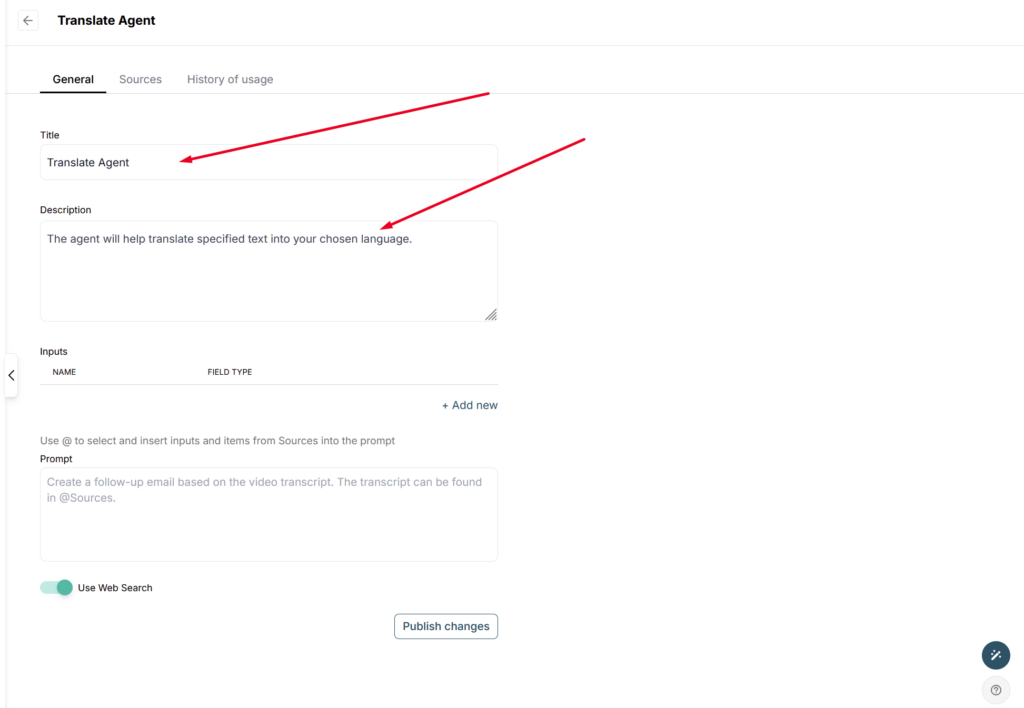
2) In the window that appears, you’ll see the settings for your new agent. In the Title field, enter the name of the agent.
In the Description, briefly explain what your app does. This helps other members and clients understand its purpose.
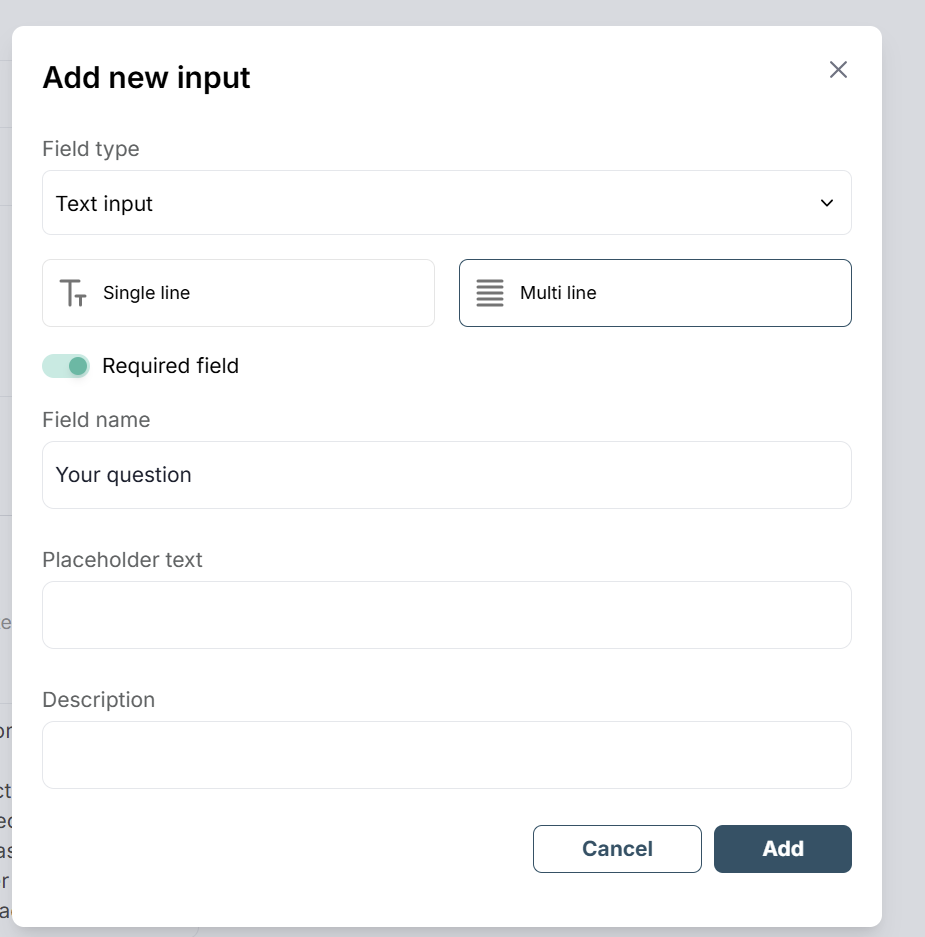
3) Next, it is necessary to create a mini form through which users can add text for translation and specify the desired language.
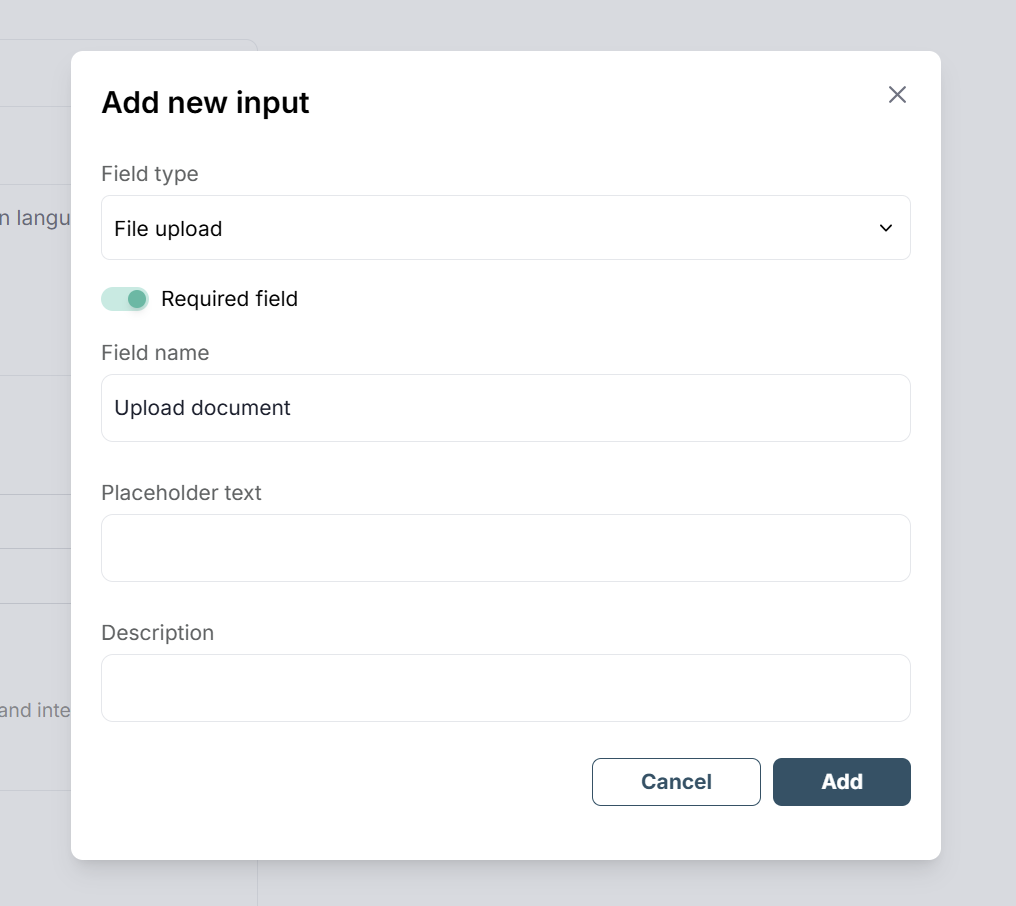
In addition to text fields, you can also allow users to upload a file. For example, when using the app, a user can upload a document and have it translated. We support various file formats — from images to documents.
4) Next, you need to define what the app should do. To do this, simply write the required conditions (prompt) in natural language.
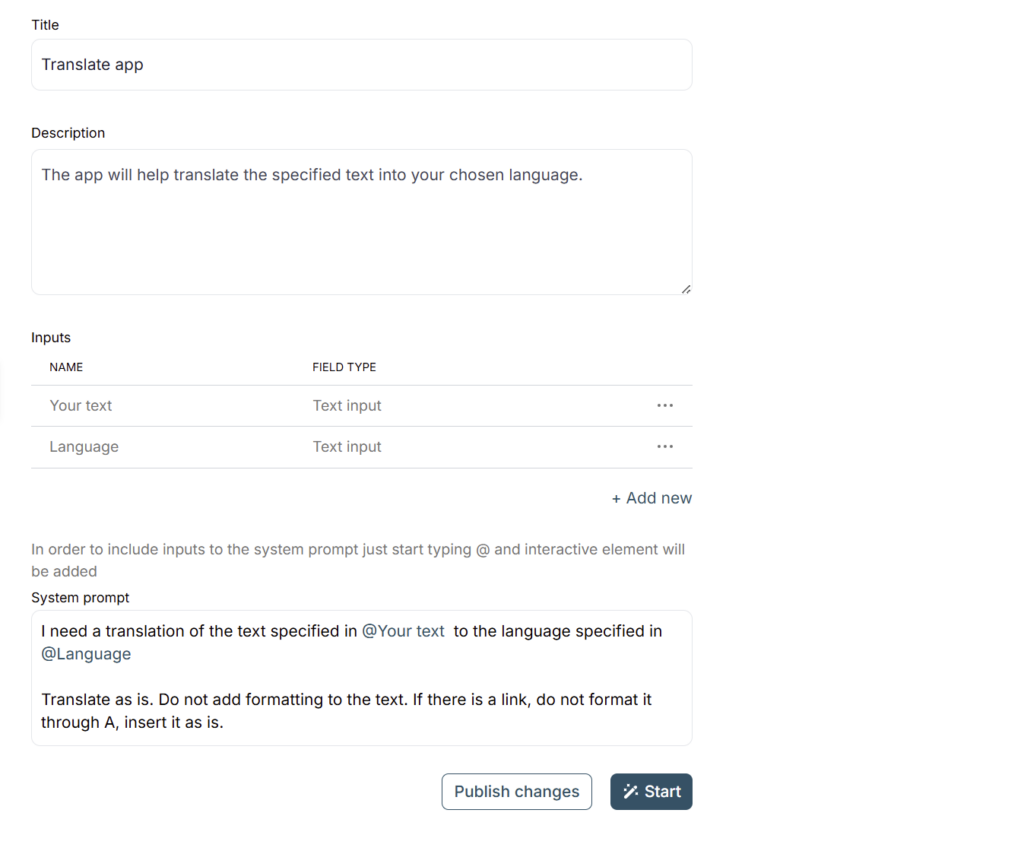
Since we’re using a form, you’ll need to reference the form fields directly in the prompt. To do that, type @ and select the relevant field from the list.Since we’re creating a translation app, your prompt might look something like this:
I need a translation of the text specified in @Your text to the language specified in @Language
When writing your prompt, don’t forget to select the necessary fields from the form.
It is also possible to immediately add several additional conditions. For example, you can ask not to add your own comments, maintain a neutral tone, and not add extra formatting to the text.
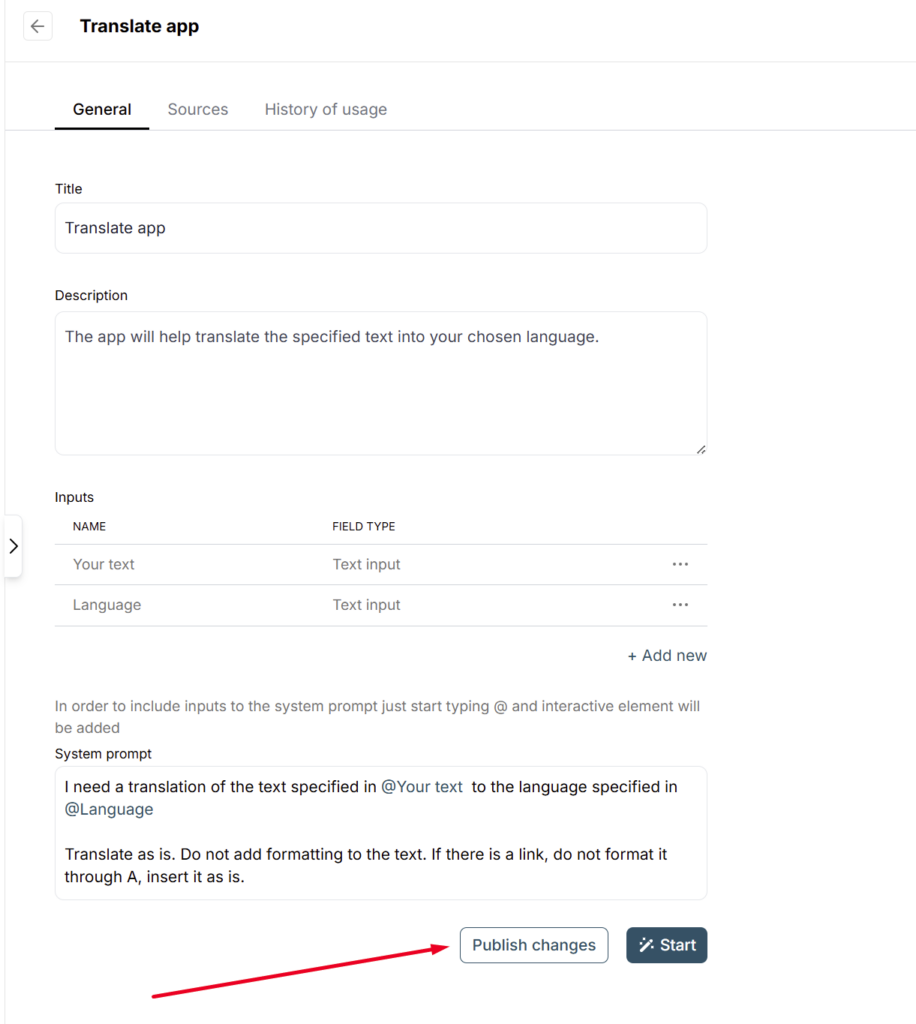
5) Next, click Publish changes to save and publish your app, making it available to users in your organization.
Now let’s try out our app. Click Start, enter the text you want to translate, and let’s try translating it into French.
As you can see, it’s all very simple. You can create these mini apps for any tasks you need — from text generation to image and document analysis.
Using Sources in AI Agents #
Sources allow your app to reference and work with existing content from your Fusebase organization — such as pages, folders, or files.
This means you can build apps that, for example:
- Analyze the content of a specific document
- Summarize information from a page or folder
- Extract key insights from uploaded or linked materials
- Use workspace pages as templates (e.g., for Proposals or Reports)
- Use workspace knowledge to create an AI assistant
Let’s try creating an AI app for Customer Success that can answer questions based on the content of your knowledge base.
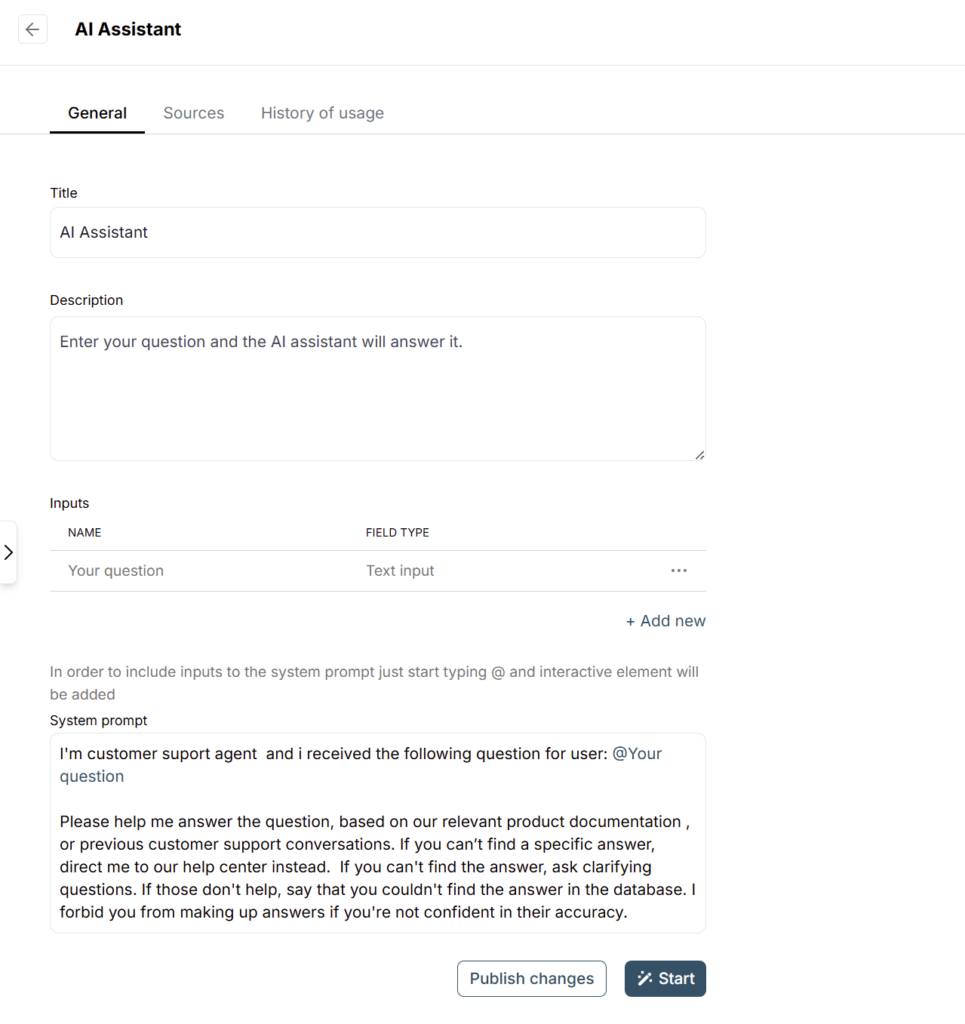
1) Create a new app and specify the name and description.
2) Next, add a field where your team members will enter their questions.
3) Now you need to define the prompt, specifying what the agent should do — namely, answer the questions entered in the field. Don’t forget to specify that the questions should be taken from the Your question field. You can also add a set of rules — for example, instruct the assistant not to make up answers if it’s unsure of the correct response.
Prompt example:
I’m customer suport agent and i received the following question for user: @Your Question Please help me answer the question, based on our relevant product documentation. If you can’t find a specific answer, direct me to our help center instead. If you can’t find the answer, ask clarifying questions. If those don’t help, say that you couldn’t find the answer in the database. I forbid you from making up answers if you’re not confident in their accuracy.
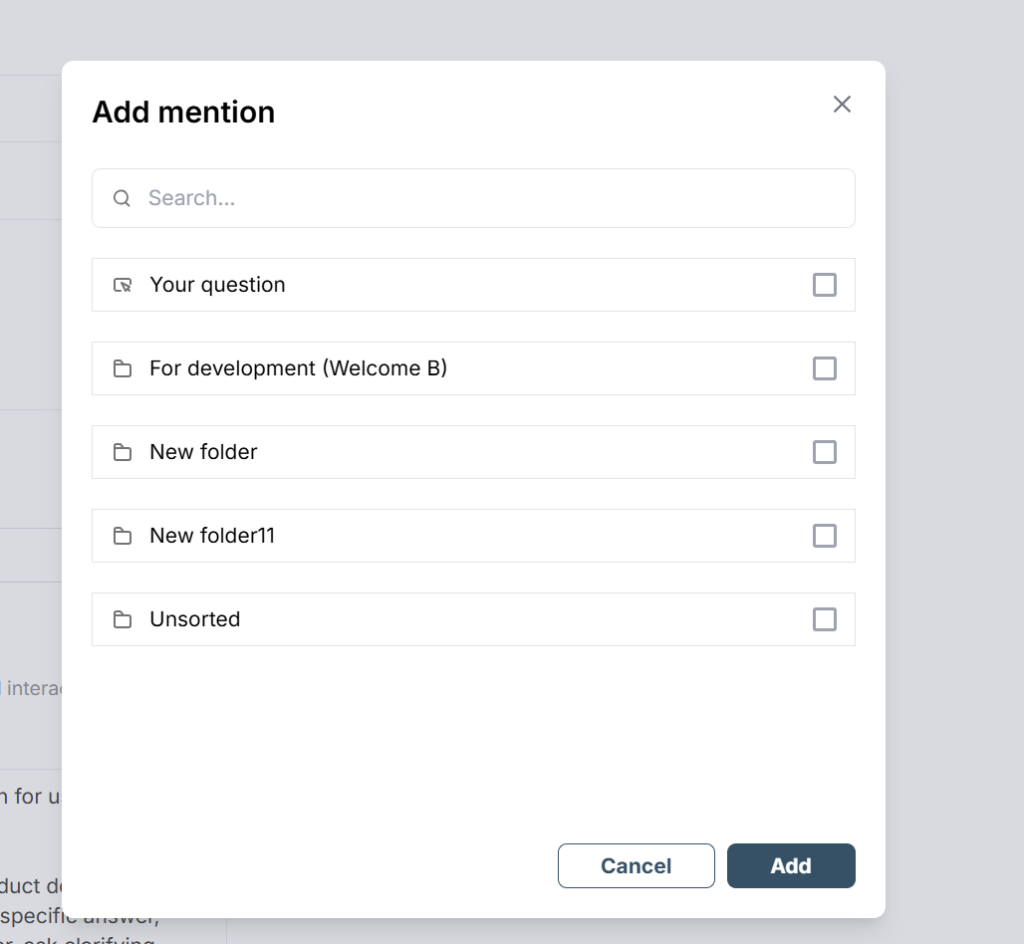
Next, you need to go to Sources and select the folders or pages that the assistant will use to generate answers.
It’s important to note that you can also reference specific folders or pages from Sources directly in the prompt if needed. In the case of the assistant, this isn’t necessary — but, for example, you might want to point to a specific page (to use it as a template) or a particular folder. To do this, simply type @ and select the relevant item from the list.
Now let’s publish the changes and launch our app. Let’s test it with a simple question that’s often asked in our support.
As we can see, the answer is accurate and the app works as expected.
Integrations – connect your favorite services to agents. #
Our agents not only allow you to search the Internet, your knowledge base, or generate new content, but also fully integrate with the services you use. This way, our agents become a true personal intelligent assistant, enabling you to easily automate your everyday tasks.
For example, you can send research results to Slack, book meetings in your calendar, create invoices in Stripe, and much more. And all of this without complex interfaces or configurations. You simply give a command, and our agent understands and executes it. Integrations are implemented through a new innovative protocol – MCP (Model Context Protocol).
You can read more about the functionality in this article – https://nimbusweb.me/guides/fusebase-ai/integration-of-ai-agents-with-other-services-google-calendar-slack-stripe-etc/
Web Search Tool #
Our agents can also perform web searches to retrieve relevant information. To do this, you can use the Web Search option.
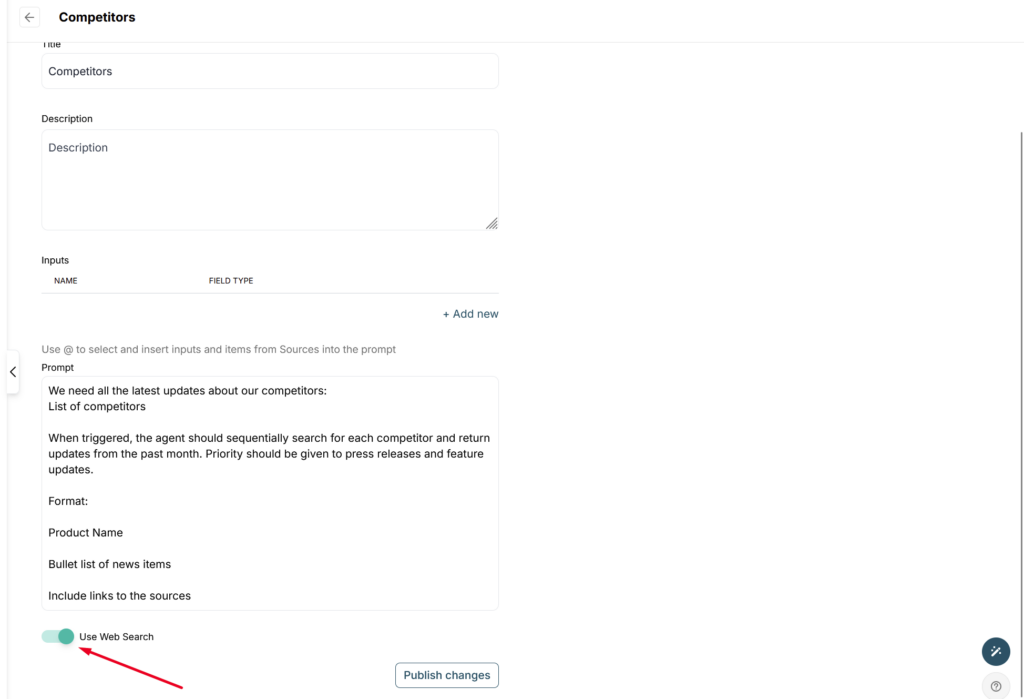
For example, let’s say you need an agent that searches for the latest news about your competitors. You simply create an agent and provide a prompt like this:
We need all the latest updates about our competitors:
List of competitors
When triggered, the agent should sequentially search for each competitor and return updates from the past month. Priority should be given to press releases and feature updates.
Format:
Product Name
Bullet list of news items
Include links to the sources
After that, you just need to run the agent whenever you want to get updated information.
You can also specify a URL directly, and in that case, the agent will search for the required information at that exact address. For example, you can instruct it to look for release updates about Fusebase at https://nimbusweb.me/blog/ — and the agent will go straight to that link.
Integration with Chrome Extension (Include WebPage Content to the agent) #
You can also use agents directly in the browser extension. It provides full functionality — plus an extra feature: the ability to use the content of the currently open page in the agent.
For example, the agent can summarize articles from the current page or help respond to support tickets or emails based on your knowledge base.
To include content from the open page in the prompt, just press @ and select Webpage content.
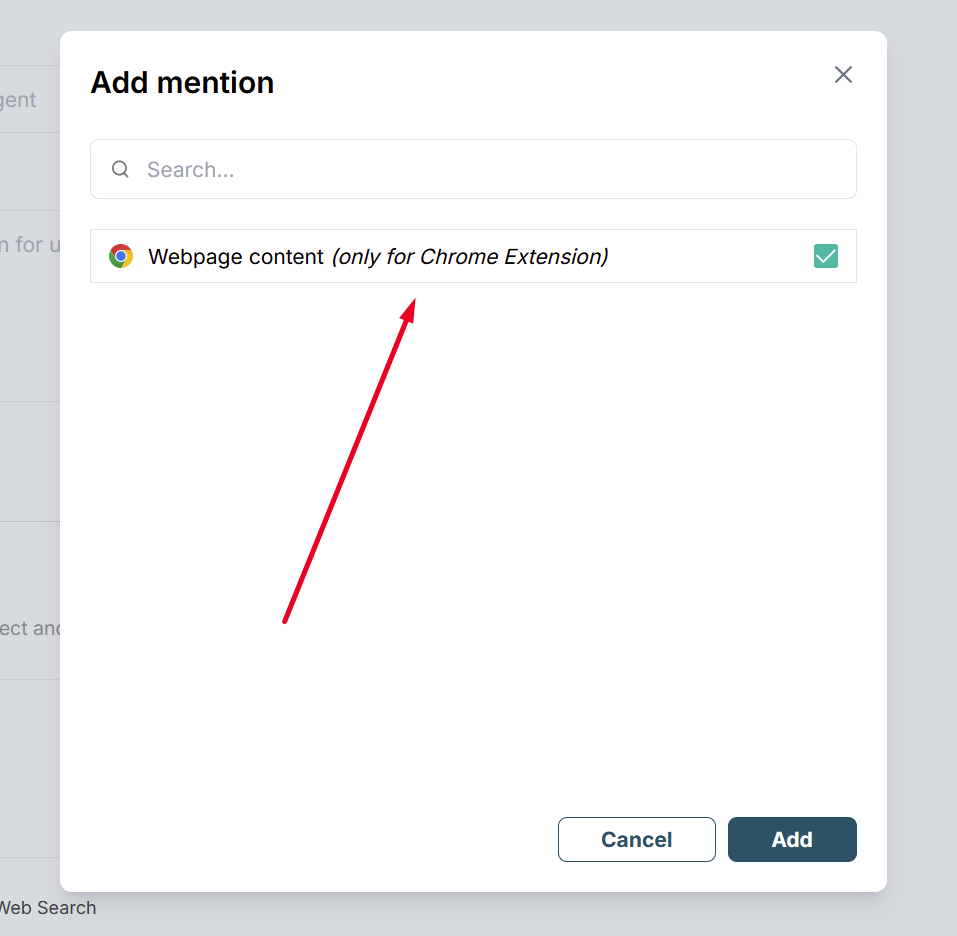
Example prompt: Analyze and summarize content from @Webpage content
In this case, when you launch the agent from the extension, it will automatically summarize the content of the currently open page.
What data do our agents index?
Currently, our agents can work with:
- Text content from your pages;
- Tasks — they understand task content, assignees, labels, deadlines, and more;
- Office files (PDF, XLS, DOC, TXT, etc.) — they can answer questions about the content, provide analysis, and even handle complex documents with large tables;
- Images — they can extract and understand text from images, as well as interpret image content;
- Videos — they can transcribe video files and answer questions based on the transcript content;
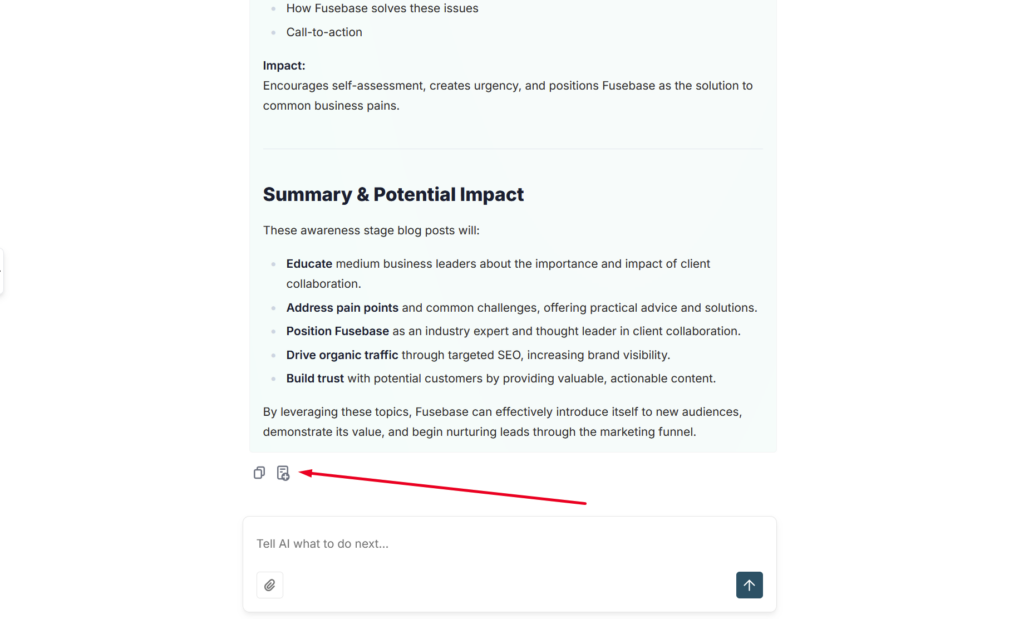
Saving a Response in FuseBase #
You can create a new page in Fusebase from the agent’s response. Moreover, you can even save the response to an existing page, thereby enriching it with new information. You can do this by clicking the corresponding icon below the agent’s response –
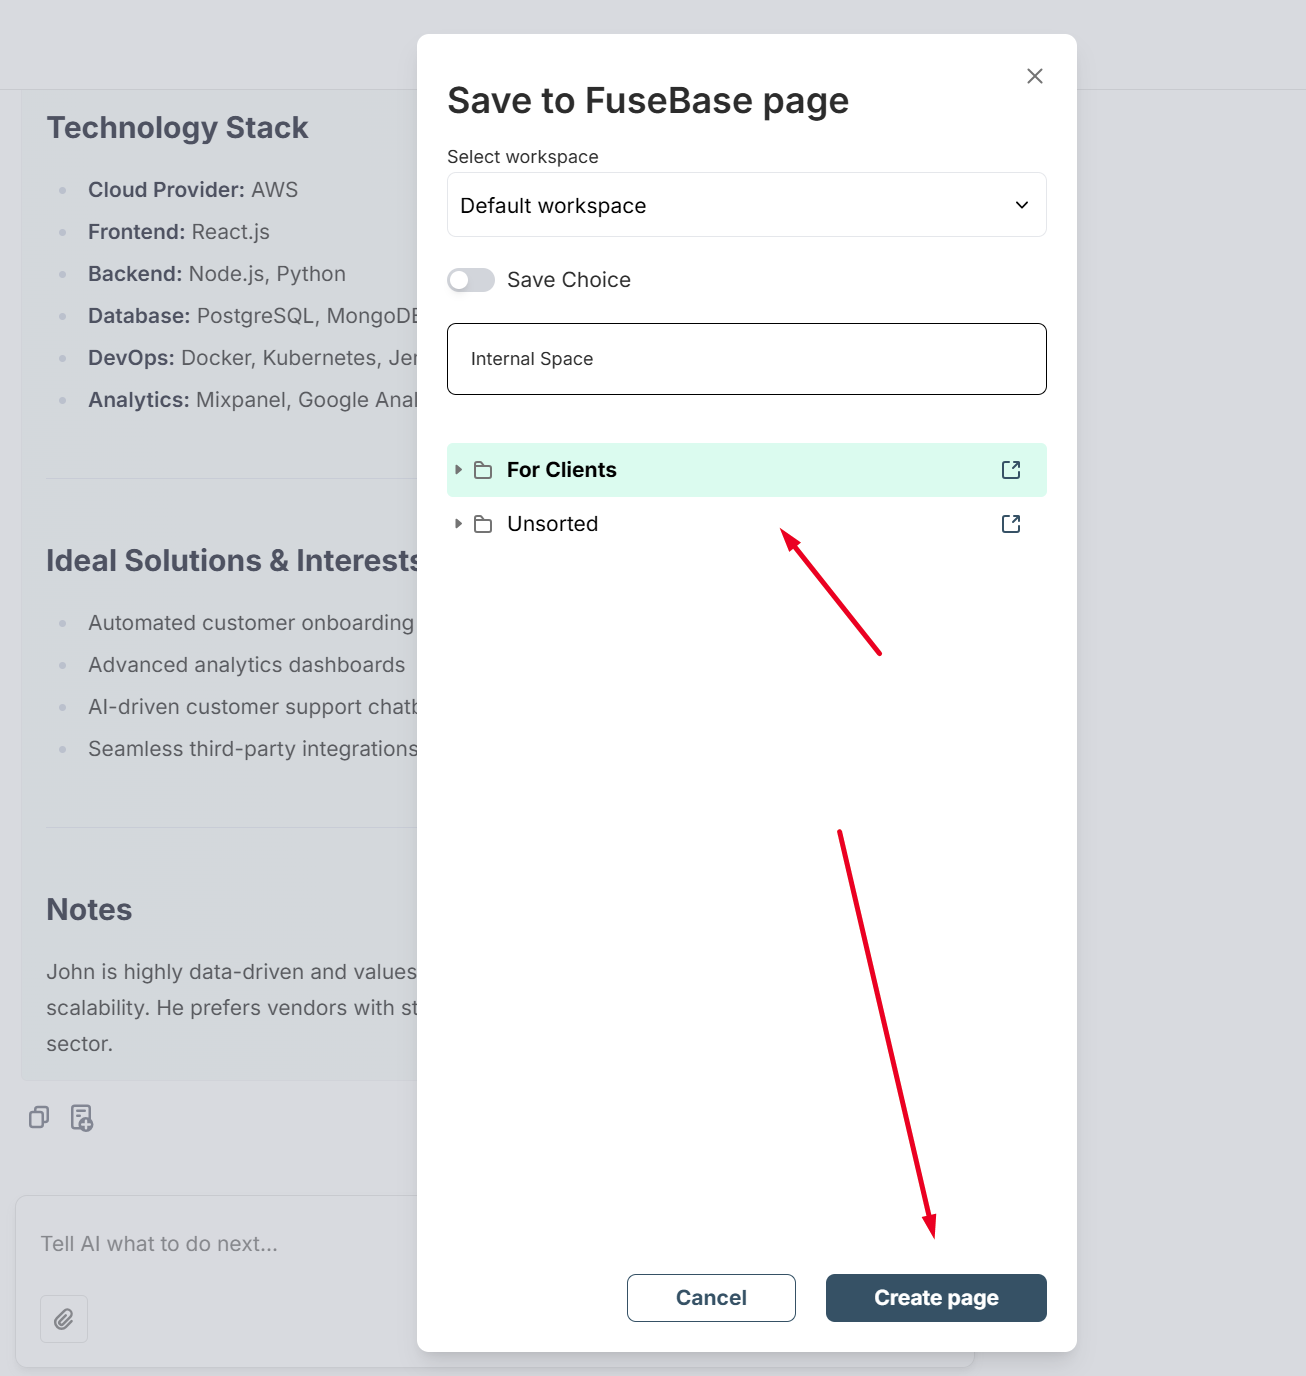
If you want to create a new page with the agent’s response, click on the desired folder and press Create page –
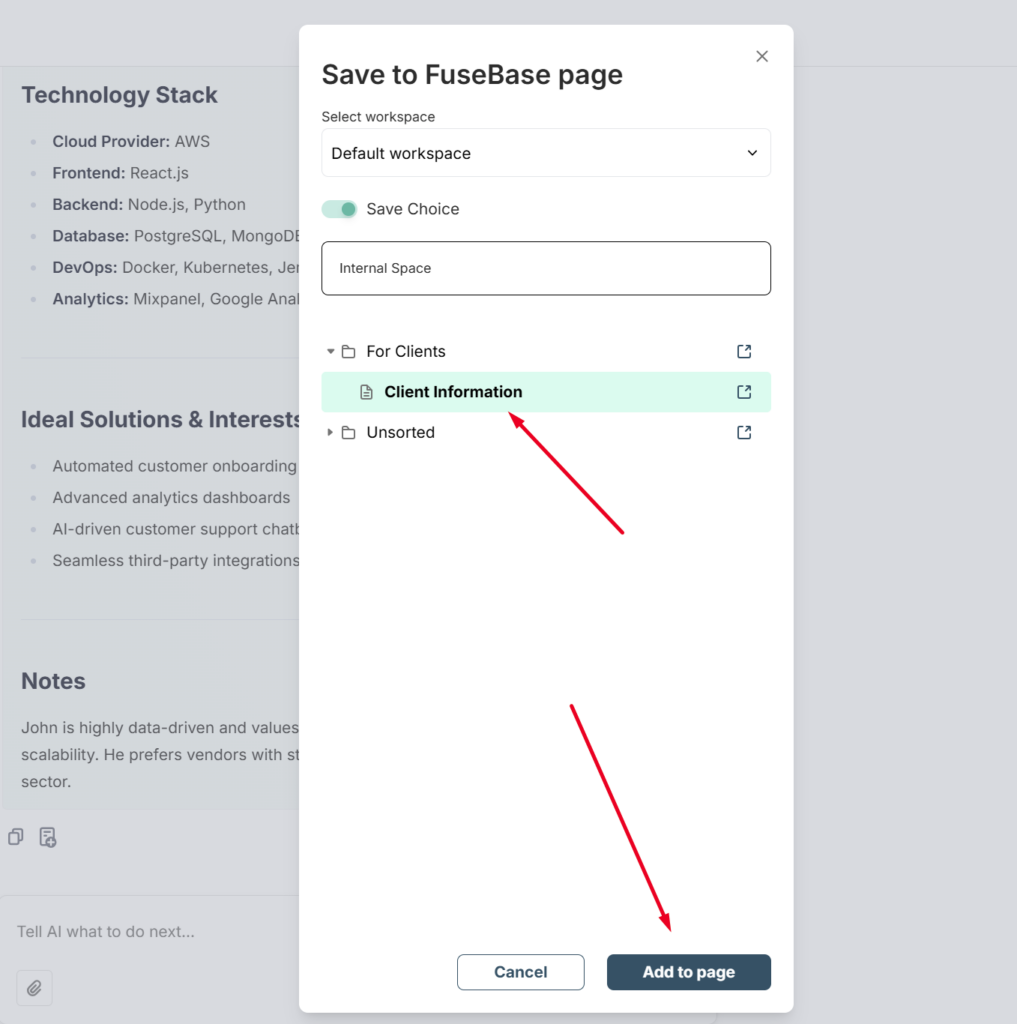
If you want to enrich an existing page, click on the desired one and press Add to page –
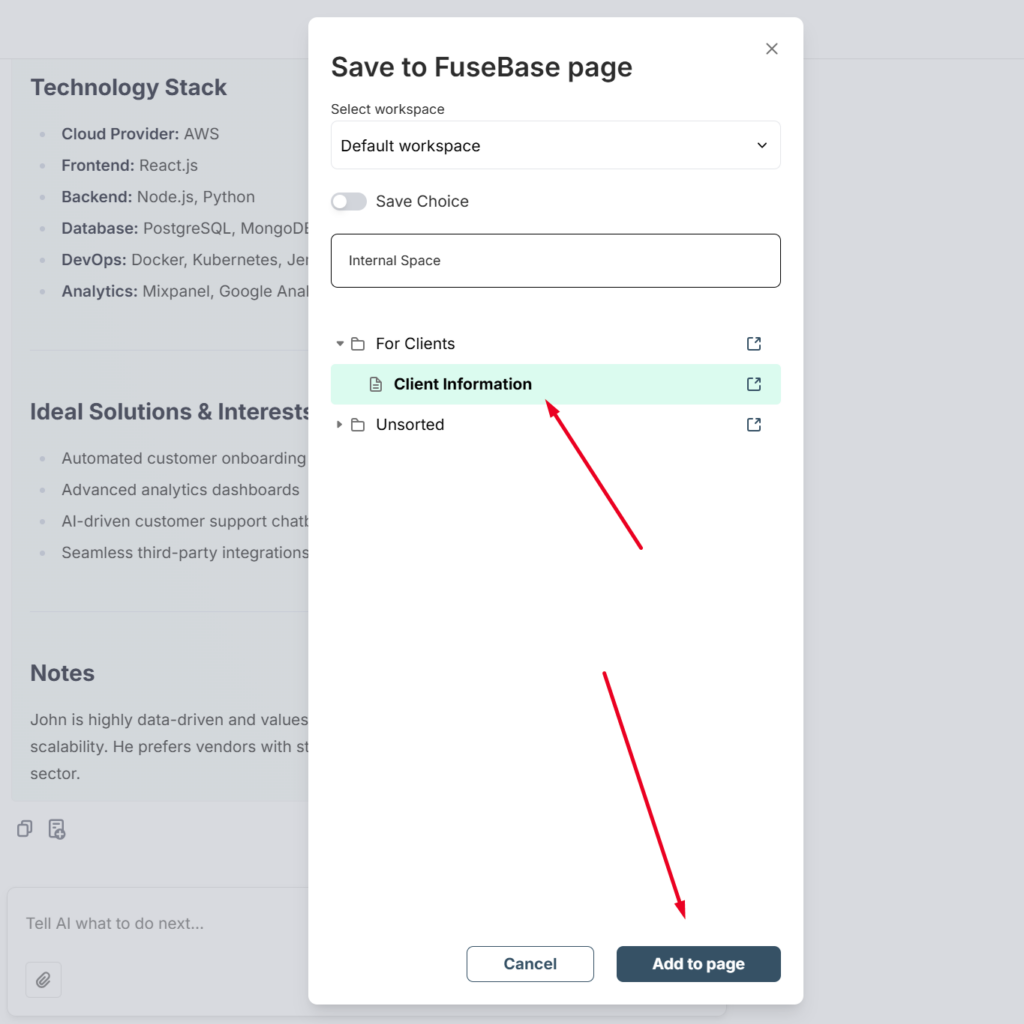
You can also speed up saving responses by enabling the Save choice switch. In this case, the agent remembers your selection, and you can save to a page or create a new one with a single click.
Agent Access Management #
By default, agents are available to all organization members, but you can manage this and decide who will have access to your agent.
To do this, go to the agent settings in the Visibility tab.
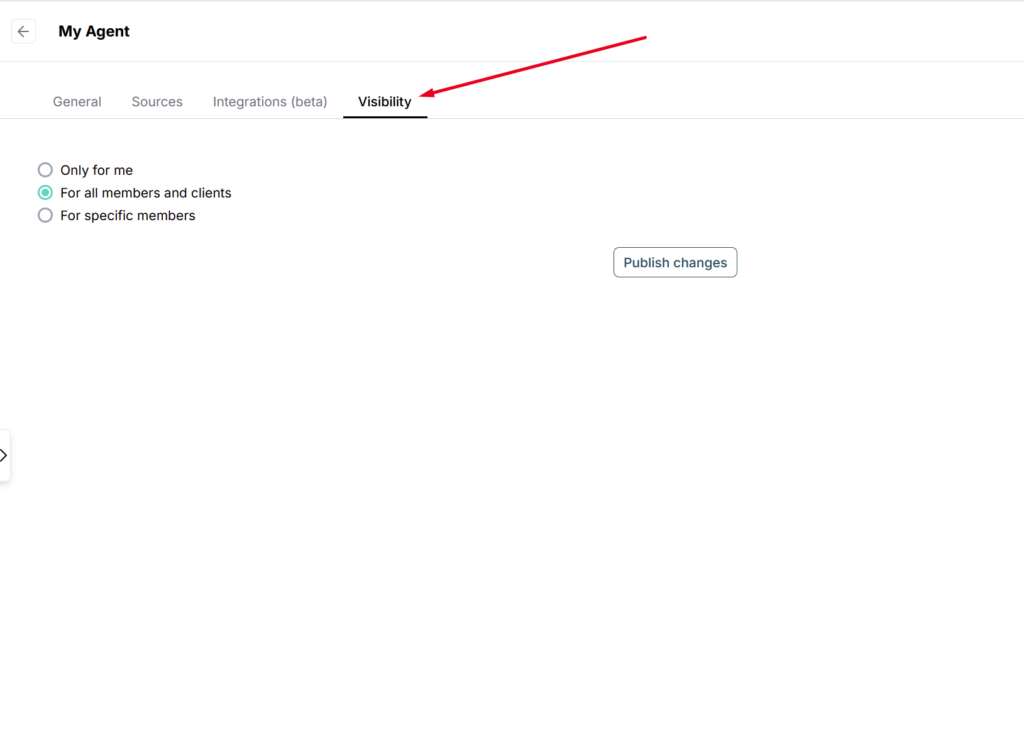
Then, choose the appropriate option:
Only for me – the agent will be visible only to you
For all members and clients – all members and clients of the organization will have access to the agent
For specific members – select specific members who will have access to the agent.

After selecting, click Publish to save the changes.