Using our console, you can add an unlimited amount of members to your organization/ workspace.
- Invite a member to the organization.
- Add a member to the workspace.
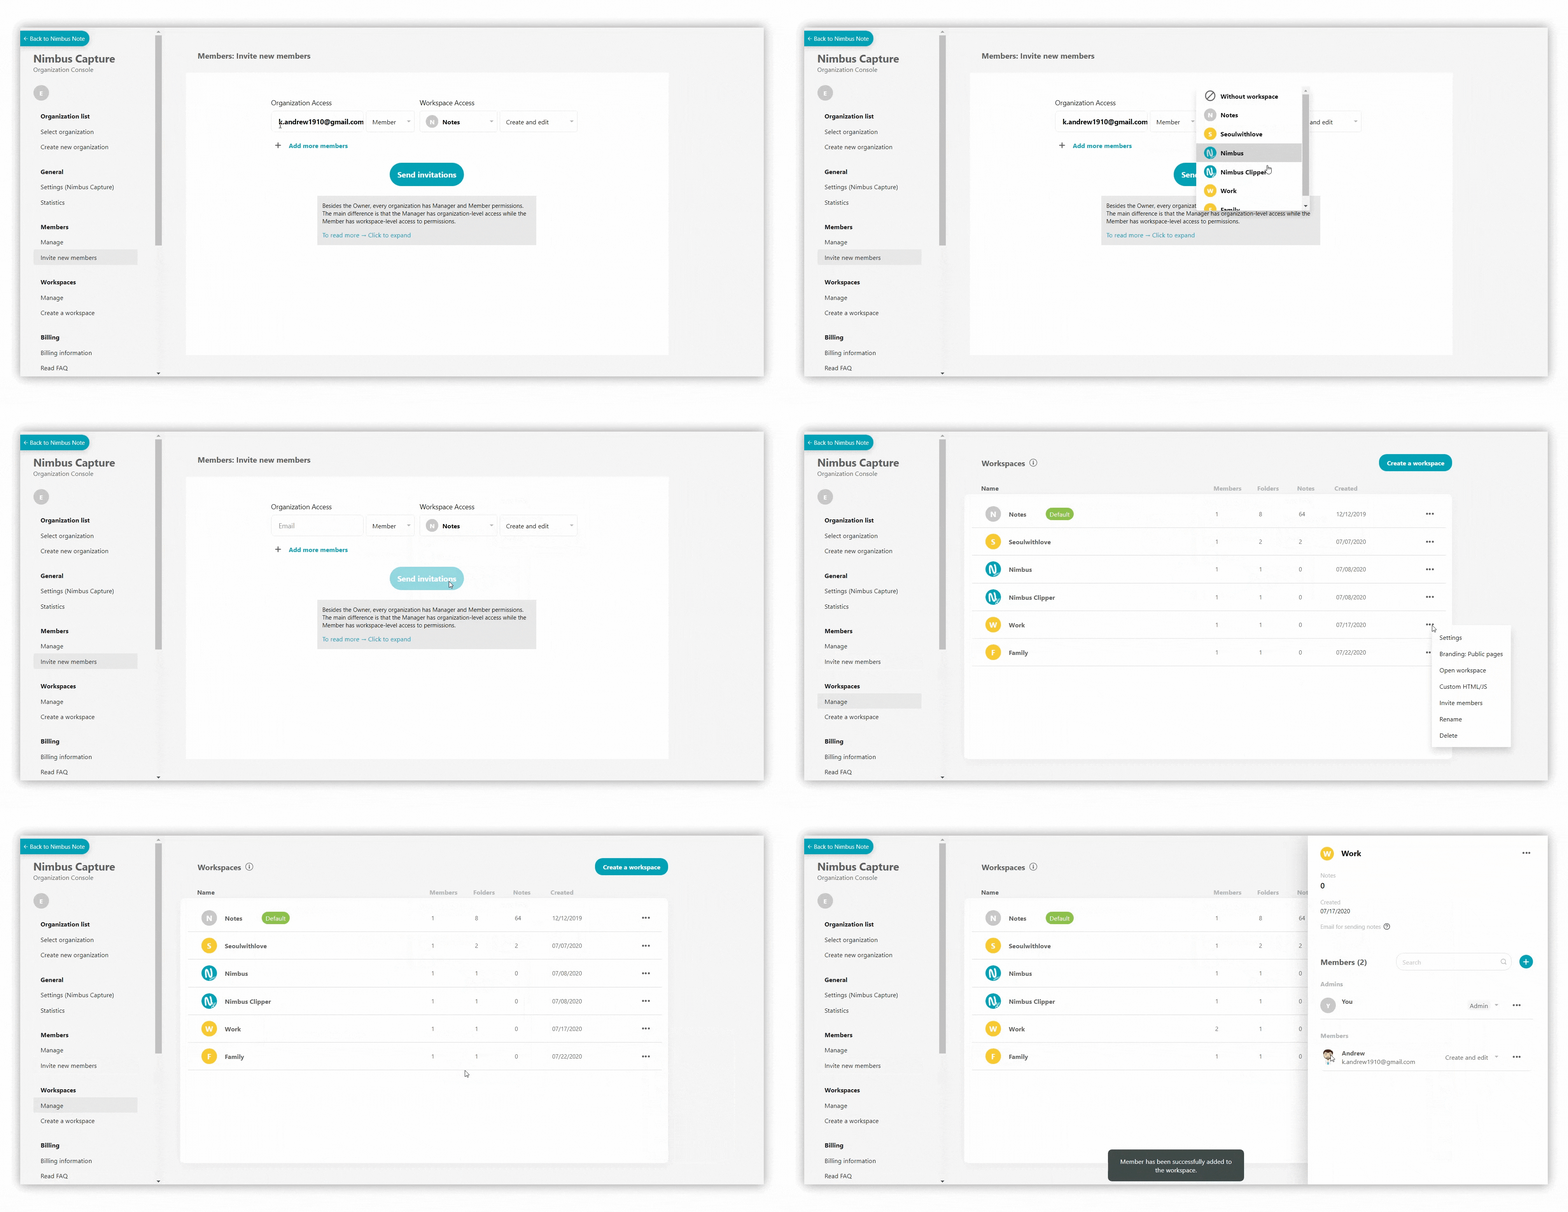
Note: A member can be a part of an organization, but not be a part of a workspace.
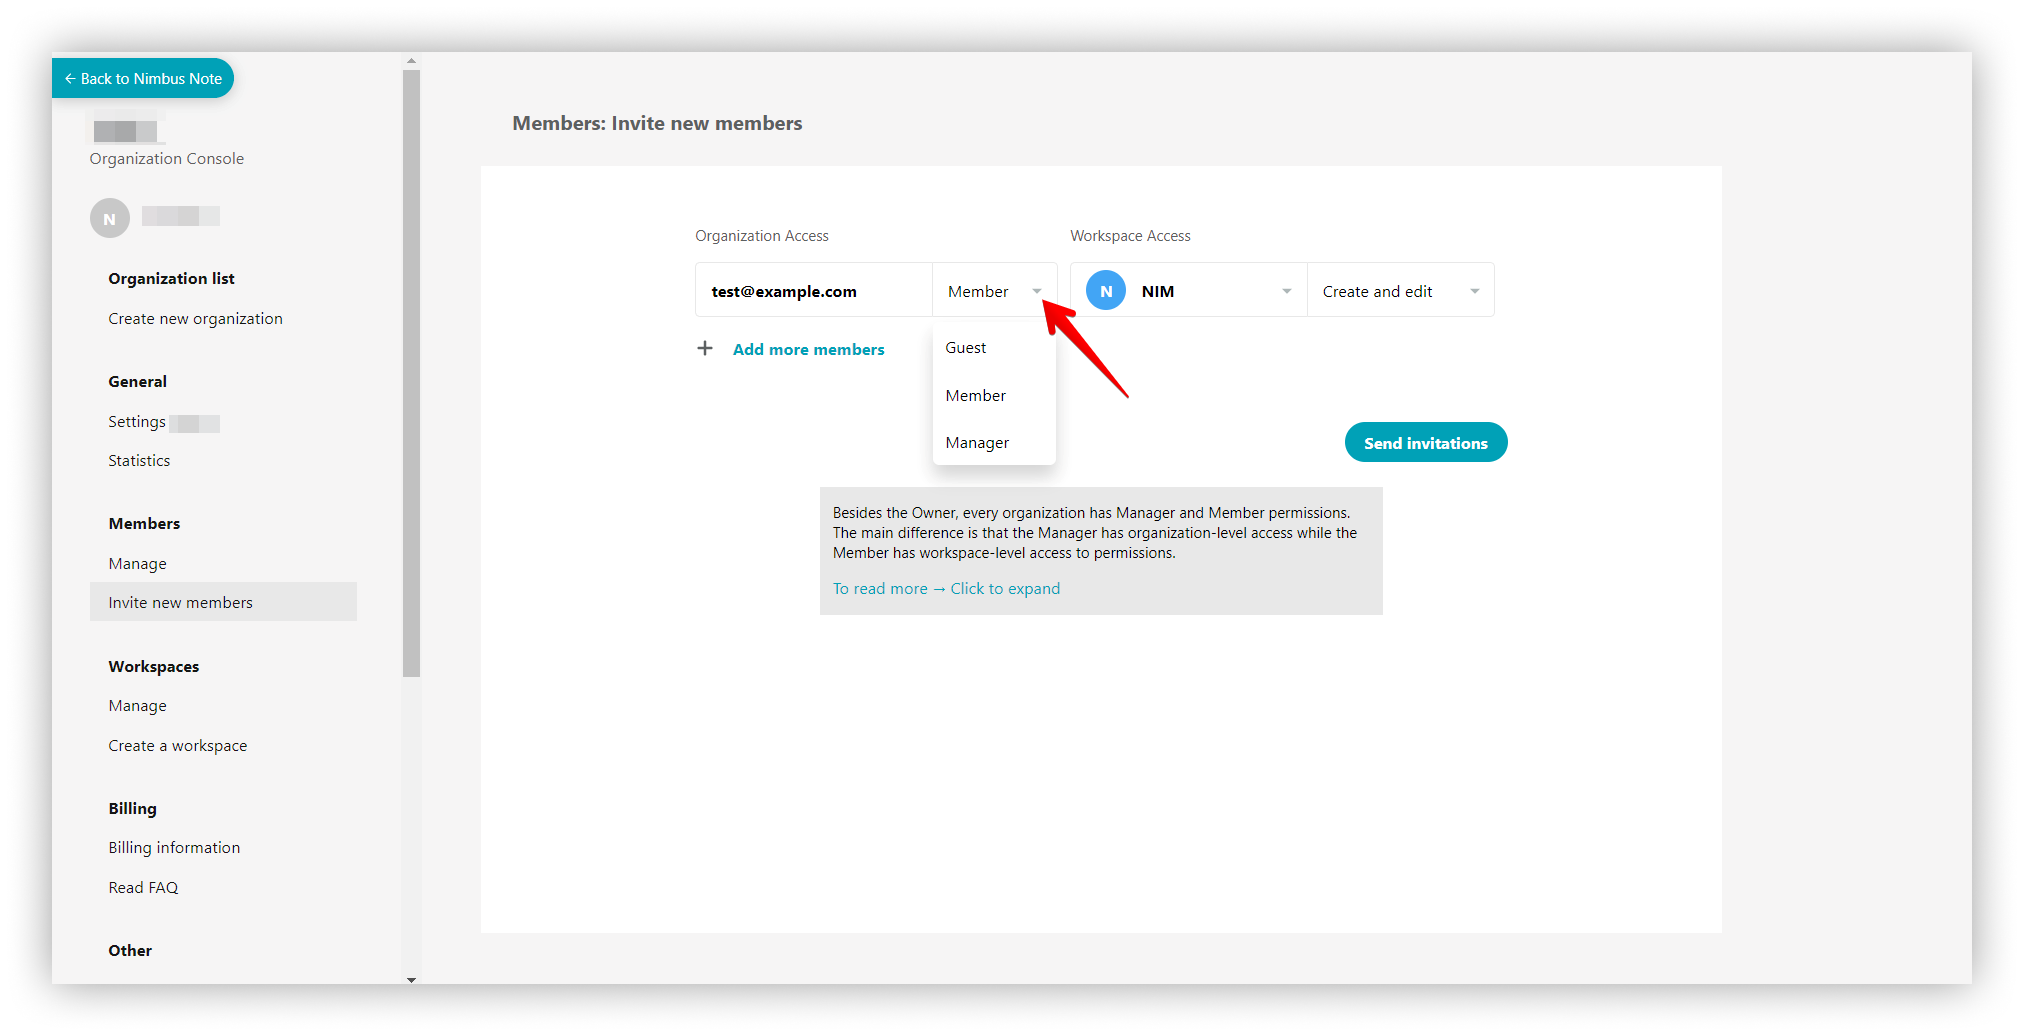
Types of accounts in organizations #
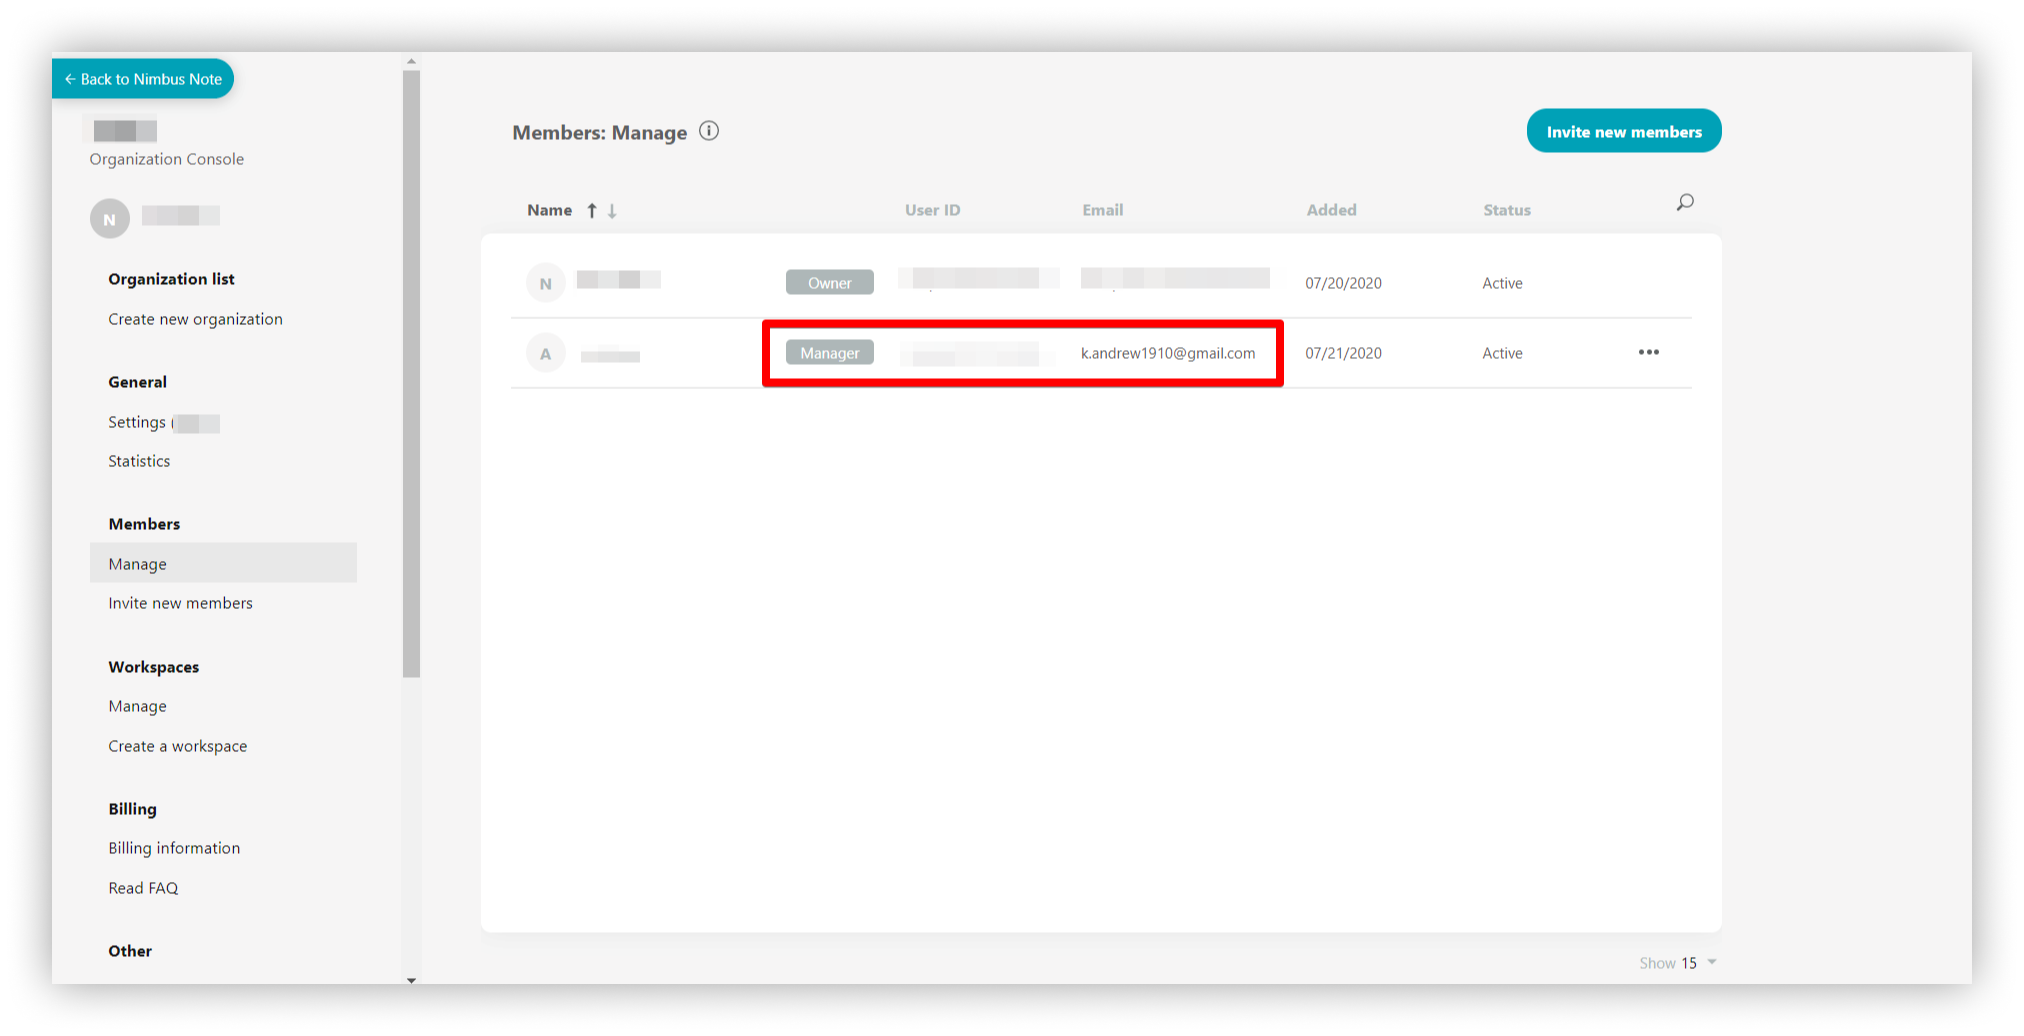
- Organization Owner and Managers have access to all workspaces and to the organization’s console.
- Organization Members can access the workspaces they have been added to by the organization Owner or Managers.
- Members with a Guest role can have access to only one workspace and their stay in the organization can be limited in time.
Note: Members and Guests do not have access to the organization console.
.png)
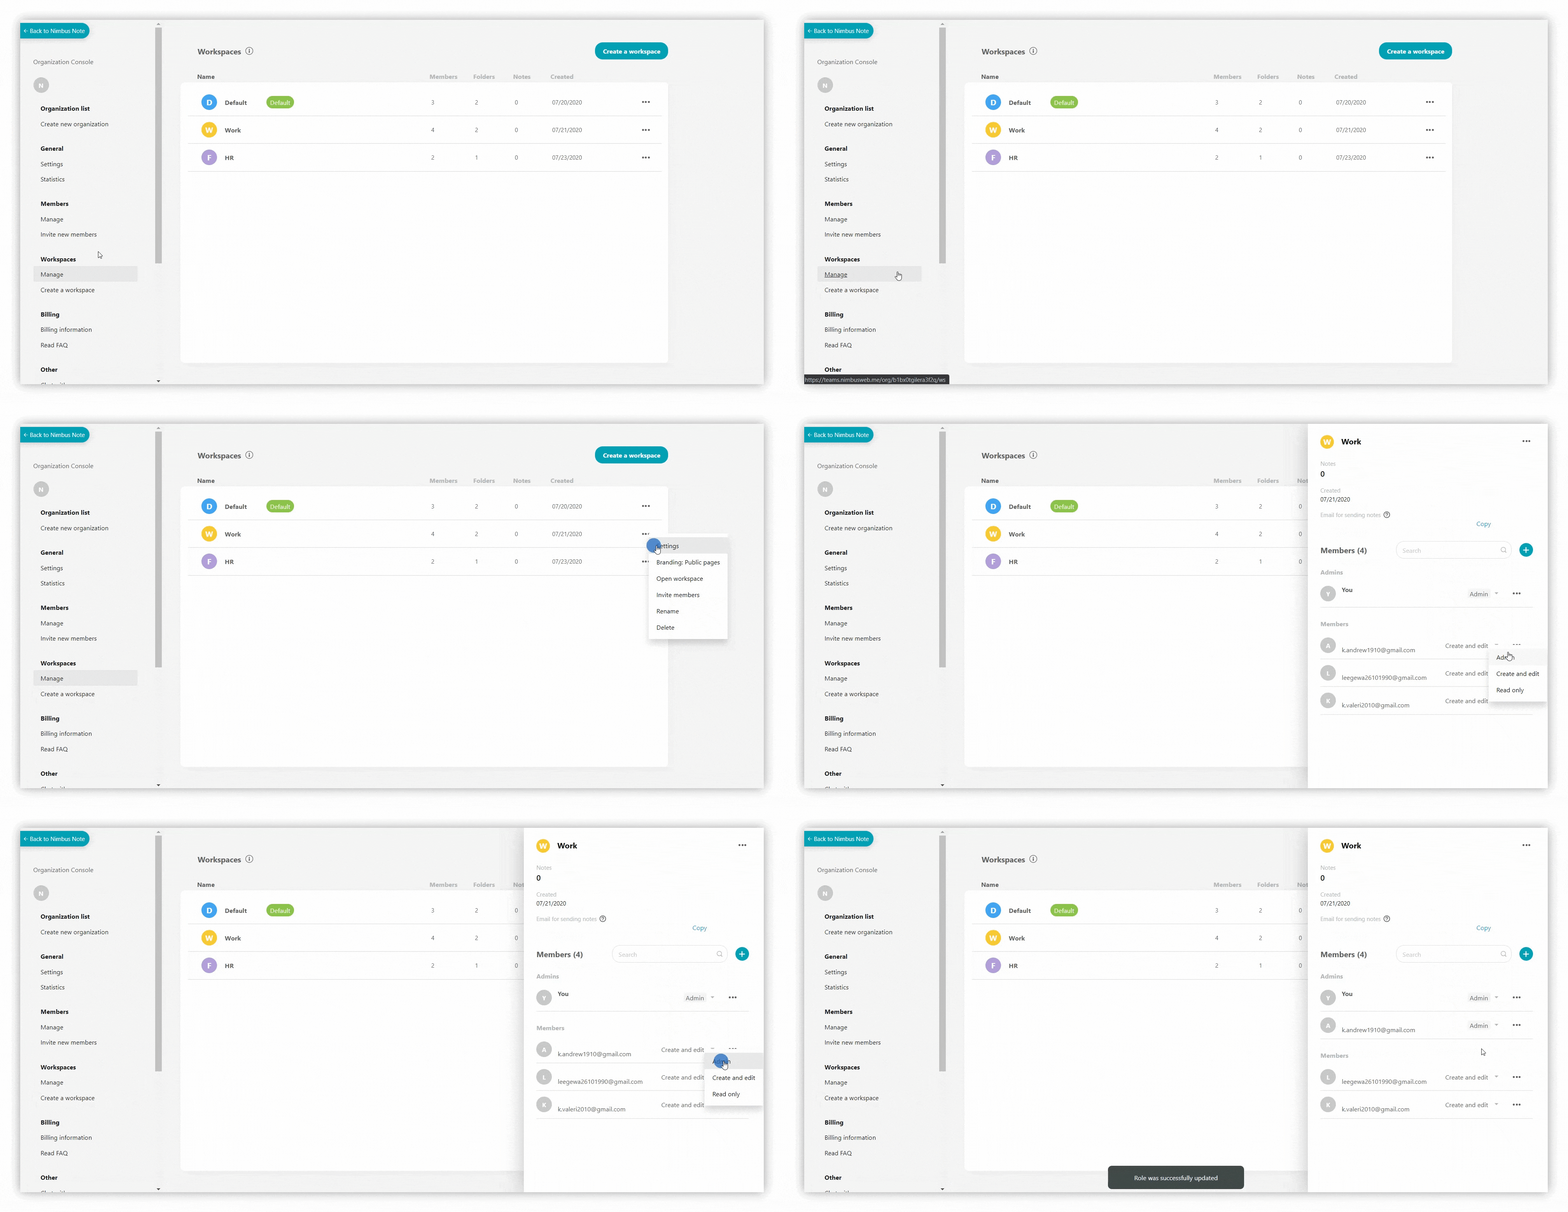
Types of permissions in workspaces #
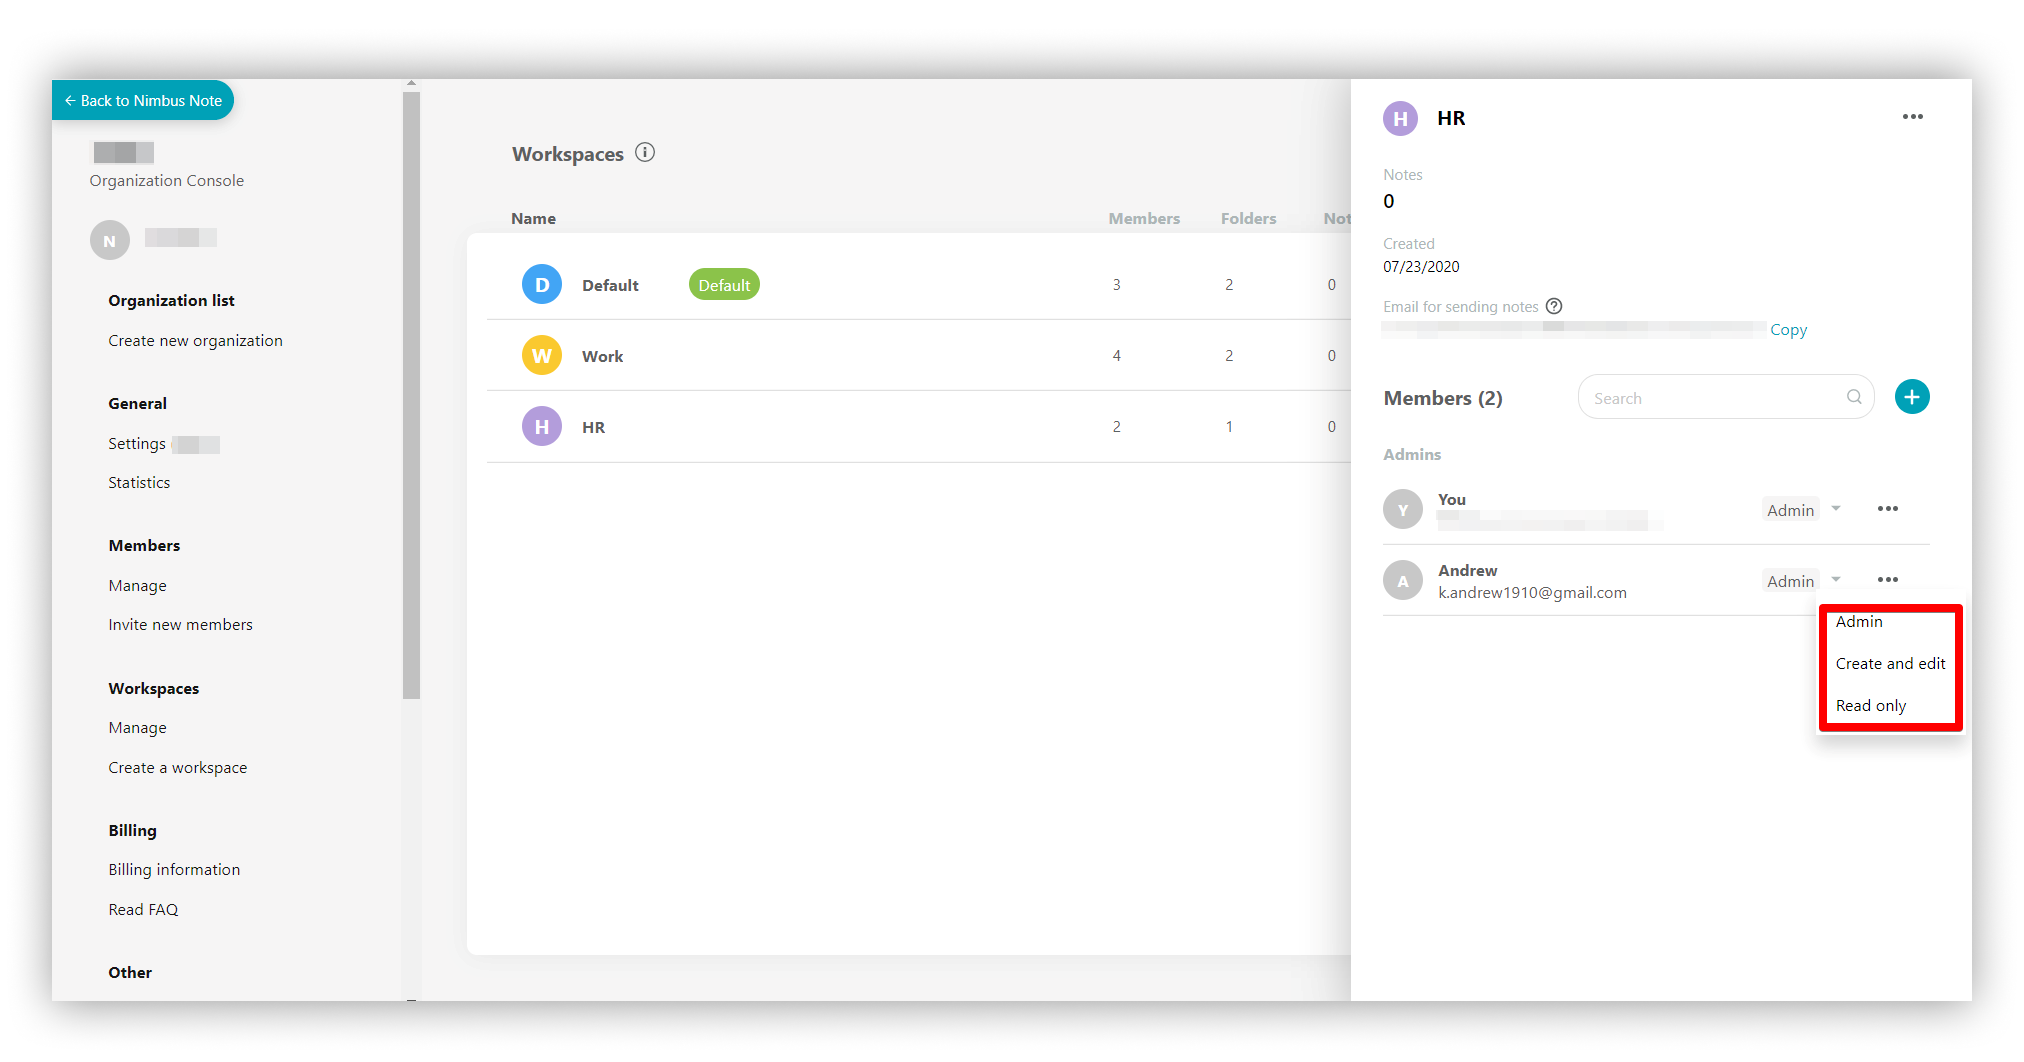
- Admin – users can edit pages, add new pages, share your pages through public pages.
- Can create and edit – users will be able to do full-fledged work on pages – read, edit, and even delete pages. Folders and tags management will also be available.
- Read only – user’s pages will be available only for reading.
.gif)
Add members in the organization #

To add a member to the organization, follow these steps.
- Go to https://teams.nimbusweb.me/.
- Navigate to Members – Invite new members
- Enter the member’s email address.
- Choose a nessesary role in the organization.
- Select the workspace to which you want to add the member. If you want to add a guest or a member without a workspace, select “without workspace.”
In the future, you can manually add guests / members to the desired workspace through the workspaces page. - Select permissions for the user.
- Send an invite.
- The user will receive an email with an invitation to join. After accepting, the user will become a member of the organization.
Note: An invite is sent only the first time a member is added to the workspace. In the future, the member will be automatically added to the workspace.
.png)
Add members in the workspace #
%20(1)%20(1).gif)
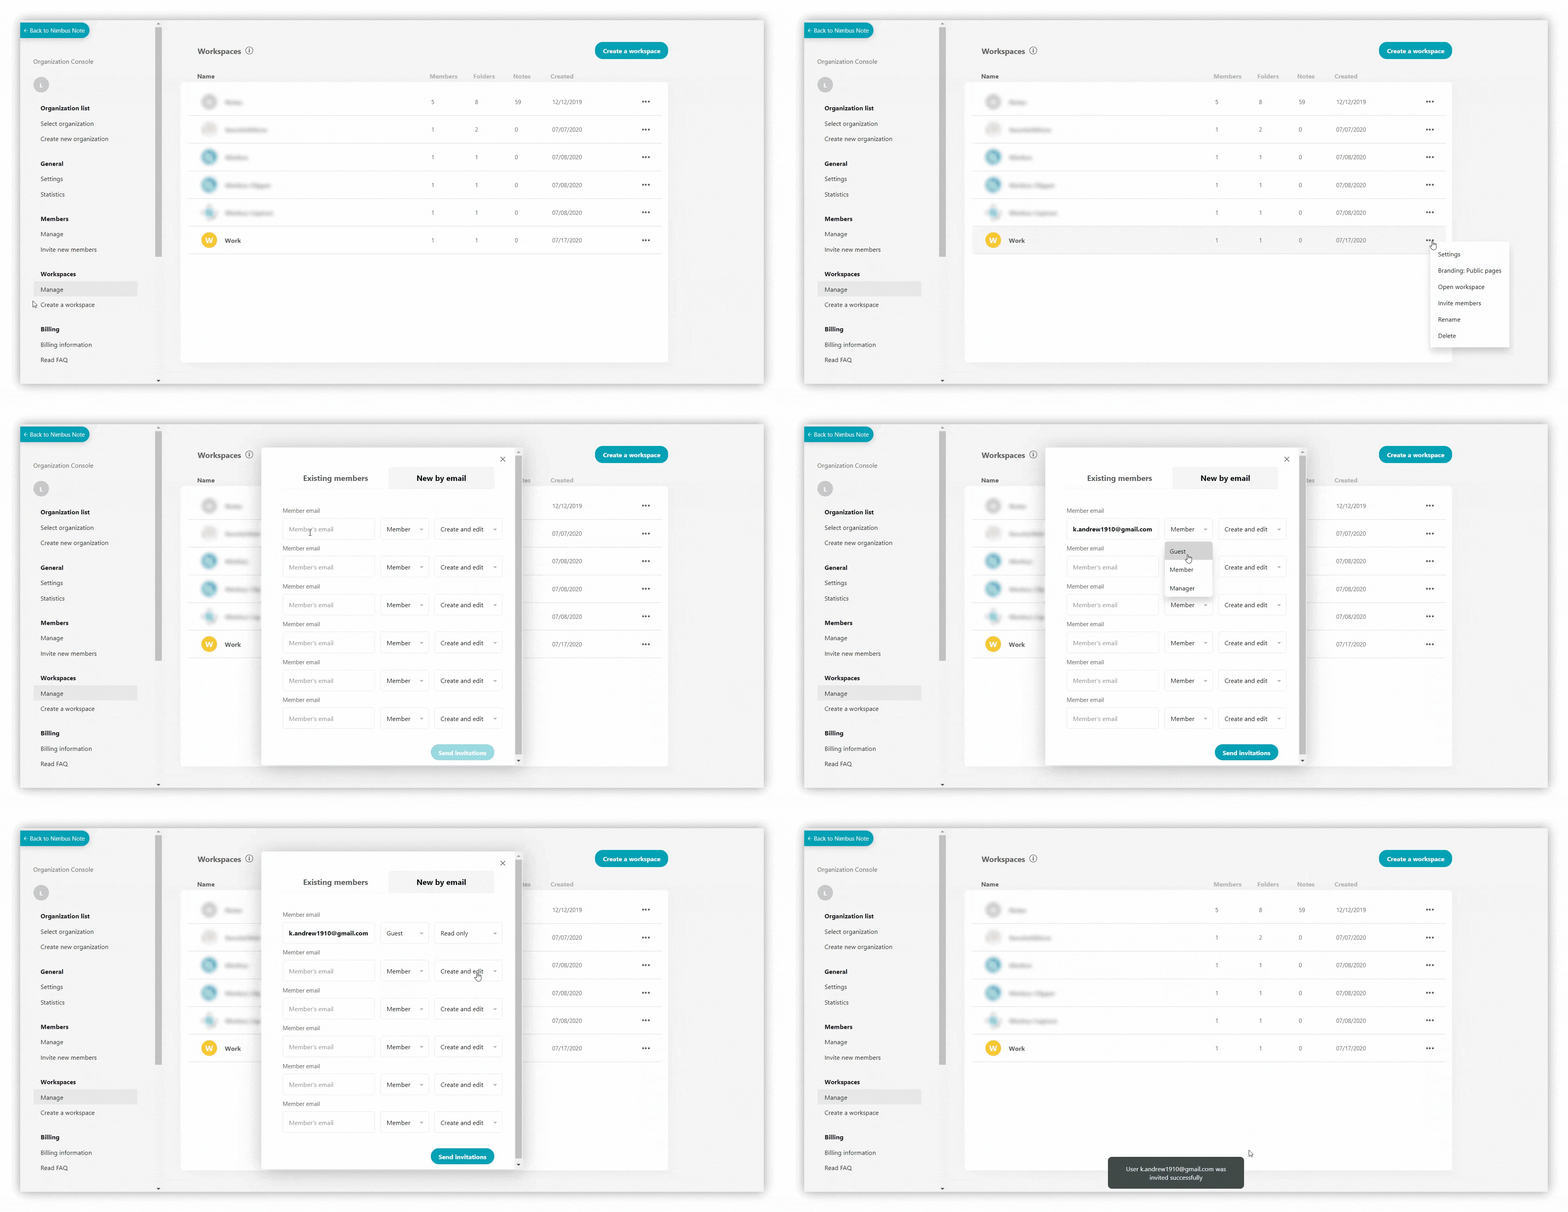
To add a member directly to the workspace, you need to:
- Go to the section Workspaces – > Manage.
- Next, select the workspace to which you want to add the user.
- Press on + in the Members section or select Invite members inside the three dots menu.
- Select New by email and enter the user’s email address.
- Choose a nessesary role in the organization.
- Select permissions for the user.
- Send an invite.
The user will receive an email with an invitation to join. After accepting, the user will become a member of the organization.
Note: After adding a member to the workspace, you can always change their permissions.
.png)
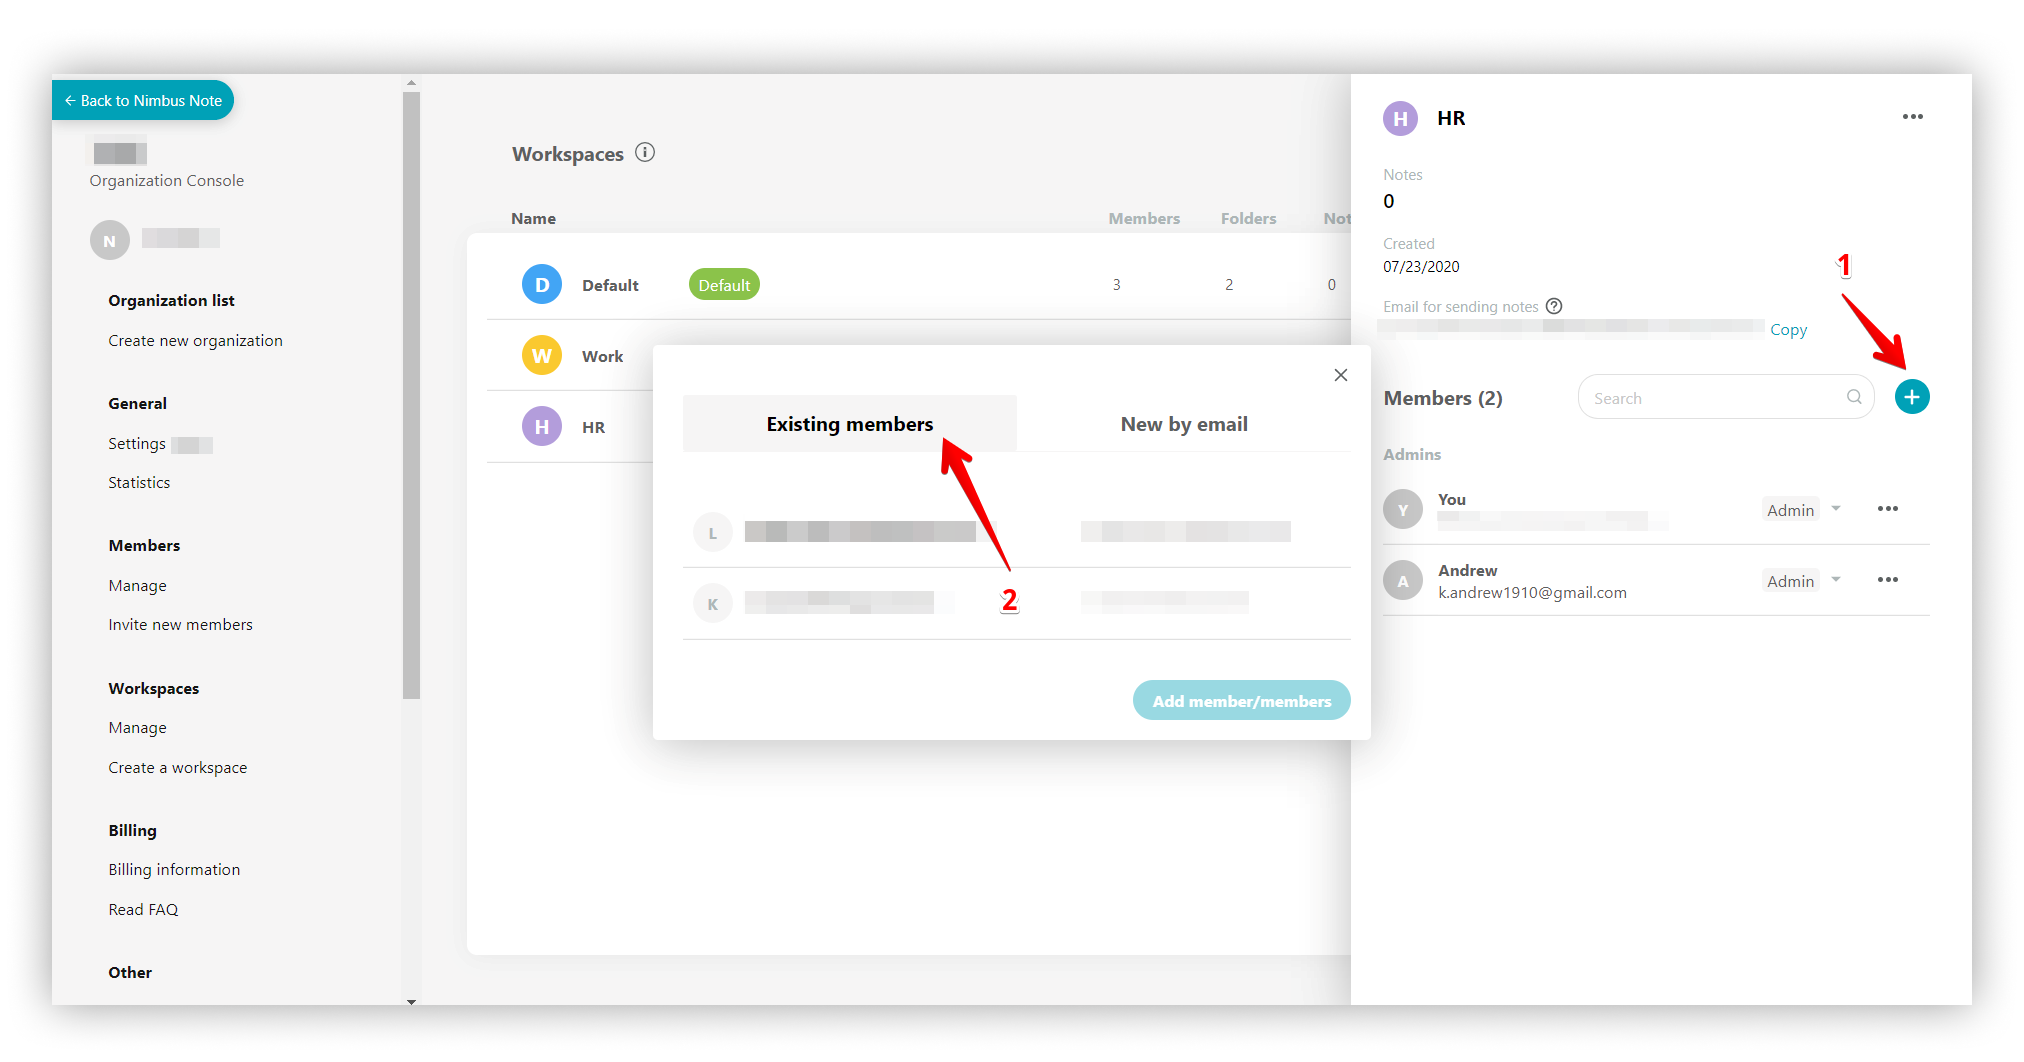
Note: You can also add a member to the workspace from existing members.
.png)
I want to invite a new member to only a specific folder or page. Is that possible? #
Yes, of course! This functionality is available for Team and Business plans. You can read more about restricting access to folders here – Managing access to folders and subfolders – Nimbus Platform. If you want to restrict access to a page, in this guide will help – Managing Access to Pages – Nimbus Platform.