The Organization console is a place where you can manage your organizations (both personal and business), workspaces and members. You can also track organization statistics and billing information, add branding to public pages & web client and much more. All of this is available in https://teams.nimbusweb.me/.
General Settings #
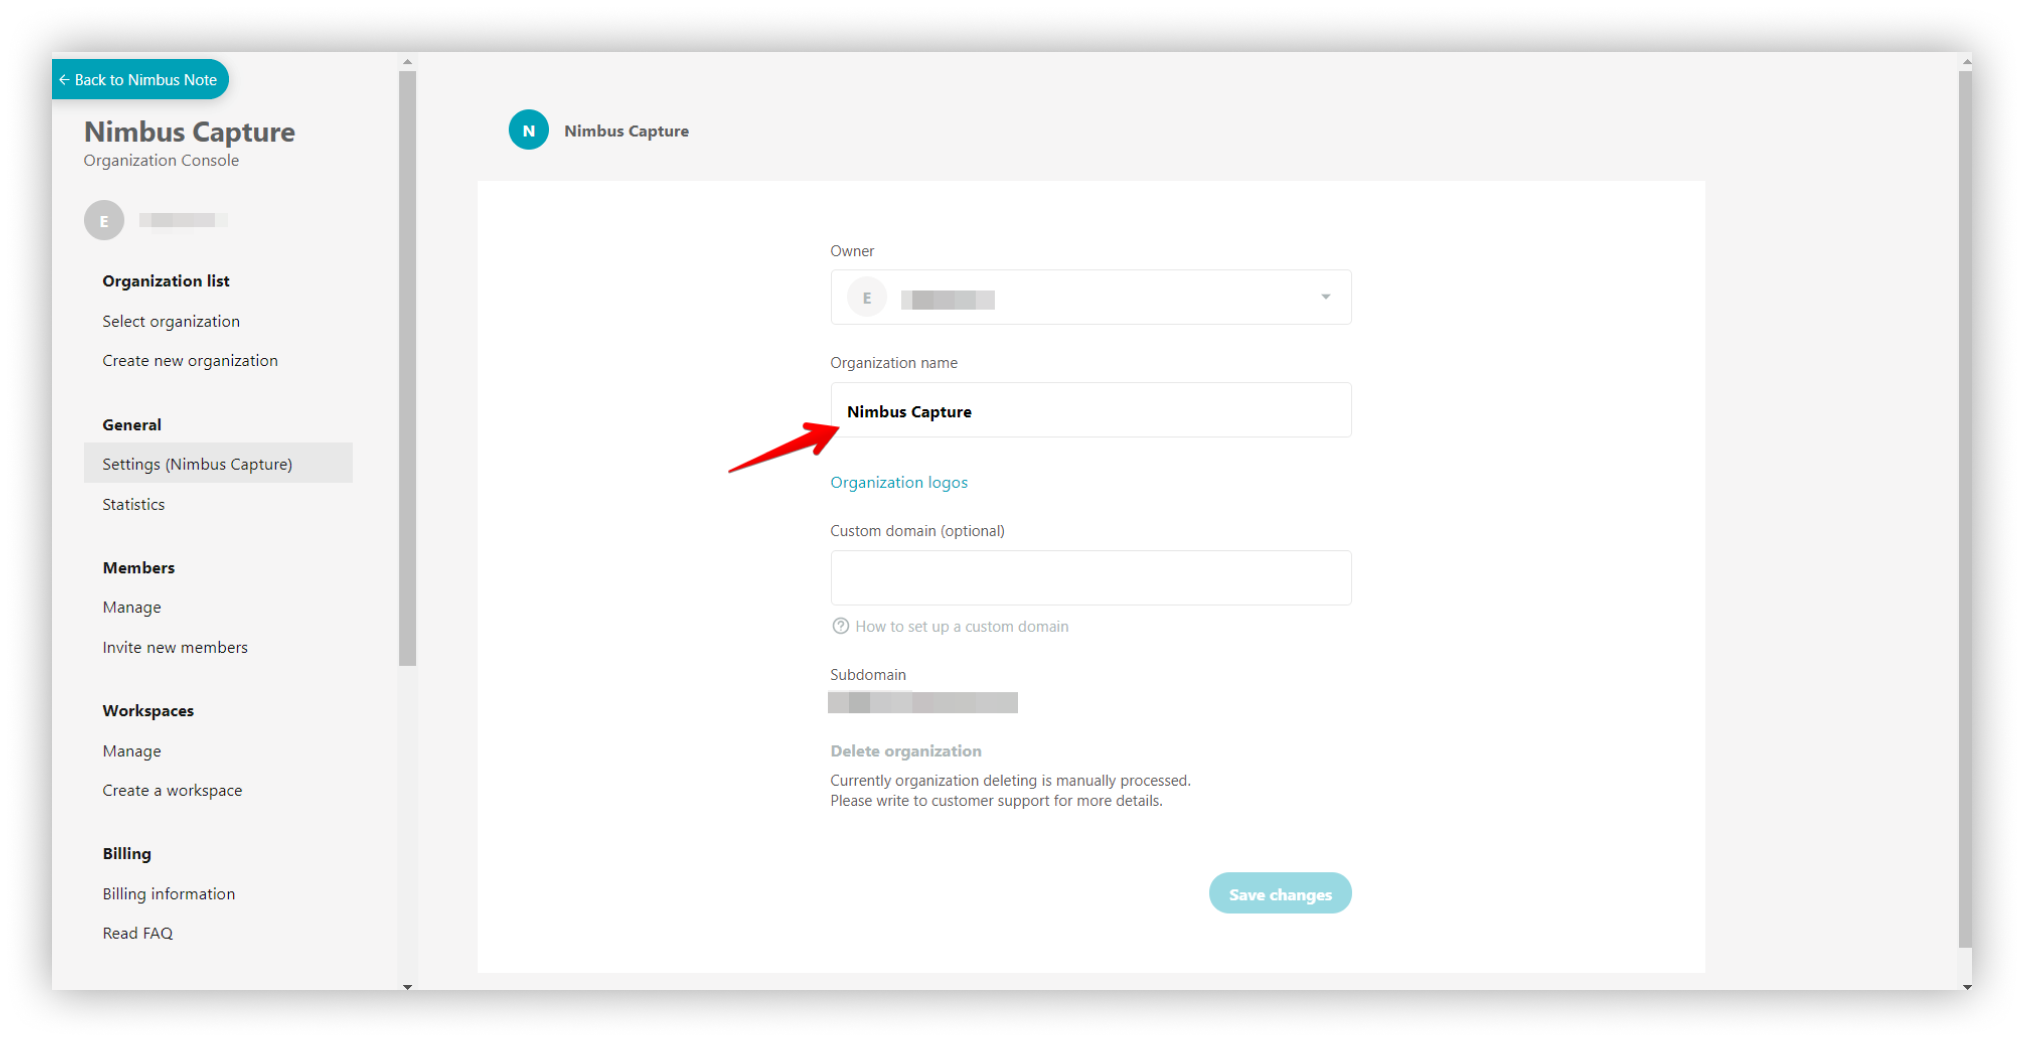
In Settings, you can view or change information such as the name of the organization.
.png)
Custom domain (CNAME) #
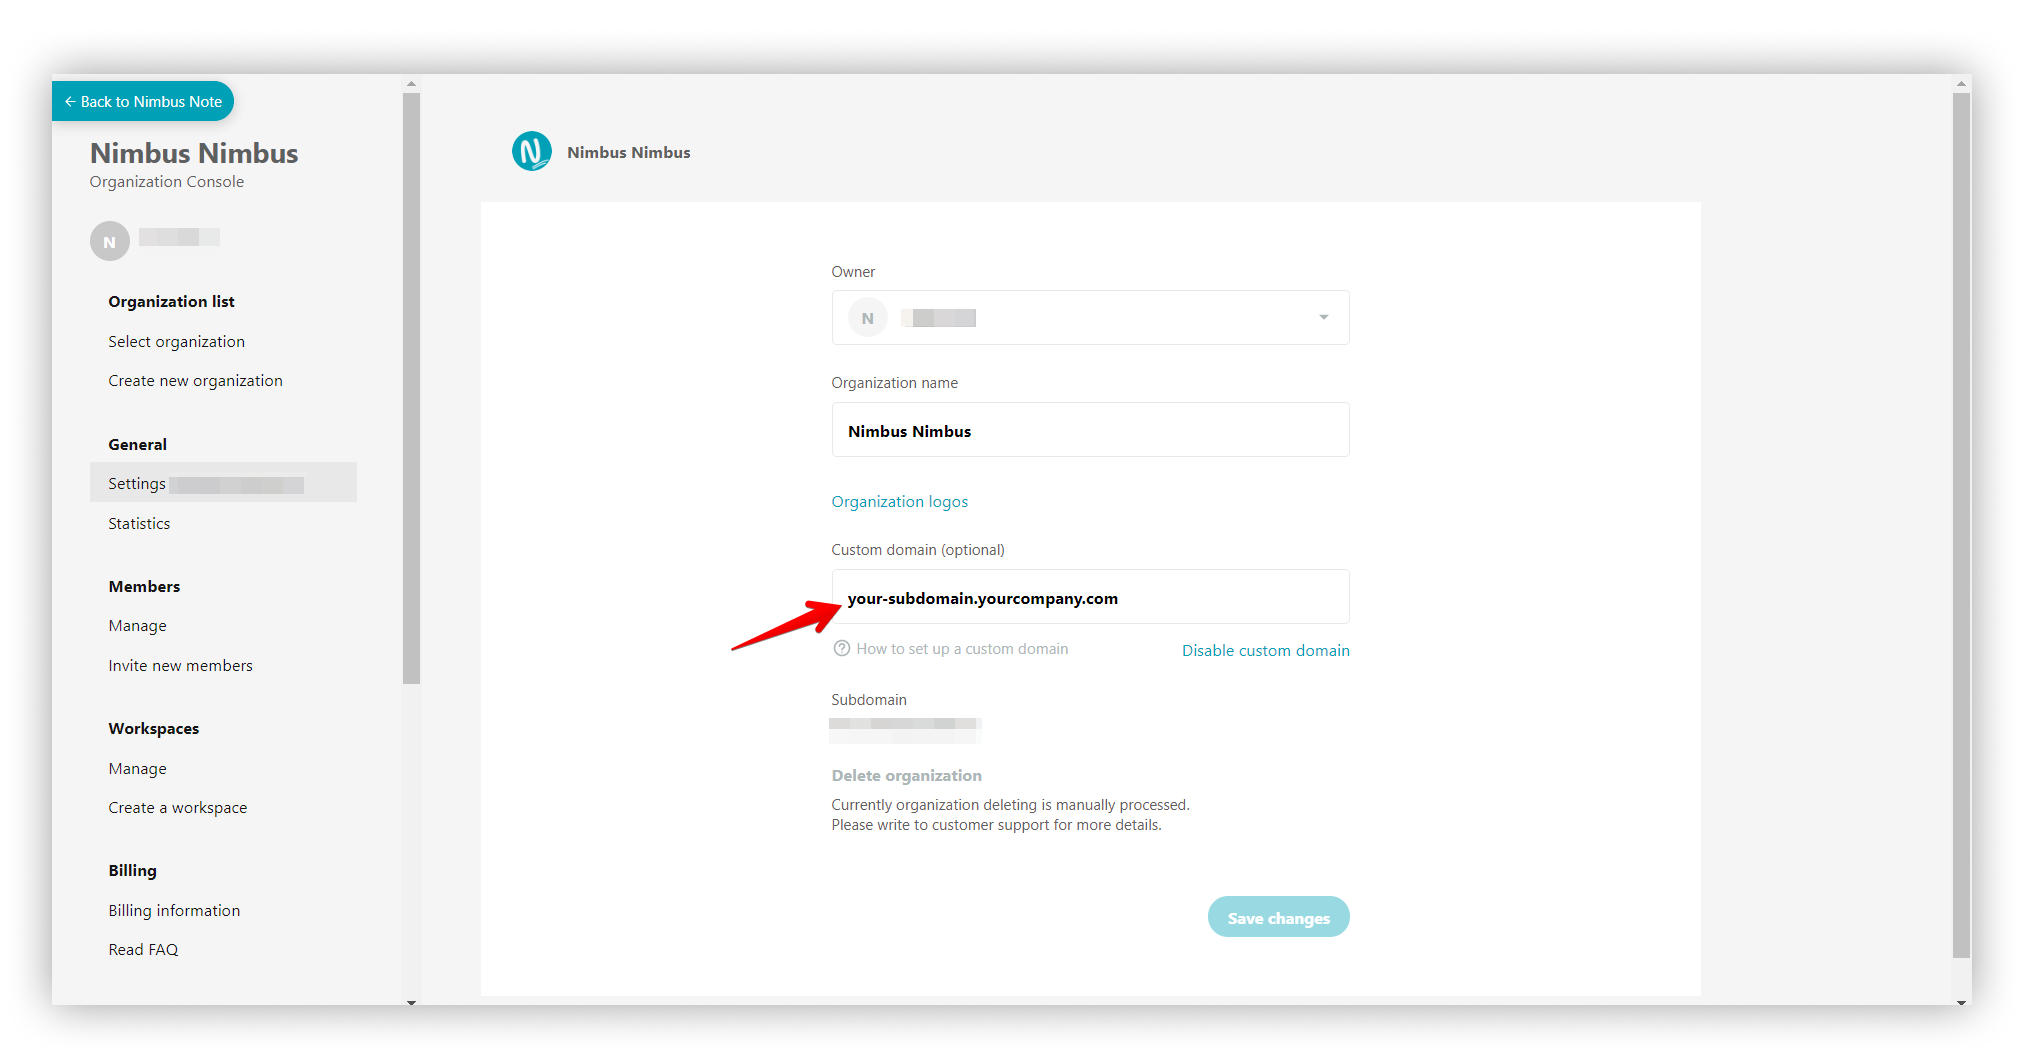
After creating an organization, you will get a subdomain in the format “yourcompany.nimbusweb.me“
Optionally, you can add your personal domain. Then the web client and public pages will be displayed on a subdomain like “mypages.mydomain.com”.
To add a custom domain, you need to go to the settings.
- Fill the field Custom Subdomain.
- Click on Save changes.
Then, when you go to the organization in the web client, you and your members will use the domain you have set.
.png)
☝ Note: CNAME option is available only for Business plans.
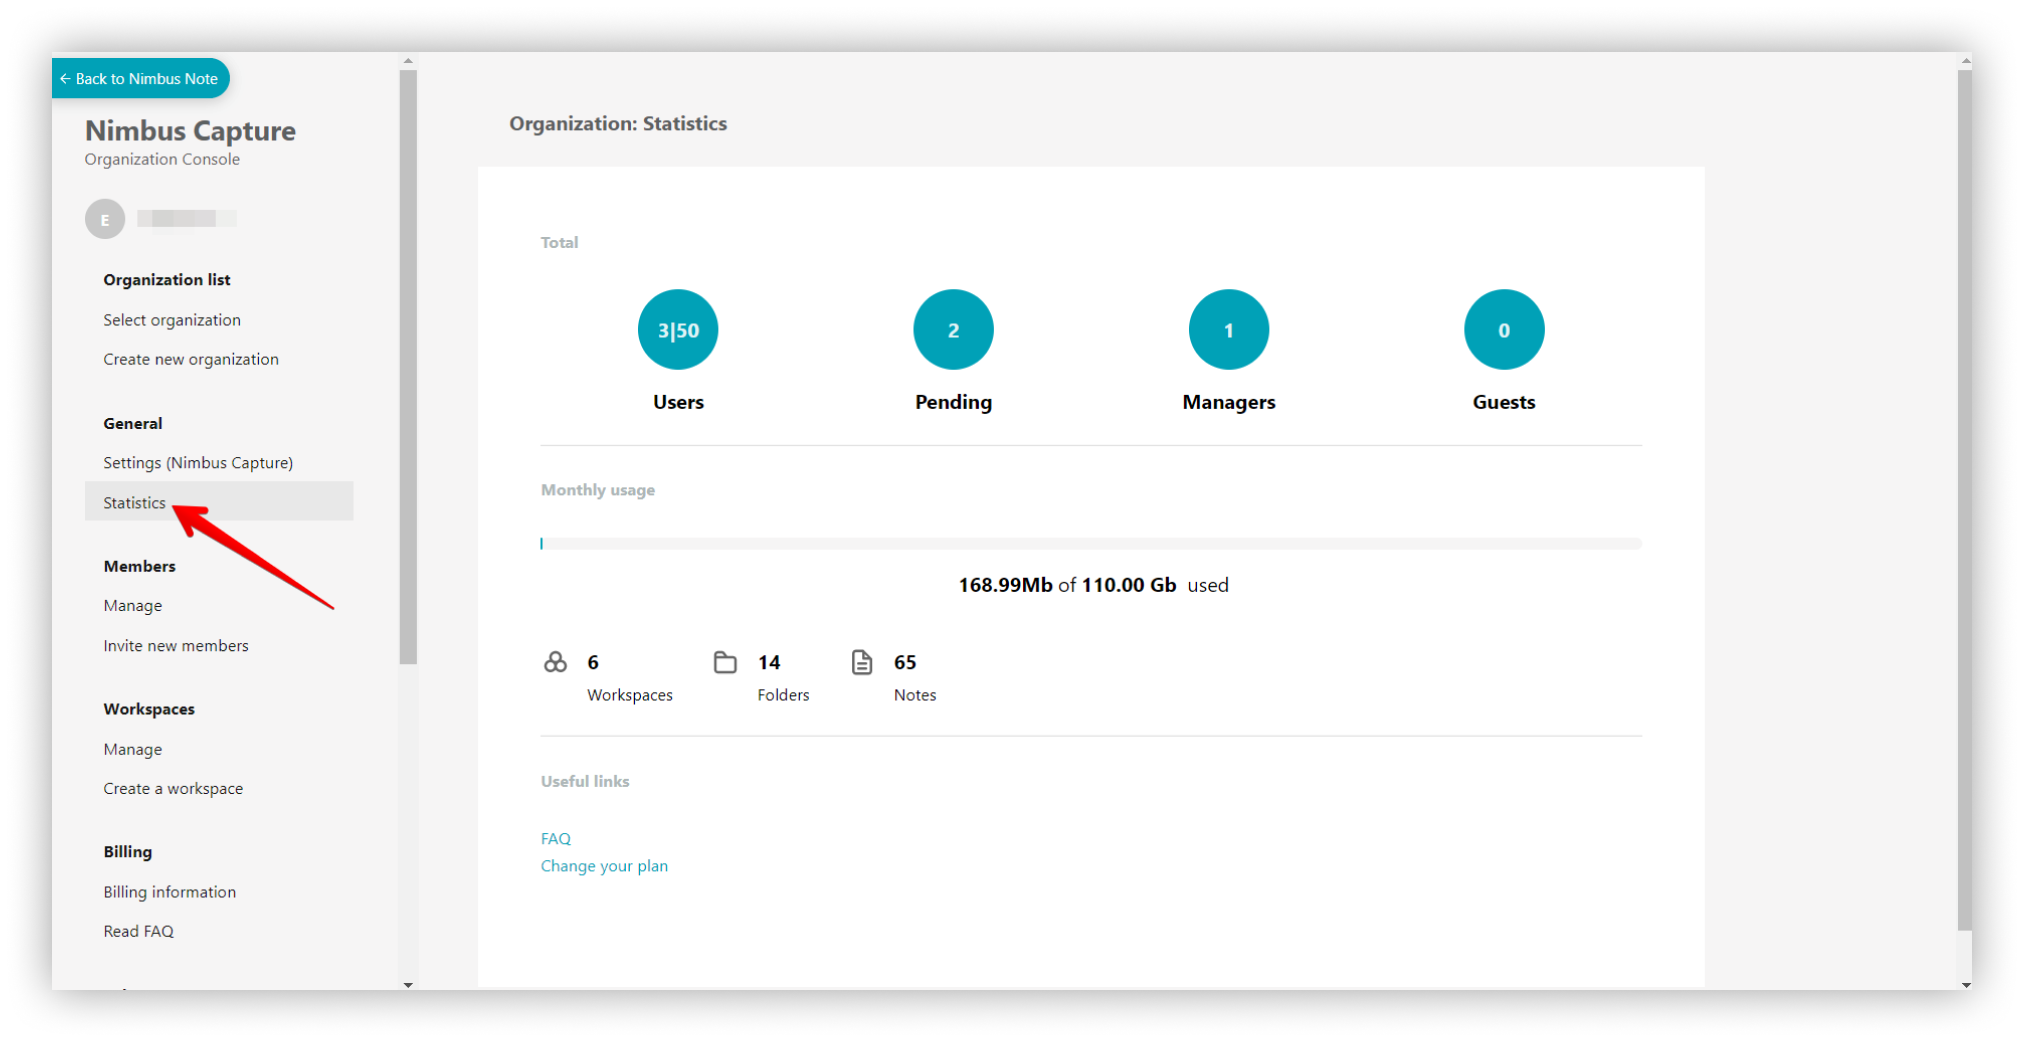
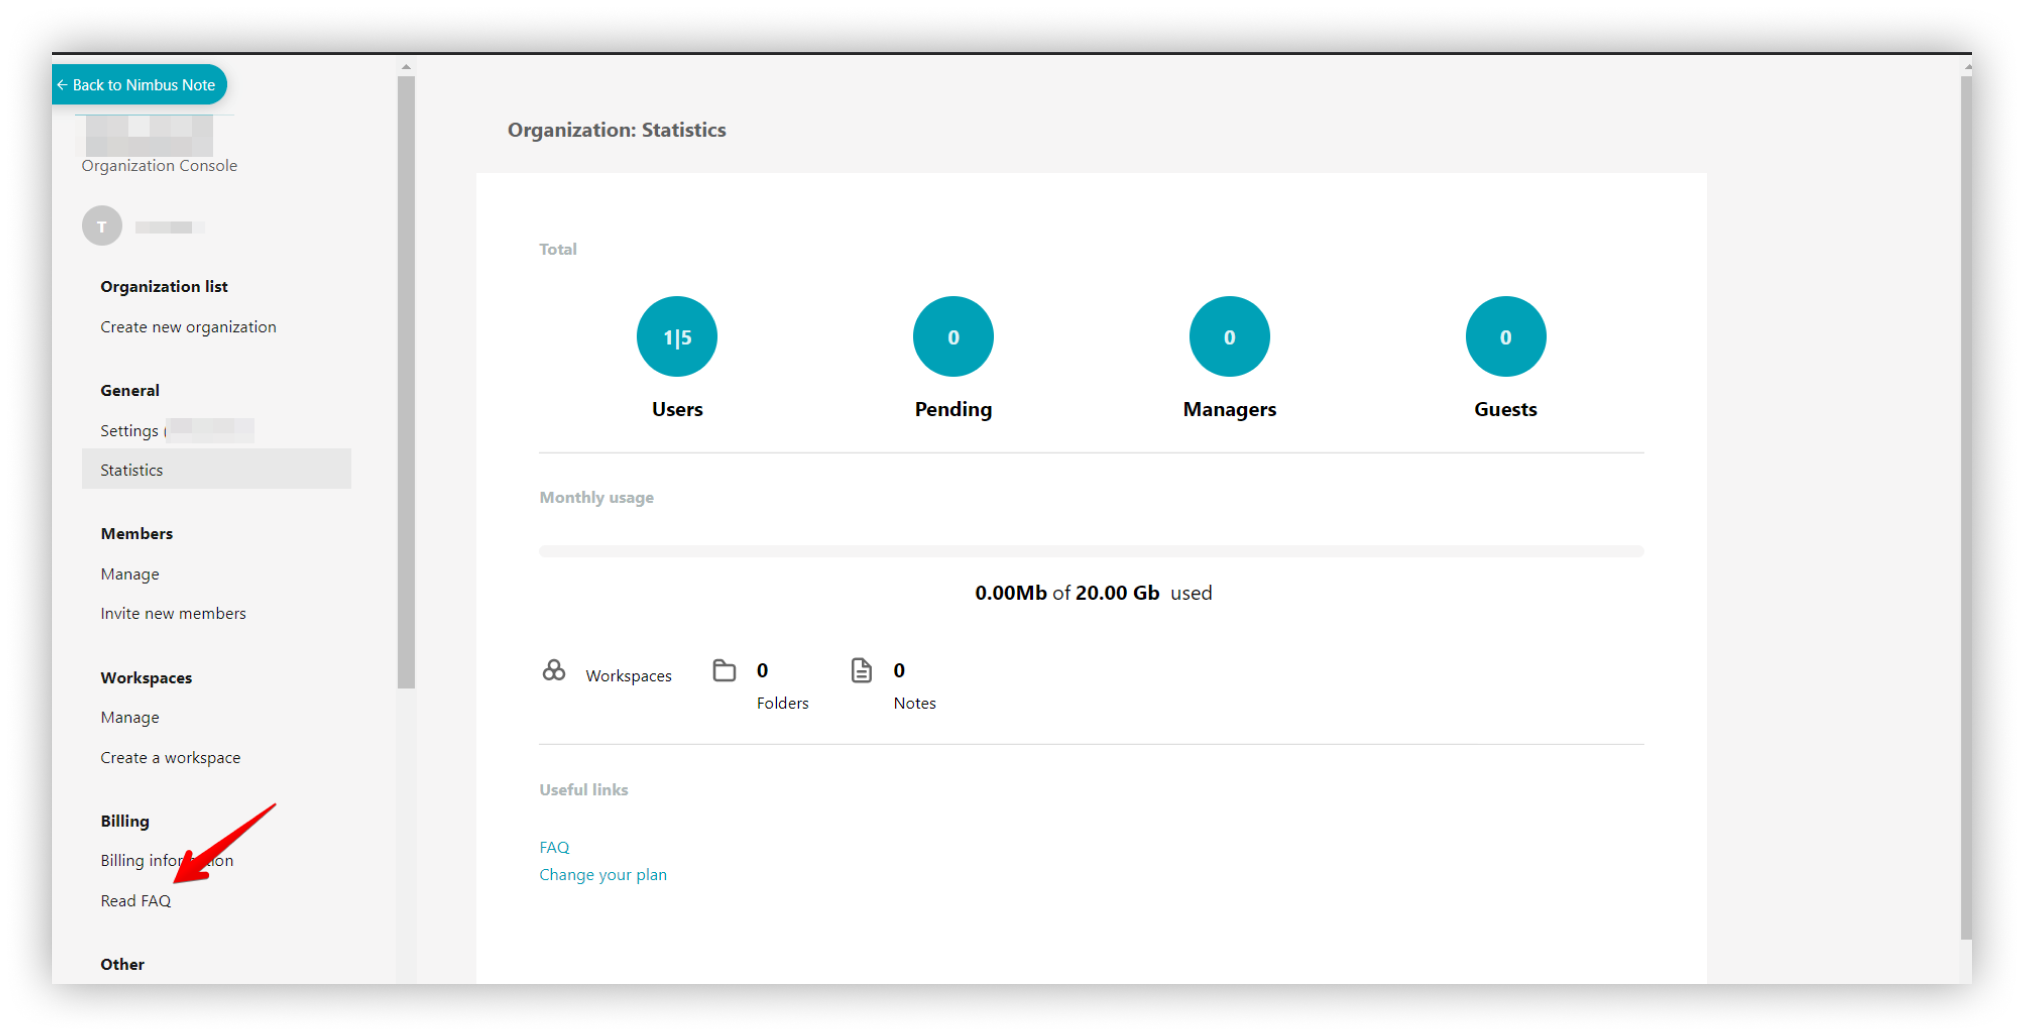
Statistics #
In the Statistics section you can see:
- count of users
- user traffic
- count of workspaces / folders / pages
- useful links.
.png)
- Also, you can always return to your pages from the console. To do this, click on Back to Nimbus Note.
.gif)
Members #
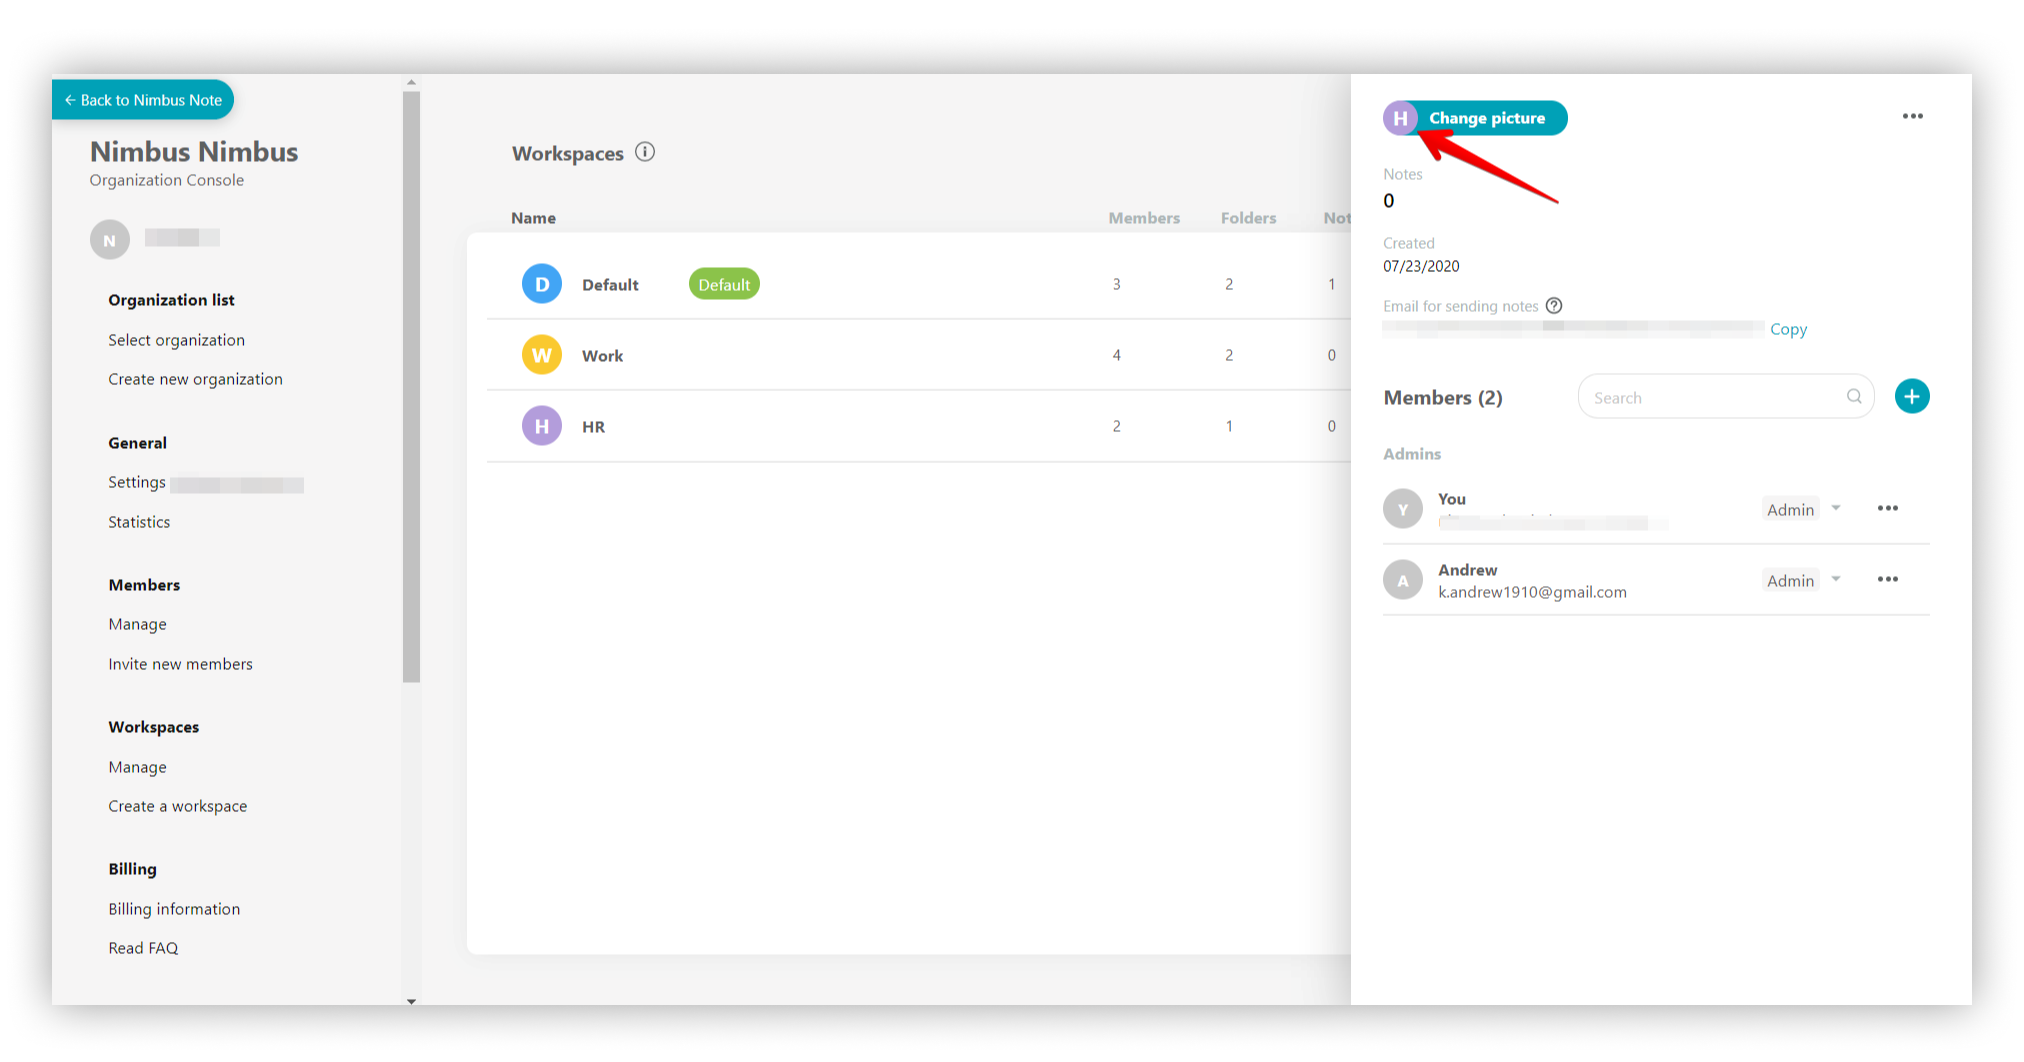
In the Members section you can add members to your organization and manage them.
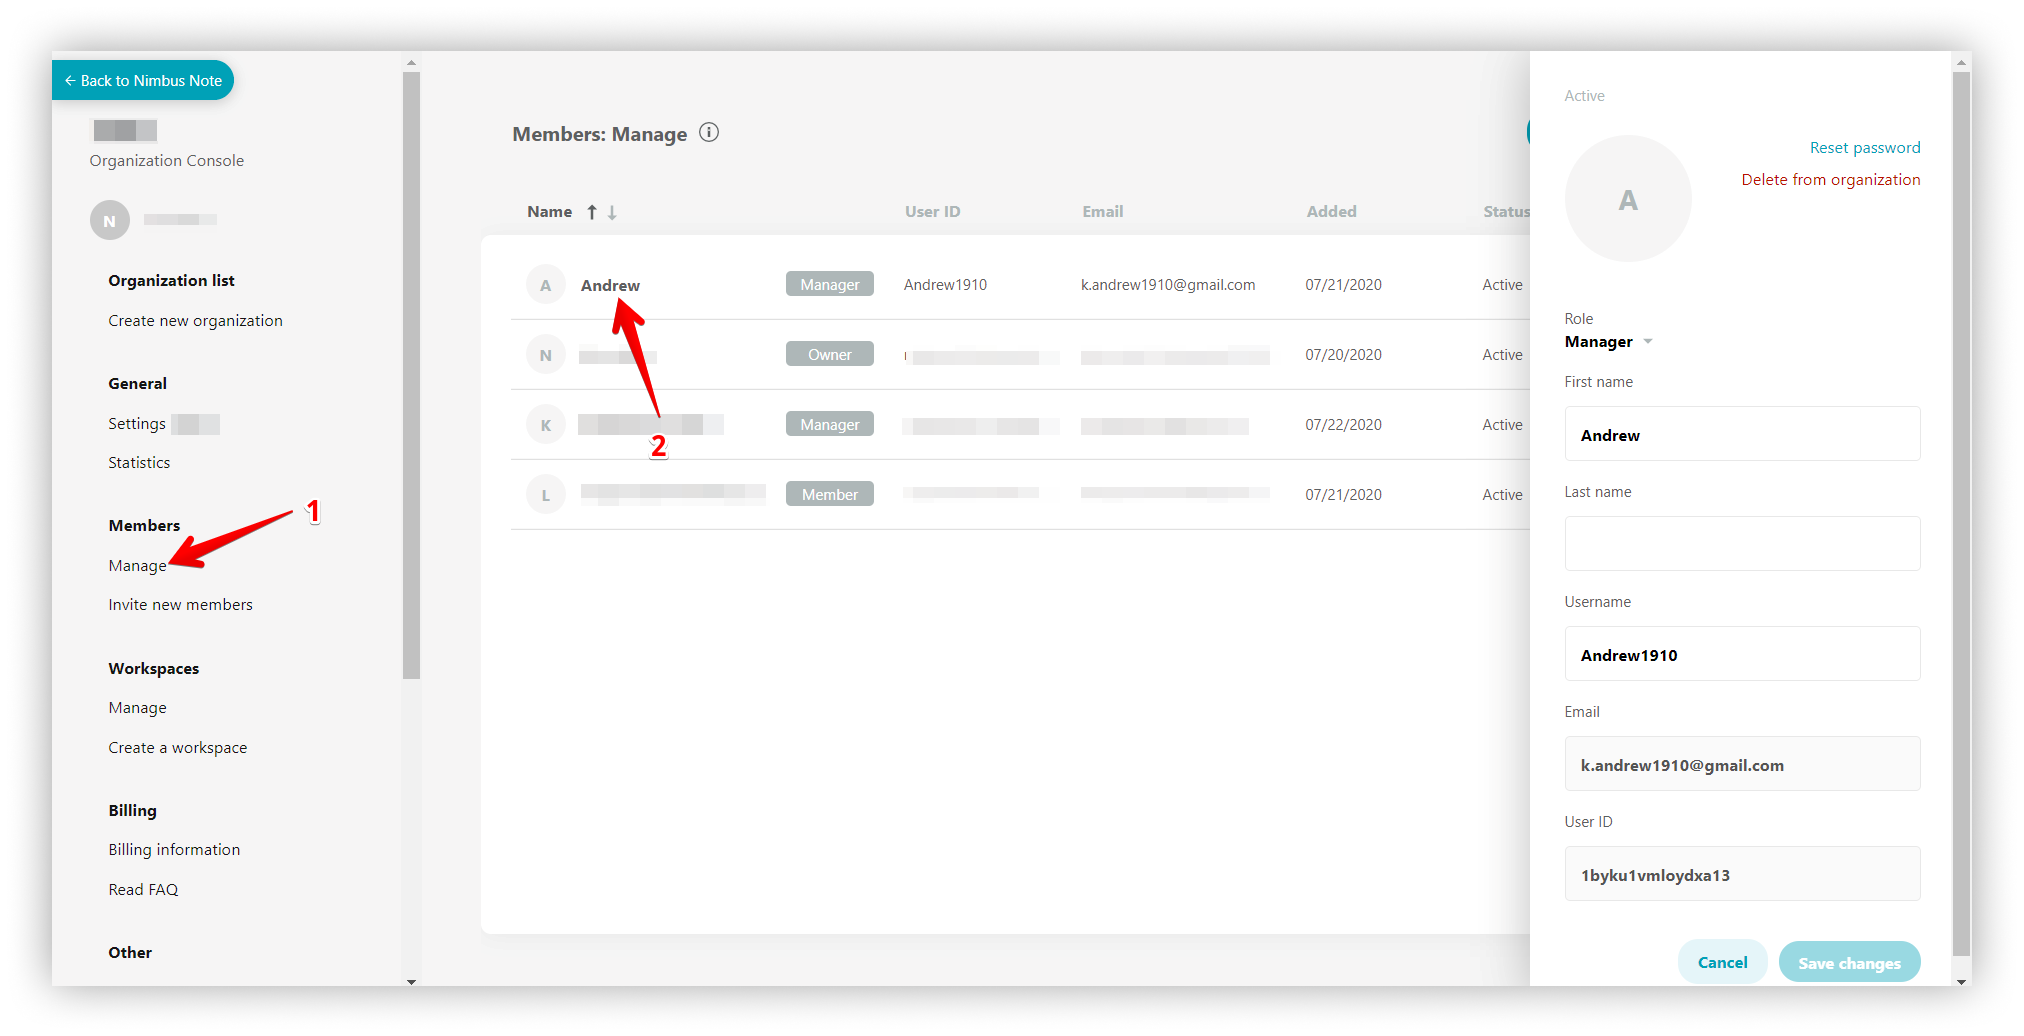
Manage members #
To manage members you need to go to the Members section.
- To manage and edit, select Manage.
- Then click on the member.
.png)
Invite new members #
- To add a member, click on Invite new members.
Read more about inviting members
Workspaces #
To organize information properly, you need a good filing system. In addition to searchable tags and nested folders, Nimbus Note allows you to organize your pages into Workspaces.
A member may have different permission levels in different workspaces. For example, a member might be an admin in one workspace and have read-only permissions in another.
☝ Note: Each workspace is independent, with its own pages, folders, reminders, and members.
In the Workspaces section, you can create a new workspace, manage existing workspaces, and invite / add members to the workspace.
Manage workspaces #
.png)
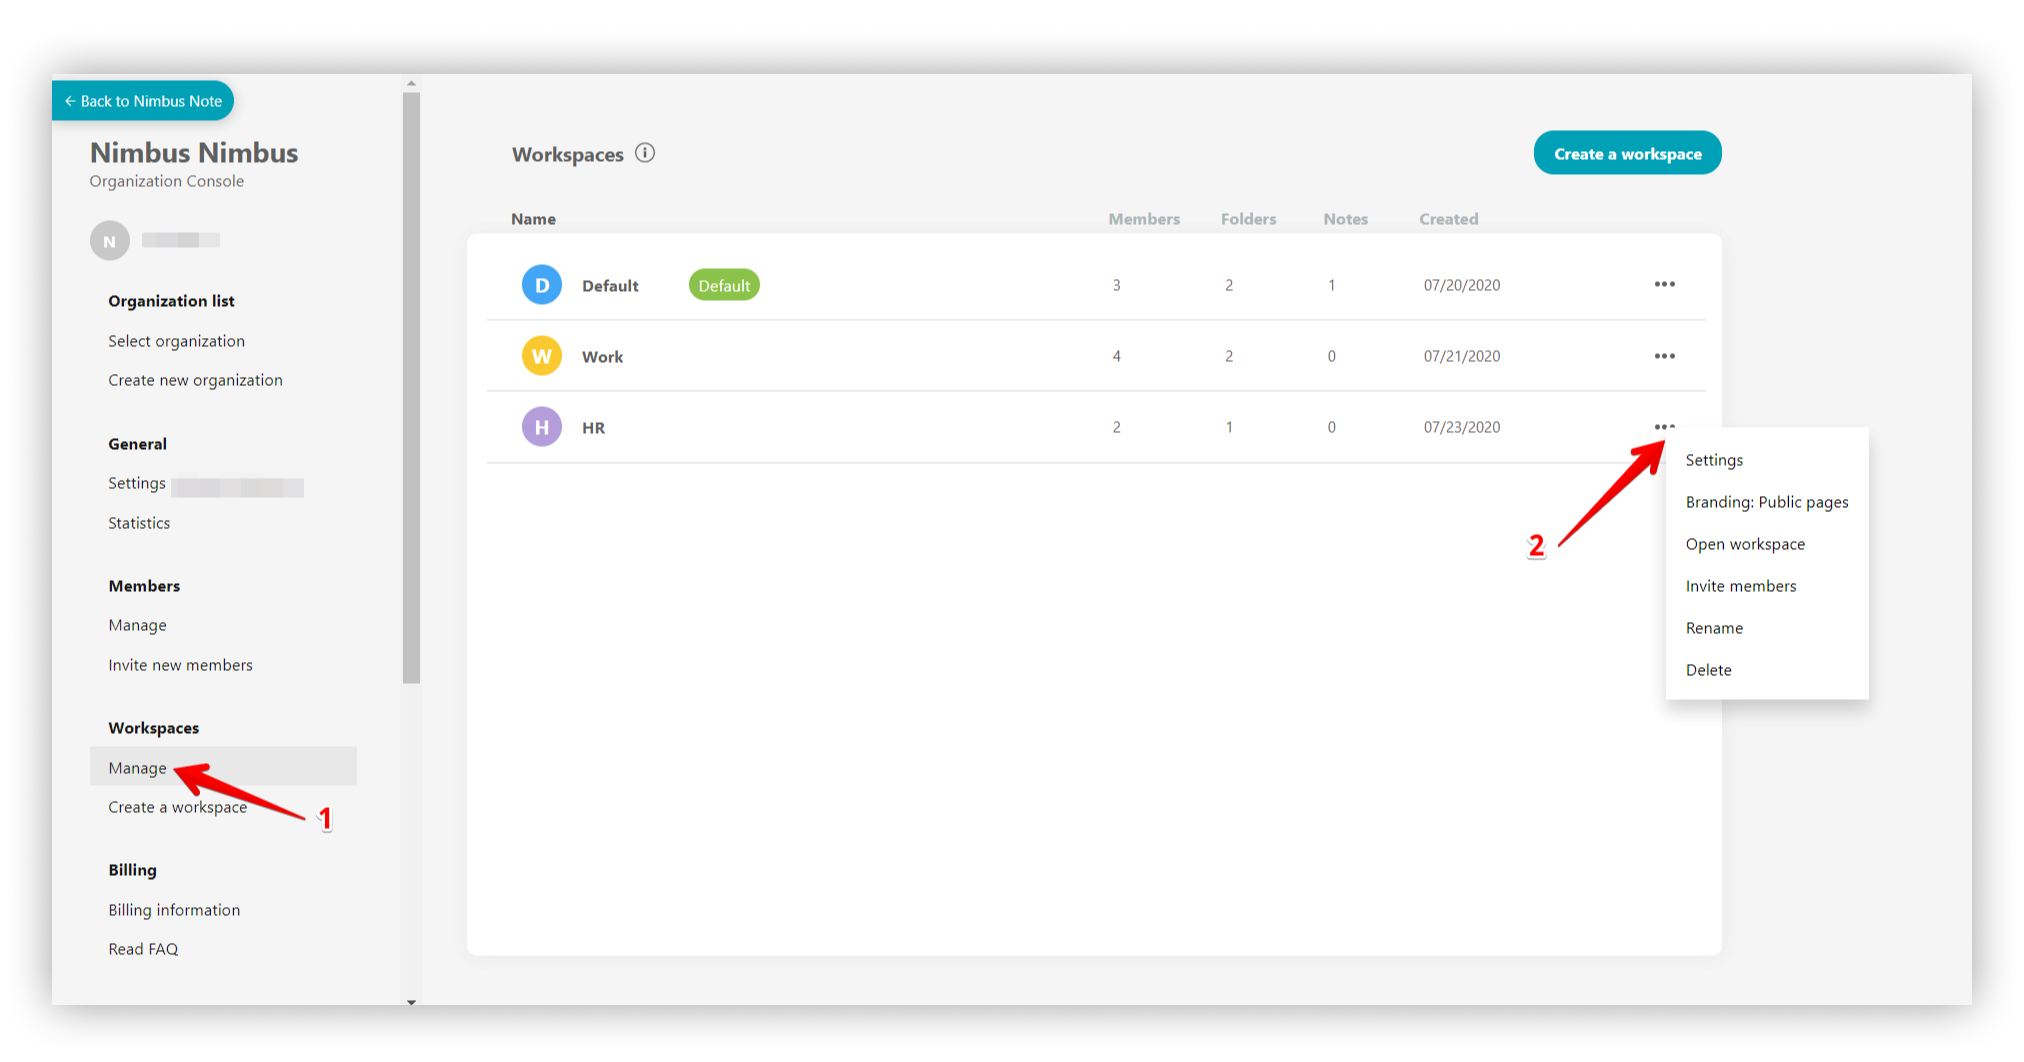
To manage workspaces you need to go to the Manage section.
- Click on the three dots.
- Settings – opens the workspace settings panel.Branding Shared pages – here you can change the appearance of shared pages / folders and add components of your brand to them.☝ Note: Branding feature is available only for Business plan users. ?Read more about Branding Shared pages
- Open Workspace – clicking will open the selected workspace in a new tab into the web client.
- Invite members – you will be able to invite / add members to the workspace.
- Rename – you will be able to change the workspace name.
- Delete – you will be able to delete the workspace.
%20(1)%20(1).gif)
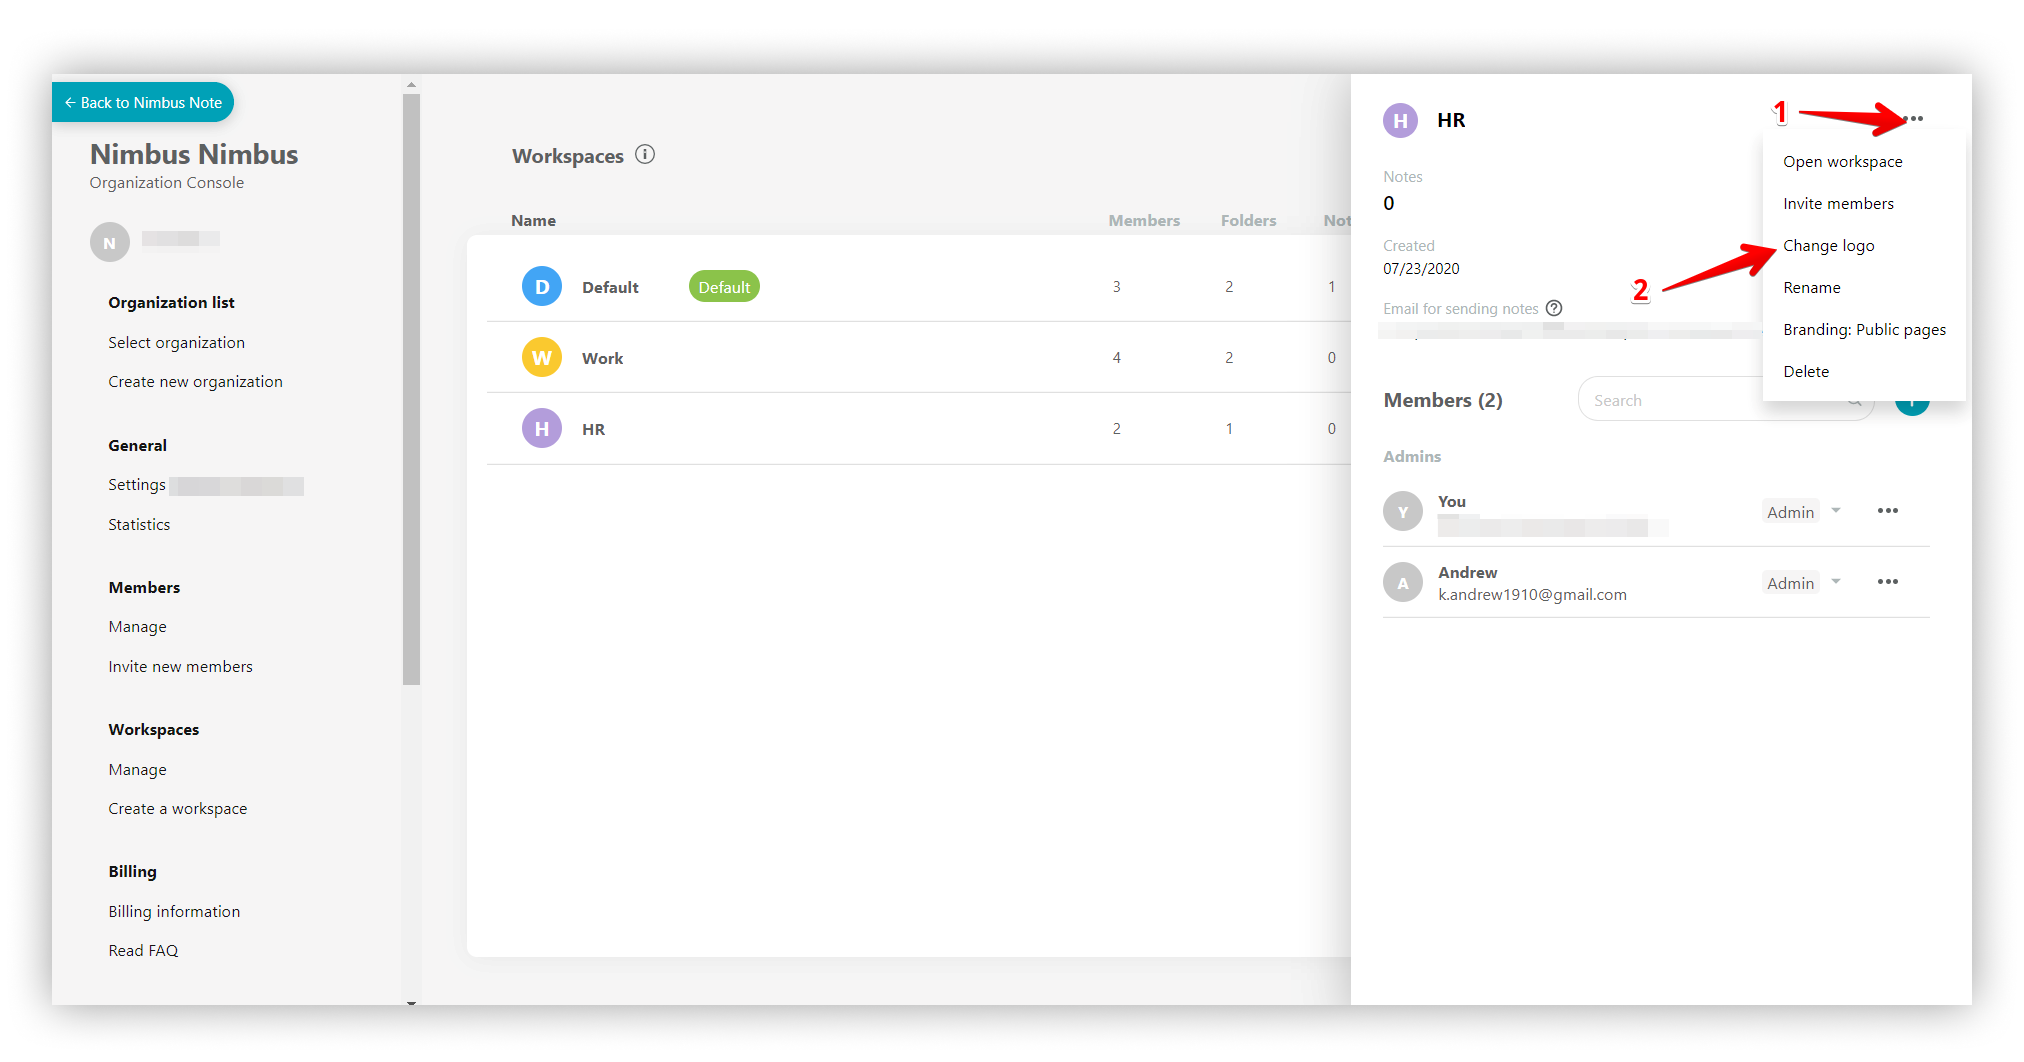
- You can also change the workspace logo if you click on the workspace and select the three dots menu.
- Or just click on the workspace logo.
.png)
.png)
Create a workspace #
- Click on Create a workspace.
.gif)
☝ Note: Free plan users can have only one workspace, Premium users – up to three, and Business users – an unlimited count of workspaces.
Billing #
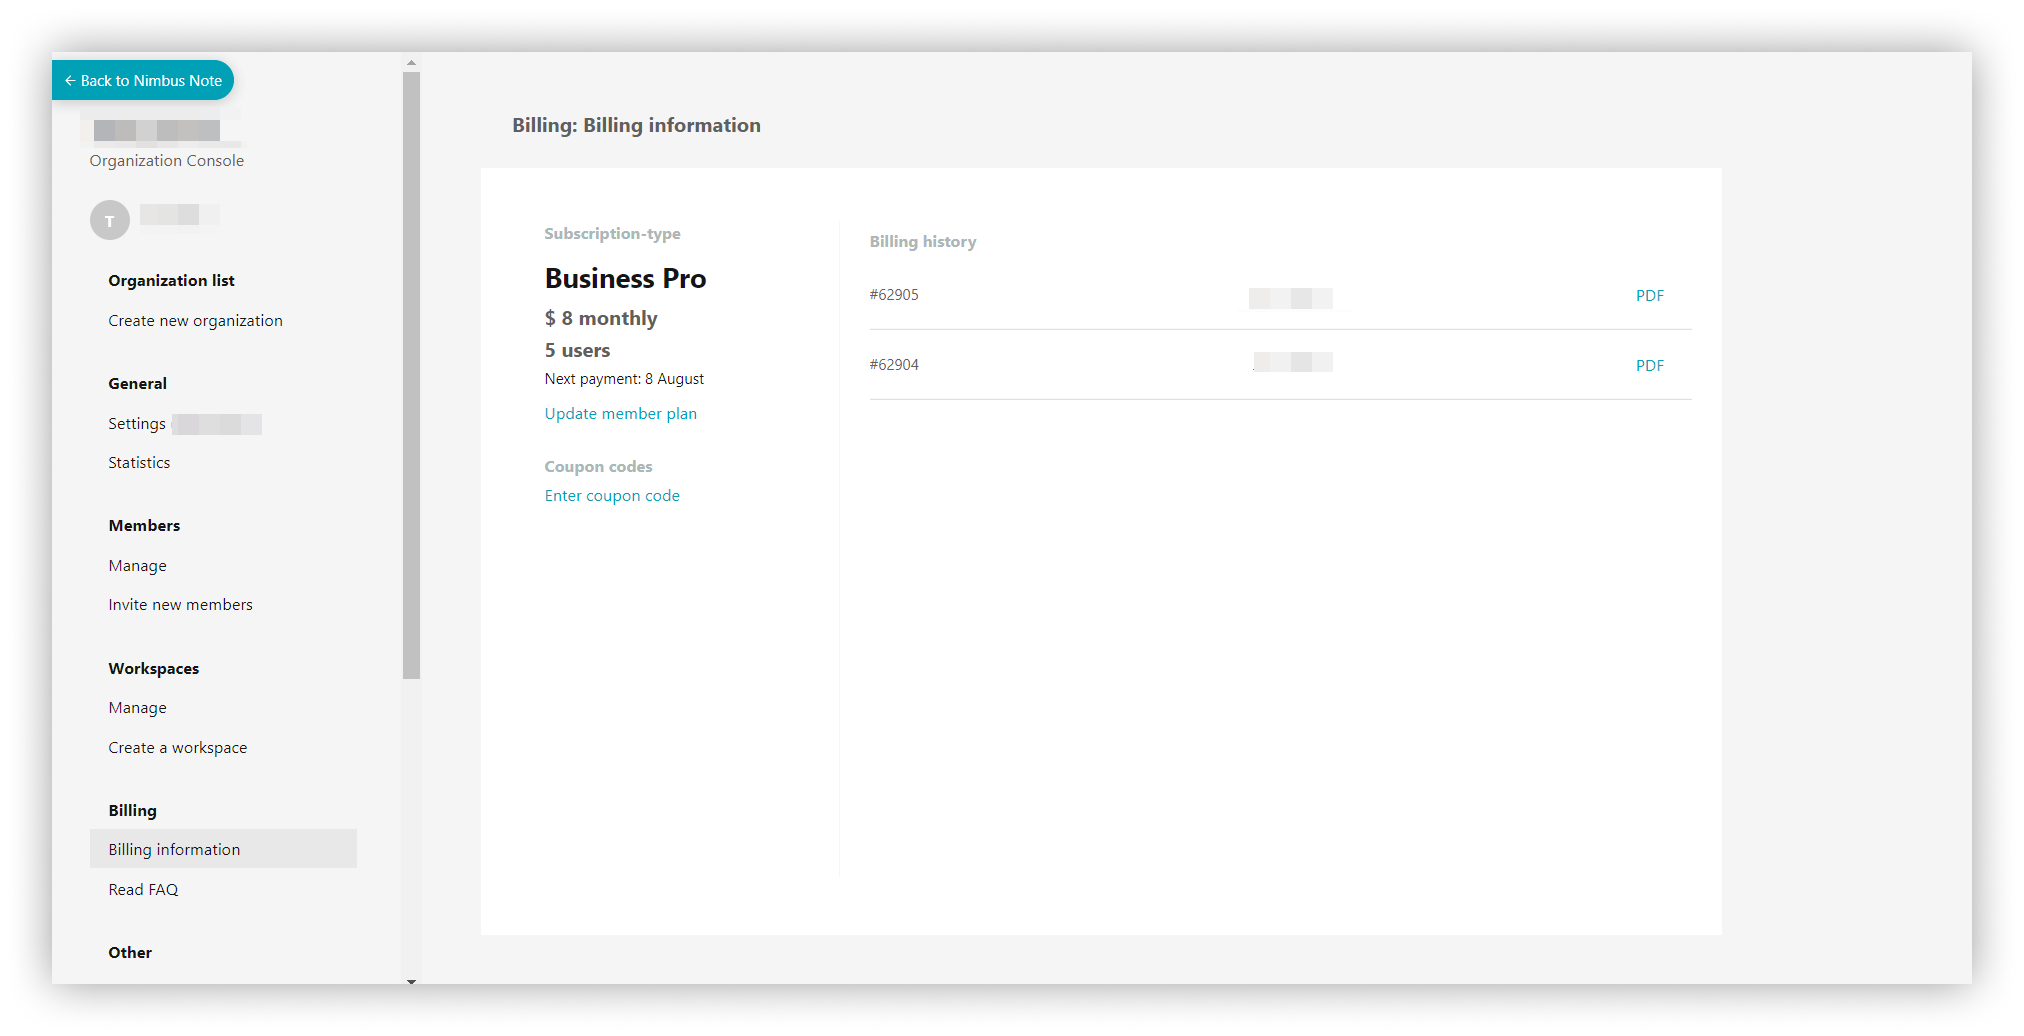
- In the Billing section you will have access to information about the subscription and billing history. Also here you can update your plan.
.png)
☝ The Billing section is available only to Owner.
- Read FAQ – by clicking you can learn more about billing.
.png)
Creating a multi-organization #
To create an organization, follow these steps.
- Fill the Organization name.
- Enter the Organization address.
- Fill the Workspace Name.
- Select from the drop-down list What do you do or your team do?
- Select an approximate count of team members.
- Fill the Сustom domain (optional).
- Then press Save changes.
☝ Note: You can create an unlimited amount of organizations.
.gif)
Organization logo #
.gif)
To set an organization logo you need to:
- Click on Organization logo.
- Upload small logo to display the logo in the organization settings and in embeds.
- Upload big logo to display on the login page.
You can change the appearance of public pages / folders and add components of your brand to them.
☝ Note: This feature is available only for Business plan users.