Introduction #
We are happy to see you in FuseBase Portals, the best collaborative tool for Clients and Teammates!
FuseBase Portals are centralized hubs for your clients and partners. They allow you to create no-code websites based on FuseBase pages, bringing your internal and external collaboration to one place.
Use FuseBase Portals as a knowledge base and publish all the information your clients & partners need such as meeting notes, updates, and roadmaps. You can customize elements and add your own branding. And the most important thing— you control your information. You can share FuseBase Portals publicly or only with specific people, with specific rights.
Creation #
Excited to have your portal? Us too!
Just one click to create the best space for you and your clients 🙂
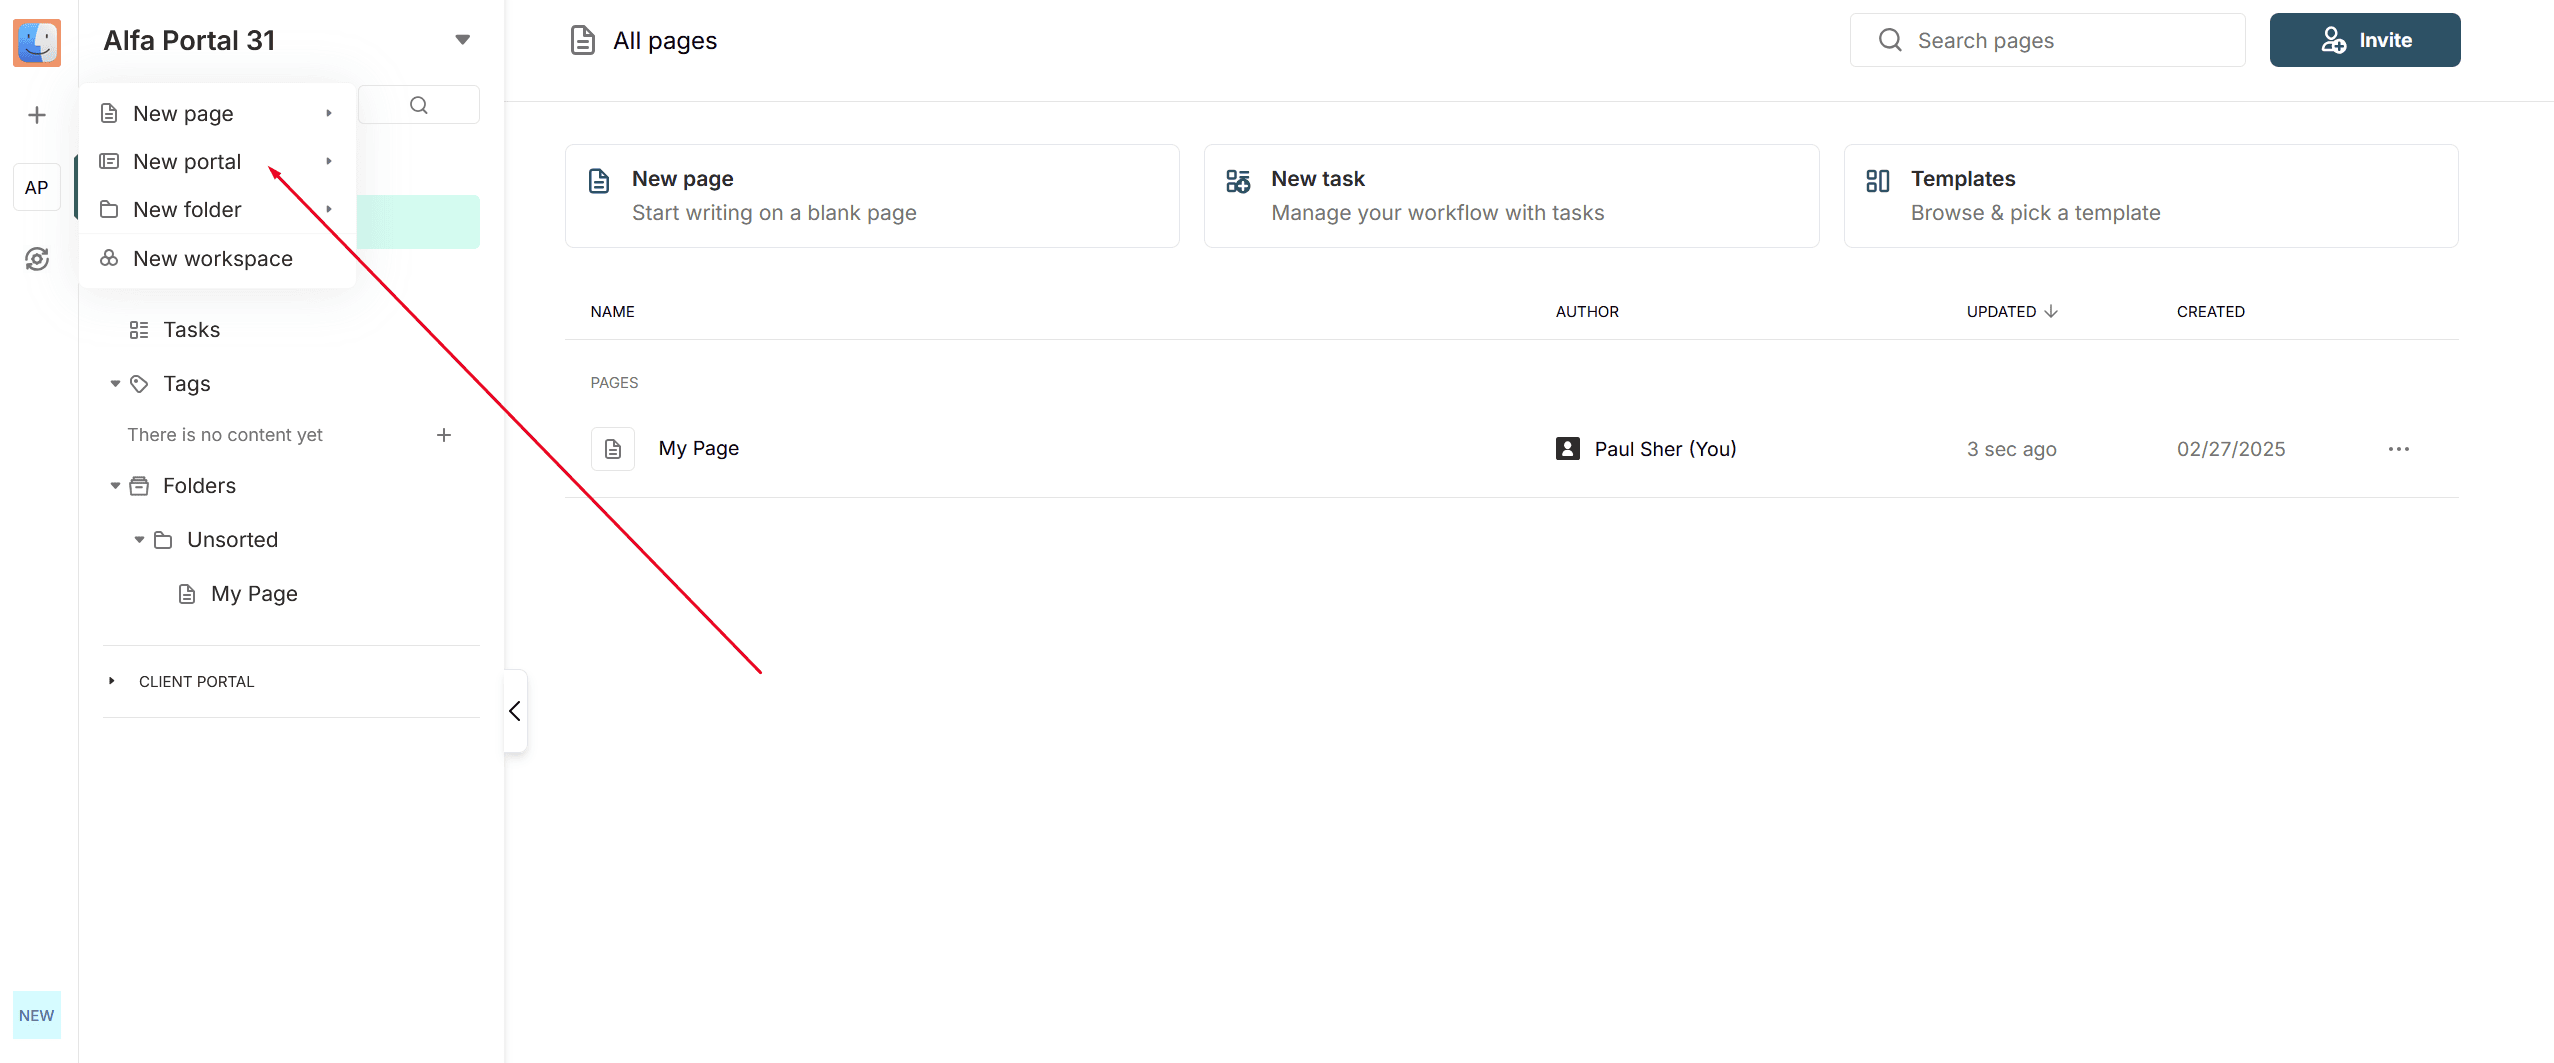
Please, click + in the sidebar and choose New Portal. You will be redirected to Wizard, where you can configure the first settings for your portal. The process will only take a few minutes!
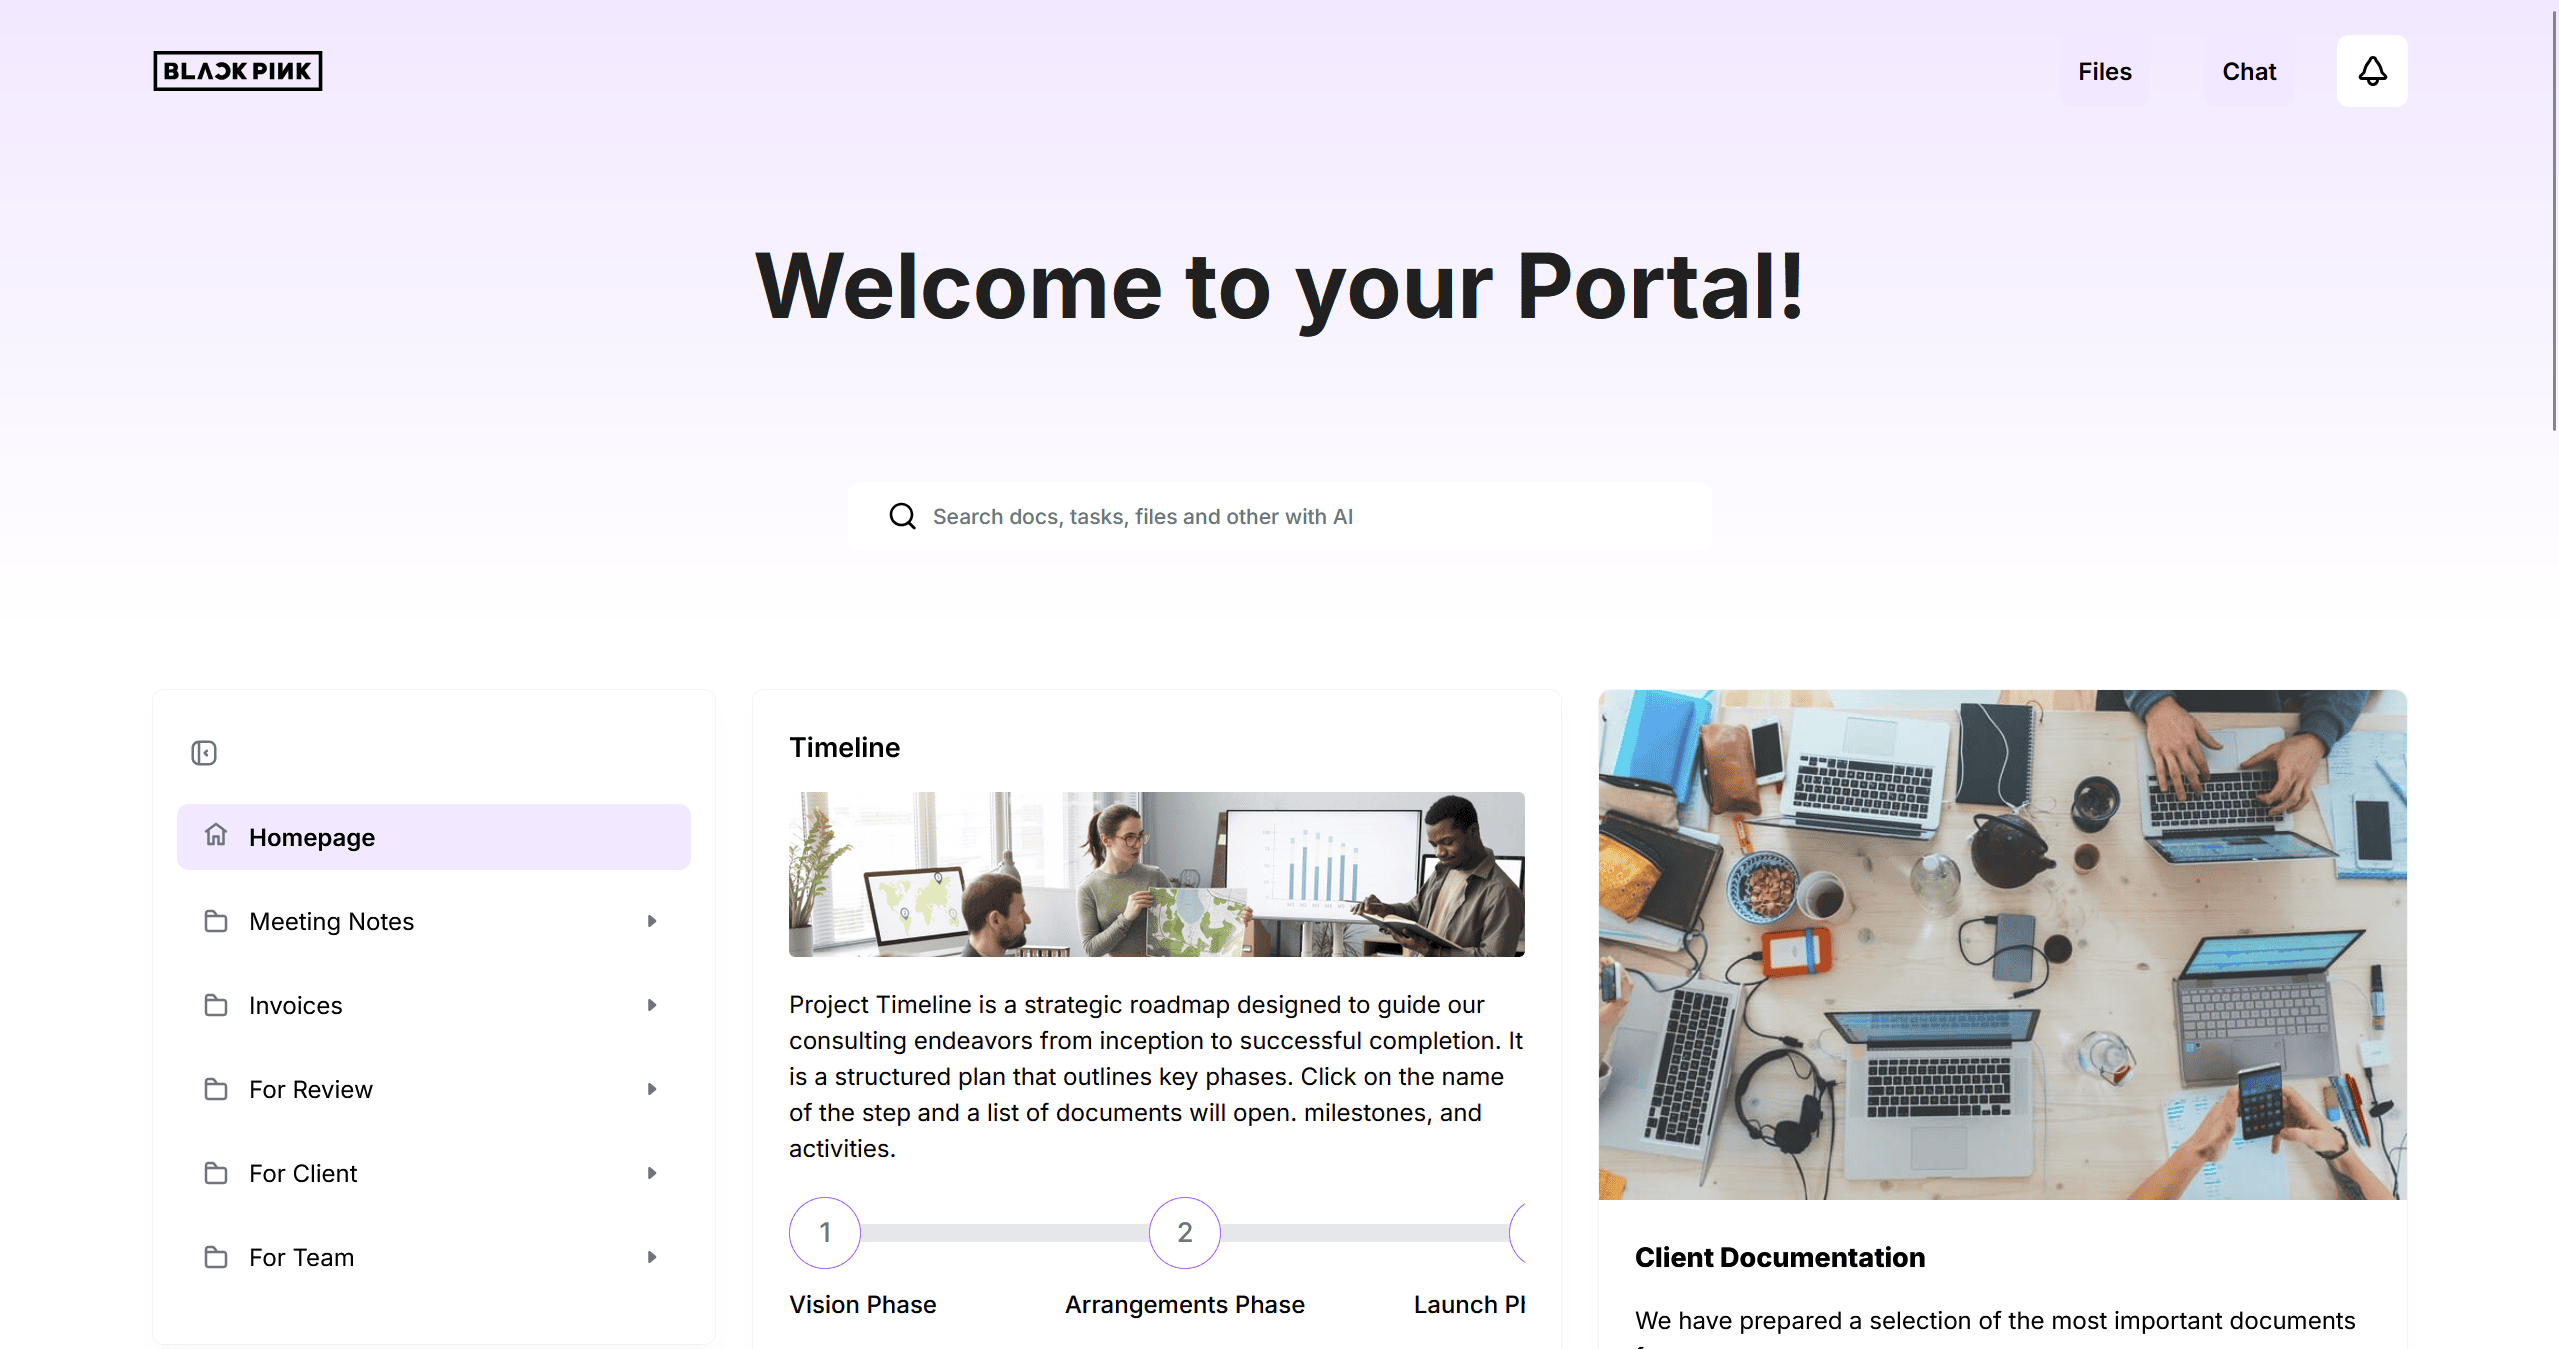
Since your portal is ready now, let’s make some more changes!
Here is an example of a completed homepage, let’s start with yours.
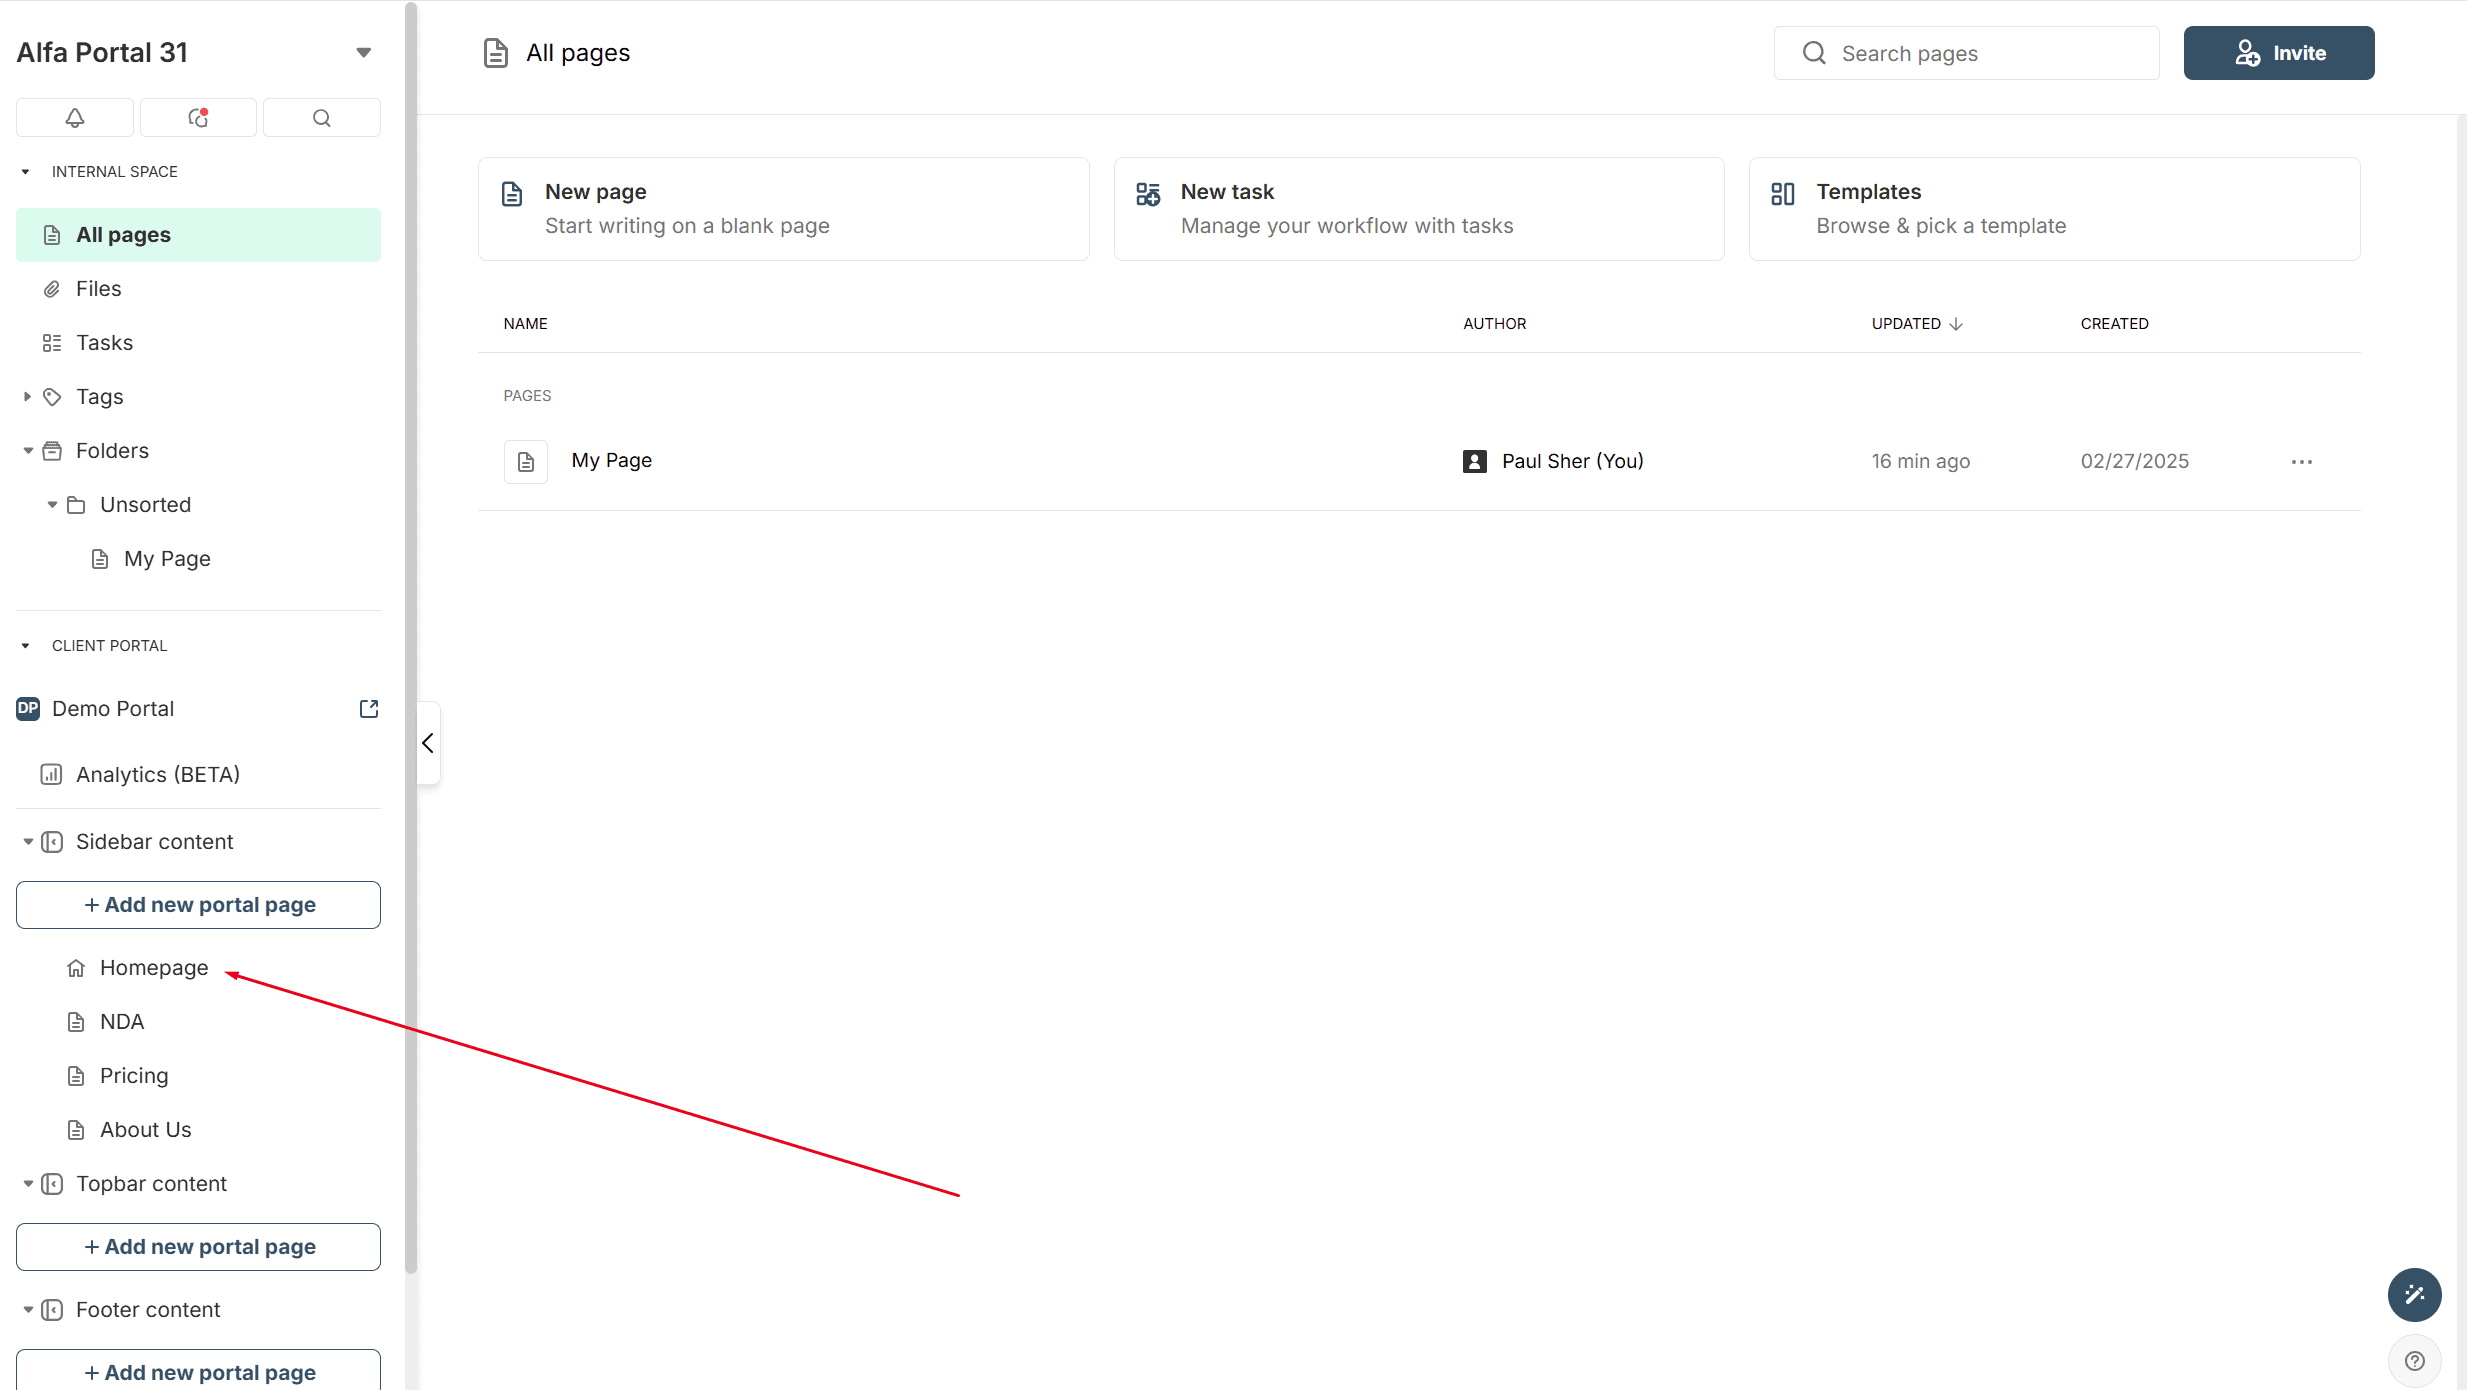
In the sidebar, you will find the Client Portal section, which includes the following items:
- The portal name with a link to access the portal.
- A link to the portal analytics.
- Sections containing the portal’s content: Sidebar, Top Bar, and Footer.
- Portal settings.
Visual Editor #
When you click on a portal page, you can enter its editing mode. For example, click on Homepage to edit the main page of your portal.
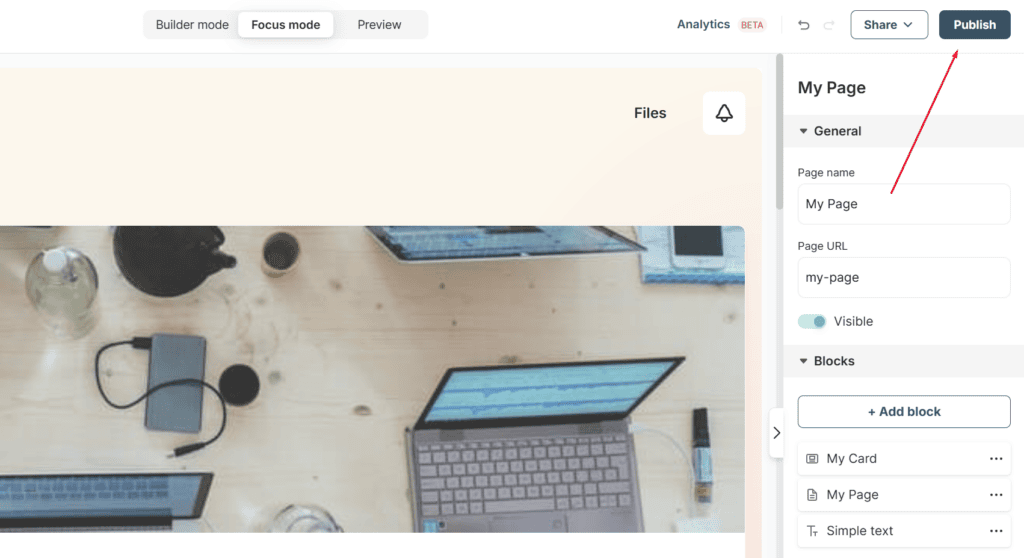
Next, you will enter the portal page editor, which can be divided into three areas:
- Left sidebar, where you can manage portal pages and folders.
- Central area, where the portal content is displayed.
- Right control bar, where you can adjust page settings and add new blocks.
You can hide the sidebar and control bar by clicking on the corresponding options.
At the top, you will find three ways to work with your portal content:
- Builder: Edit everything—both the sidebars and the page content.
- Focus Mode: Hide the sidebars to concentrate on the page content.
- Preview: See your portal exactly as your visitors will.
Adding New Content to the Portal
You can add various items to your portal:
- Pages
- Folders
- Links
- And more
Let’s try adding a new page to the portal and inserting several blocks into it. To do this, click on Add new Portal page, then use the + button to add new blocks.
As you can see, it’s very simple and fast. Now, let’s try adding a new folder and then creating a new page inside it with some blocks. To do this, hover over the desired section, such as Sidebar, and click on +. Then, select New folder.
Let’s go ahead and add an external link, for example. Then, in the Top Bar, let’s add a File Manager.
Editing Portal Content #
Now, let’s try modifying the added blocks—for example, changing their appearance or content. To do this, click on the Edit option and adjust the block settings.
For a Blank block, you can edit the content directly. Simply click inside the block and start making changes.
Blocks/Widgets #
Make your portal special with different widgets! You can add widgets to:
✅ Homepage
✅ Folder page
✅ Blank Page
You can relocate widgets using drag-and-drop.
Below, we will introduce some of the blocks available in the portal customizer.
Card group #
The Card group will redirect portal visitors to the site you’ve added.
Embed #
The embed blocks will help you with services, you’d like to tadd ho te portal. You can see the great amount of service s provided or the embeds.
To add the Embed, – follow these steps:
Click on Embed and Integrations → Enter your link or embed code → Click the Add button
The Embed will help you keep all your documents in one place without switching between pages. FuseBase works well for plugging in widgets from other platforms. Use different features to achieve more.
You can embed popular services such as: YouTube, Hubspot, Calendly and others.
You can find more information how to use embed feature in the portals here.
Chat #
Want to communicate in the Portal? The Chat widget is the best way to do it. Follow the next steps to add the Chat widget:
Choose the Chat in the Add Block → Enter the title → Choose the channel or direct messages → Choose Show or Not to show the chat only to workspace members → Click on the Add button → The Chat widget has been added successfully.
Page from Internal Space #
You can also add pages from Internal Space. For example, you can first prepare materials with your team, get approval, and only then add them to the portal.
Choose Internal space in Add Block → Select desired page → Change the title if you need → Click on the Add button → The Page widget has been added successfully.
You can edit or delete the page widget by clicking on the three dots icon or hovering over the info block. To edit the content, simply click on the page.
These are just a few of the many widgets available in the customizer. You can learn more about other widgets in our guides.
Publishing #
Don’t forget to save all your settings! The “Publish” button is right there.
Click on the Publish button and the window with the latest changes will open. There you can see when the last changes were made and what was changed. Click on Update current portal to save changes.
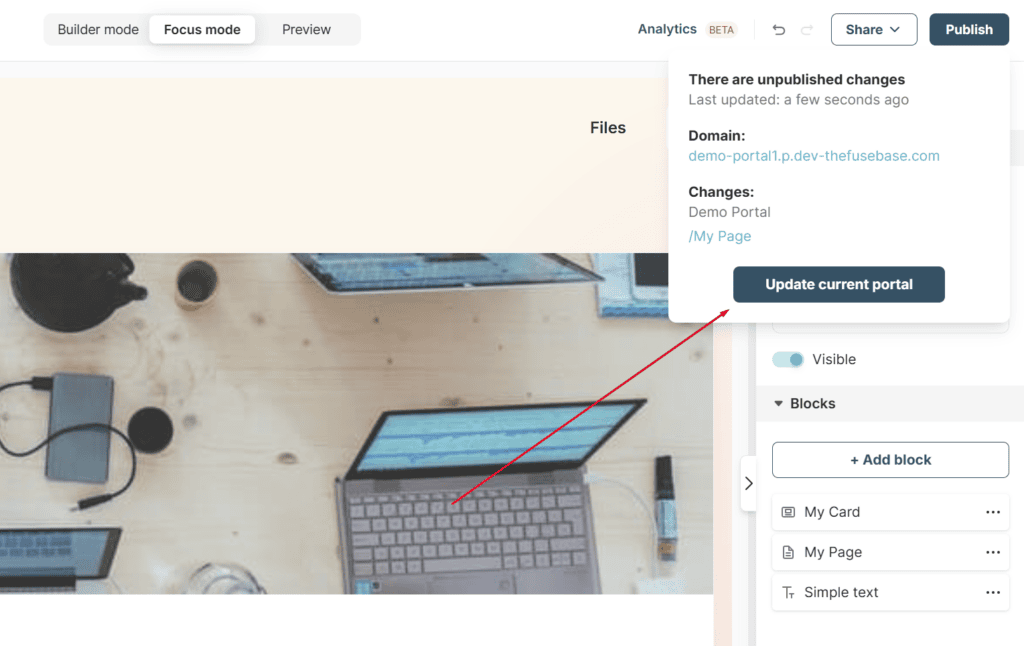
When the changes are made, you can see the portal by clicking on the View Portal button.
Settings #
In Settings, you will find various customization options and settings for your portal.
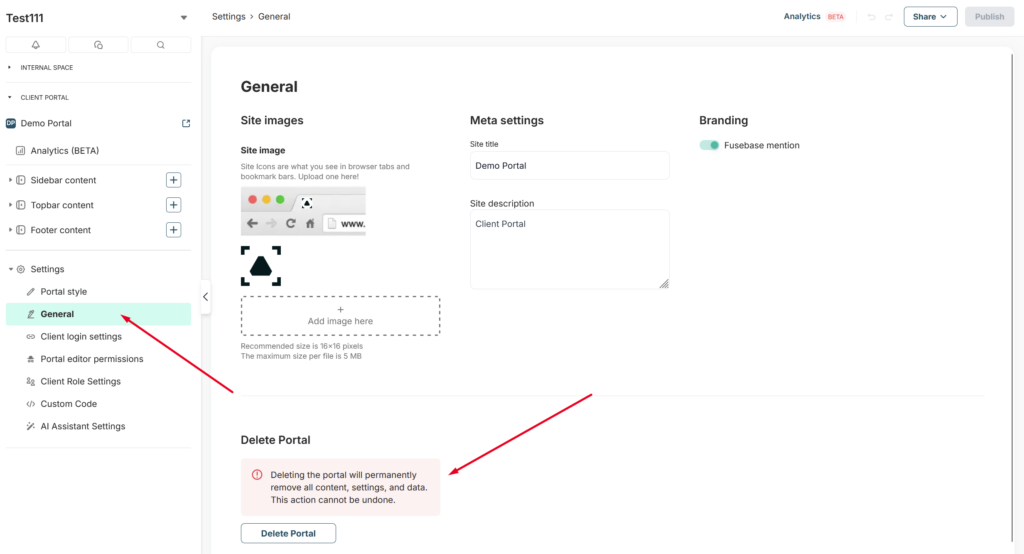
General #
You can configure site images, titles and descriptions
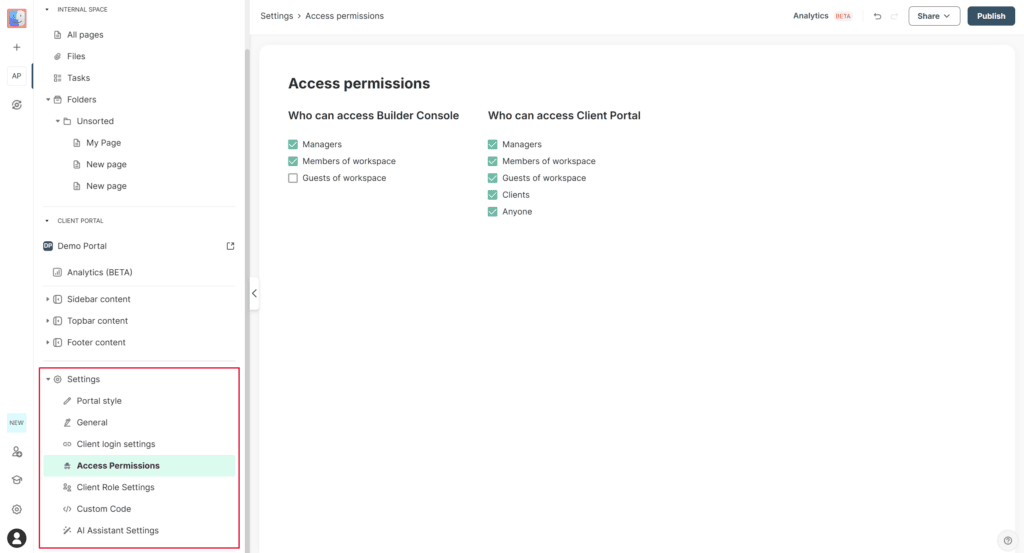
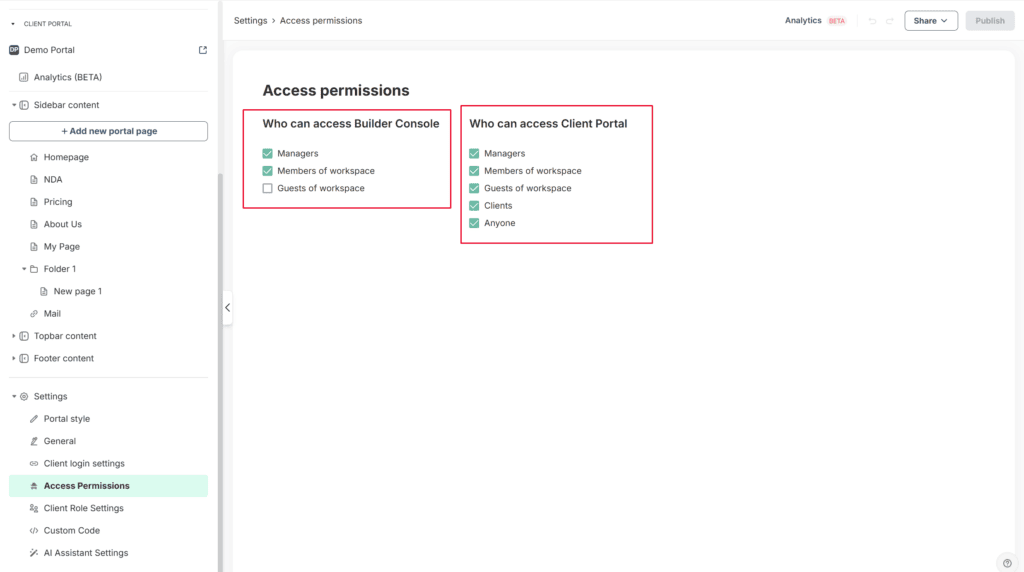
Access permissions #
Set the permissions of your portal in the Access menu.
Two levels of access are available:
- Who can access Customizer (Portal Editor);
- Who can access this Portal.
Choose the levels of users who can edit your portal and see all options with the Access Builder Console.
As you can see, there are some options that define which users in your FuseBase organization have access to the portal.
If you select Anyone outside your organization, even a person outside your organization can see the portal.
Custom code #
Insert custom HTML/JS/CSS into Portal to integrate chats, chatbots, call-to-action services, analytics, etc. Here you can read about how to use this functionality, for example, connecting Google Fonts to your portal.
Client Role Settings #
Here, you can define what clients can and cannot do within the portal. Currently, you can manage task permissions. For example, you can restrict clients from creating or editing tasks.
AI Assistant #
Here, you can enable or disable the AI Assistant in the portal. You can make it available to all visitors or only to logged-in clients.
How to delete an unnecessary portal? #
To delete a portal, go to General Settings and click on Delete Portal. You’ll then need to confirm the deletion to complete the process.
Custom Domain Name with FuseBase Portal #
Before setting the portal’s Custom Domain, you need to configure the Custom Domain for your organization. You can find more information in our guides.
If you want to use your own domain name, and you have access to your registrar’s dashboard / DNS control panel, you can easily connect your custom URL to the portal.
In order to do so, please follow these steps:
- Click on the button + and choose New portal and add a domain name you want to use. It may be any valid FQDN.
- Login to your domain’s registrar control panel.
- Go to
Domain List→ click onyour-company-name.com→ click onDNS Zone Settings
Click onAdd New DNS Recordlink. - Choose the type CNAME.
- In the dialogue Proceed to configurations, click on the Name and it will be copied.
- Paste it into the title, click on Value and it will be copied. Then, paste it into the value in your domain’s registrar control panel.
TTL has to be a default value - Once done, click on the
Savebutton. The first CNAME record is successfully created. - Follow the same steps with the second CNAME record in the dialogue
Enjoy your portal! #
Have some questions?
Contact us contact@thefusebase.com